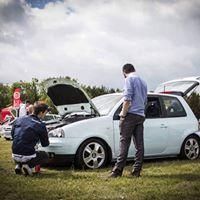
Trx 33 Posted November 17, 2015 Report Share Posted November 17, 2015 Hello.After my other thread drastically veering off topic i've decided to create a proper 'Member's cars' thread.So here is my Spanish armada:My first love, first car and a massive regret when she's sold.I'll not go into much detail here but my previous thread, you'll find HEREMy second purchase, so much potential but due to circumstantial changes and a run of bad luck, now just a parts donor.So much effort went in to fixing this only for a chocolate gearbox to ruin everything.Brought back from the dead for a mere 5 months or so, only to live on in spirit and donor parts for No.4, somewhere down the page.The current weekend toy Pretty much how she looks now ^A few tweaks since but you get the gistAnd the day i picked her upWhat i've done so far:Cruise control retrofittedGearbox oil change + Magnetic plugOil change + Magnetic plugNewsouth power gasketAvon ZZ5's all aroundNew centre caps20mm Rear spacersMiltek turbo back with hi-flow sports catRemap by John at Bigfish tuningFront lower strut brace - now removedLCR splitterForge TIPForge throttle body hoseForge 008 DVBMC Twin cone filterMats from Awesome GTISeat sport front strut braceBlack coolant capBlack washer bottle capLED bulbs inside and outWhite H3 fogsOEM Xenon headlightsDe-chromed front endPolo 9N ariel base and mastFocal PS-165 componentsAlpine 135-BT headunitTurbosmart boost gaugeTwin gauge podI'm sure theres more but i cant rememberAnd the latest addition:How i got her ^Work started straight away, stripping and swapping from my little silver baby.Swapped out the light interior for my nice clean black one, with bits kindly donated from either Arosa'sAnd then these came.And how she sits today:You'll have to excuse the bad white balance, quick snaps post shift never come out the greatest. Ill try to get the DSLR out at some point. Quote Link to comment Share on other sites More sharing options...
Trx 33 Posted November 17, 2015 Author Report Share Posted November 17, 2015 A couple of shots of the inside, gloss black heater surrounds and clock shrouds were a nice addition, along with the GTI lower door cards 8 Ball shifterOnce again, apologies for the crappy iphone pics. Quote Link to comment Share on other sites More sharing options...
Trx 33 Posted November 17, 2015 Author Report Share Posted November 17, 2015 Aaaand this happened..Unfortunately they aren't quite as bright as i'd like so i'll look into upping the voltage somehow. Trying to find decent PLCC-2 sideview LED's is surprisingly hard but hey ho. The first set of LED's i bought wanted more voltage than there was so they came out a tad yellow, the second set are nice and white, just not as bright as i'd like. 1 Quote Link to comment Share on other sites More sharing options...
Trx 33 Posted November 17, 2015 Author Report Share Posted November 17, 2015 A long days retrofitting. Successfully wired in OEM functioning fogs (and if i do say so myself, i've done a bloody good job with the cable routing) with brand spanking hardware straight from the Volkswagen parts department - not surprisingly, it wasn't cheap for a handful of clips and whatnot.While everything was apart i fitted 'One touch indicators' which makes driving so much more pleasurable by quite a surprising amount.So far, the mod list consists of:Full black interior swapGTI handbrake coverBlack headliningGTI roof bitsGTI lower door cardsPowerflex front and rear bushesSport rear beam with disc brakesGTI roof spoilerWind deflectorsDe-chromed rear badgeNew mudflapsFront fogsOne touch indicatorsWhite cluster LED'sGloss black heater vent surrounds + clock shroudUnder dash cup holderKW Inox coiloversWhiteline rear ARBPioneer headunitEGR deleteK&N filter5th Gear modRemapDebadged front grilleRear wiper deleteHID'sLED's all around15" OEM Ibiza sport alloysClear side repeatersPolo 9N stubby mast and baseOnce again i'm sure ill have forgot something but theres more planned.Next up i'm thinking about:Cruise controlRear spacersHID projector retrofitDouble din headunitRear speakersProgrammable wiper relayArch rollingSport centre exit exhaustHeated electric mirrorsA good old detail when the winter is over.Thats all for now but ill try to keep on top of this thread unlike my others. Quote Link to comment Share on other sites More sharing options...
myles983 Posted November 17, 2015 Report Share Posted November 17, 2015 Looking very, very nice. Quote Link to comment Share on other sites More sharing options...
Danyutz Posted November 17, 2015 Report Share Posted November 17, 2015 Loving this so far. Do you have a photo of the PLCC leds? Or maybe a recommendation what to get? I want to do the same to the loop.Thanks! Quote Link to comment Share on other sites More sharing options...
mattarosa Posted November 17, 2015 Report Share Posted November 17, 2015 Hate to burst your bubble on the fogs but you don't need to remove the fuse box like that, when I did it was very straight forward, intersted in the white dials though. Quote Link to comment Share on other sites More sharing options...
Trx 33 Posted November 18, 2015 Author Report Share Posted November 18, 2015 Although the fusebox didn't need to be removed, it was only 2 screws and it made it easier for my sausage fingers to get stuff where it needed to be.Regarding the cluster mod, you will need to expose the circuit board which involves taking off the needles, LCD's and a hand full of other things.I would advise getting a no-clean flux pen, tweezers and some fine solder to help things along.The LED's i used were from RS components. I'd not like to recommend which ones to buy because i would still like to try some of the other ones to get the brightness/colour just right.This is what they look like Quote Link to comment Share on other sites More sharing options...
Trx 33 Posted November 18, 2015 Author Report Share Posted November 18, 2015 On another note, can you tell what i've just got round to fitting?While i was at it today i sorted out my slight heat shield rattle Quote Link to comment Share on other sites More sharing options...
Danyutz Posted November 18, 2015 Report Share Posted November 18, 2015 There's a lot of side light smds, with different voltage, some are 3.5 some are 3.7, even 1.5. Then there's the mcd ( i think this is the brightness ). Quote Link to comment Share on other sites More sharing options...
mattarosa Posted November 18, 2015 Report Share Posted November 18, 2015 Was it not already wired from switch to white tray in the footwell? All 3 of mine have been, just needed the switch and the loom to that white tray of connectors Quote Link to comment Share on other sites More sharing options...
Trx 33 Posted December 2, 2015 Author Report Share Posted December 2, 2015 Yup, wired from the switch to to the tray already. Piece of cake to install, hardest part was changing the drivers side bulb after installing everything as the whole air filter assembly is in the way and needs removed. Next time I've got the dash apart I'll grab some pictures, there's a rattle coming from somewhere that's doing my head in so it will be coming apart again when it's not raining. Quote Link to comment Share on other sites More sharing options...
mattarosa Posted December 2, 2015 Report Share Posted December 2, 2015 Ive done it on two now like you sey dead easy, where did you get the loom from? Quote Link to comment Share on other sites More sharing options...
Trx 33 Posted December 14, 2015 Author Report Share Posted December 14, 2015 Got the loom from kufatec originally but ripped it out my silver one to fit to the diesel. Quote Link to comment Share on other sites More sharing options...
Trx 33 Posted December 19, 2015 Author Report Share Posted December 19, 2015 Okily dokily, little update; I'm hoping to get this done within a few months, just need to find some labour funds. Have a cookie if you can guess what i'm planning. Quote Link to comment Share on other sites More sharing options...
mattarosa Posted December 19, 2015 Report Share Posted December 19, 2015 Sport exhaust? Just do it yourself save the labour costs Quote Link to comment Share on other sites More sharing options...
Danyutz Posted December 19, 2015 Report Share Posted December 19, 2015 If matt guessed it, want to know more Quote Link to comment Share on other sites More sharing options...
mattarosa Posted December 19, 2015 Report Share Posted December 19, 2015 It's a nice touch if it is Quote Link to comment Share on other sites More sharing options...
Kes Posted December 20, 2015 Report Share Posted December 20, 2015 Cars looking very nice, you've been busy. Quote Link to comment Share on other sites More sharing options...
Trx 33 Posted December 20, 2015 Author Report Share Posted December 20, 2015 Yup, sport centre exit it is. Unfortunately i don't have access to a welder so DIY is off the cards. I rang up TPS to buy the panel needed, approximately £25, but once the lad on the phone processed the order it was found to be a discontinued part, so out came the drill. I've yet to have a look under the bumper of the diesel but i suspect there will have to be an arch cut into the rear panel alongside the section of boot pan to be removed. I already have the exhaust, heat shield, bumper and insulation so once i get the panel welded in and sealed it should be bolt on and paint. Quote Link to comment Share on other sites More sharing options...
Trx 33 Posted January 29, 2016 Author Report Share Posted January 29, 2016 UPDATE: Excuse the crappy picture but i was in a rush. Centre exit is on. I just need to go to the bodyshop and get the bumper done, while i'm there i might get the arches cut or rolled because the rust is spreading and i'm wanting a wider track at the rear, plus there is a little dink in the passenger arch, two birds. Fiddling round with the exhaust has made me wand a decat, and maybe a nice shiny centre resonator the tail pipe is sticking out a little more than id like, so again, two birds. Quote Link to comment Share on other sites More sharing options...
Trx 33 Posted February 4, 2016 Author Report Share Posted February 4, 2016 A little side note, I have been experiencing some strange braking recently, stepping on the brakes hard would send the car into the other lane. Not good. So when I had the bumper off I decided to take a quick look into the problem. It turned out to be a stuck hand brake cable, to the extent that it was completely immobile. The rear drivers wheel would free wheel with the handbrake fully applied. i had a look on eBay for some cables but all they had was febi brand for £15 a pop. A phone call later to the parts department and I managed to get a pair for around £8 each for the genuine article to pick up the next day. Its worth paying a little extra for genuine parts but when they are cheaper it's a no brainier. I always try the parts department whenever I need something because I'm quite often surprised by their prices and I would urge everyone else too as well. Aside from that, I'd recommend everyone to change the 10+ year old handbrake cables next time they're messing around without the rear end. The handbrake, being a part of the car you use multiple times every day, really makes it feel like new with brand spanky cables. And for a 20 minute job you can't knock it. Quote Link to comment Share on other sites More sharing options...
Trx 33 Posted February 29, 2016 Author Report Share Posted February 29, 2016 (edited) Well, I've been a busy boy this weekend. Firstly I tended to my blown speakers, I replaced them with a nice set of Hertz coaxials and some shiny new hardware. The door cards had to be trimmed a little but nothing too major. Next in line was a service, genuine filter and oil from the parts department complemented with a gold plug for added protection. While I was on the ramps I took the time to drop the whole exhaust system from the turbo back as the middle section was sitting too far back, upon removal I found that the sleeving was pretty messed up beyond salvage, so I just cut it off and added a sleeve clamp, that got the exhaust sitting nice and flush with the bumper. Speaking of the bumper, I managed to split the upper and lower sections of the original and sport bumpers with the help of a hair dryer so I didn't have to go to the paint shop, saving me a good £150 or so. I'm pretty damn happy how it turned out. After all that I just had time to give her a quick wax, finally getting a chance to break out one of the pots of dodo juice I had ordered a few weeks back. Beads up nicely, small to medium beads in a very uniform pattern, a lot tighter than the collinite I have been using for the past few years. I still have a pot of light fantastic to try so I'll give that a lash on next time I clean her. Just waiting for a nice day when it's not raining or salty to squeeze a photo shoot in. Roll on summer. Edited March 17, 2016 by Trx 33 Quote Link to comment Share on other sites More sharing options...
Pete Posted February 29, 2016 Report Share Posted February 29, 2016 Damn Daniel. Quote Link to comment Share on other sites More sharing options...
Trx 33 Posted March 19, 2016 Author Report Share Posted March 19, 2016 Back at it again with the white Arosa. Blue Arosa Quote Link to comment Share on other sites More sharing options...
Recommended Posts
Join the conversation
You can post now and register later. If you have an account, sign in now to post with your account.