Leaderboard

Popular Content
Showing content with the highest reputation on 12/04/2013 in all areas
-
i think you could get away with that new audi R8 replica bodykit that VW have just started making... that with some neons would look quality on a red car! the neons would need to be green... Wheels are a difficult one but if you can get some 20" wheels to fit id go for them. dont declare anything on your insurance as thats going to cost loads and when you fork out for the lambo doors it might get a bit tight on your wallet unless you're loaded or have nice parents... Hope this helps2 points
-
Right, so after trimming 2 headlining's i thought i should probably put up a how to for anybody attempting the same thing. What you will need: Spray glue - High temp to withstand the summer heat pounding the hell out of your roof Material - I used OEM spec foam backed textured nylon (Audi) Knife - Preferably a scalpel Scissors - A strong pair Space - Space is essential as the headlining is a large piece of car, i recommend doing it on a table Advised to have: Hot glue gun - Handy tool for any trimming attempt, Re-sticking clips/brackets and trim clip bases Hot glue - Black high viscosity for a strong hold Spray glue - An extra can is always handy 1. Remove old headlining Some people fing this difficult and end up snapping the clips that hold the rear in. The important thing to remember is that the headlining comes out at the FRONT first. To do this you MUST remove the grab handles, interior light and sunvisors, C pillar trims are optional but you might find it easier to do so. The sunvisors are a serious pain to remove but if you push the base towards the rear of the car whilst pulling down it should disengage the front part of the clip, this is not always the case though. You need to pull it out in an arc motion because of the shape of the clip. Brute force WILL damage the clip so just be patient and it will come out in time - i spent over 10 minutes on the passenger side while the drivers side was less than 1. Once all hardware is removed you should be able to lower the front a bit, wiggle it backwards a little to disengage the clips then push the headlining towards the windscreen over the top of the interior mirror. Its just a case of removing it from the car now - i found it easier to remove it from the boot with the rear headrests out. 2. Sise up the material Quite simple really, roll out your chosen material and place the headlining on top of it to size up how much you will need. When you have the correct size, cut it so you have slack on either side for wrapping. 3. Prep For this i used a table, much easier than doing it on the floor plus you can spin the headlining around on it as it is bowed so you have access to all areas. Lay out your headlining on the table and wipe with a damp cloth to take off any lint and crap that is lurking on your headliner. Drape your material over the headliner and move it into position so that the material covers the whole of the headliner, smooth it into the major contours to check it still covers everything. Fold the material in half, length ways, so that you have easy access to the back of the material, which you will be glueing, and the headliner, which you will also be glueing. 4. Glue Cover both the material and the headliner with your spray glue, cover a minimum of 80% of each surface to ensure proper adhesion when pressed together. Once the glue has been sprayed and both surfaces have been covered. WAIT. This is an essential step of the glueing process, you must allow 1-5 minutes depending on the glue for the solvents to evaporate. This is the 'tack time' and will ensure the glue is at its strongest point when the mating of the materials occur. -ALWAYS read the instructions on the can as they vary from make to make- When the glue has tacked, pull the folded half of the material to the very back/front of the headliner depending which end you started with. Work from the center out ensuring there are no creases. When you get to the grab handle recesses, leave a little slack either side and push the material to the deepest point. Only leave a little slack or it will crease, too little slack and you will find it difficult to get the deepest recess to stick as it wants to pull its self out. Repeat this with the other side, the sun visor area is the most difficult as you need to stick it in a less conventional way - usually the rule is work from the center out so you would be smoothing the interior mirror section down and around the base of the visor recesses first. This leaves too little slack. Honestly i cannot tell you how to do this as it is down to the skill/judgement of the trimmer although you should get the feel for it and work it out for yourself. 5. Cutting and wrapping NEVER cut flush. Always wrap the material to the back side of whatever you are trimming, THEN cut. Flip the headlining upside down and run the can of glue around the edge, overlapping both the material and the headlining so they both get a coating of glue. -TACK TIME- Fold the long flat spots around and push them in leaving the corners till last, trim the excess as you go ONLY when it has proper adhesion. When you get to the corners, you may need to 'finger' the material. Dirty as this sounds, it is the process of cutting little fingers/slits in material (usually these slits go deep, almost flush with the piece getting trimmed) so that it can be pulled and stretched around tight corners, the fingers allow you to cut down to a flush level yet retain the strength of wrapping so that no peel occurs. Once all wrapping is complete you can now cut out the visor clip holes, the interior light hole and slit where the grab handle clips slot. This is where a fresh scalpel comes into its own, it slits through the grab handle slots like a hot knife through butter, you'll probably find it difficult without a scalpel because i started to struggle when my scalpel started to go slightly blunt. For the interior light hole, cut an X shape from corner to corner, trim off the points then fold the flaps back on themselves and stick down. -CONGRATULATIONS- you've trimmed your headliner Now all thats left is to fit your new headliner. To do this, feed the headliner through the boot so that the front is between the mirror and the windscreen, lift the rear of the liner and feed the clips into the slots into the roof. Push the headliner back to the rear and up. Squeeze the edges up into the roof, be careful to avoid the C pillar trim clips when your doing this. The headliner should hold its own now. Feed the interior light wire through the hole and clip the light in. Then fit all the rest of the roof peripherals and your done.1 point
-
The Lupo is coming on great Amber, seats look right at home, should definitely apply for UD!1 point
-
i hate you pat... you didnt facetime me this morning at 7.20! if you're still stuck later pop round you fairy and i will help you do it. cant believe youre struggling to change a bulb...1 point
-
I'm going to try for show and shine, I've sent them an e-mail asking about the deadline and they've said that entries need to be in by the end of Feb so I've got some time to get everything looking perfect1 point
-
If you do a quick search in the how to section i've put up a pretty detailed guide, But since i'm being nice ill give you the link HERE1 point
-
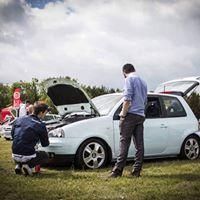
Few more pics from The Derwent Resevoir drive Phil1 point
-
Drums offer better braking performance IMO, they just look gash and overheat1 point