Haakon Posted December 2, 2010 Author Report Share Posted December 2, 2010 I'm in the process of setting up a graphics/ car wrapping business, so I need a rolling advertisement Maybe I should order some of this vinyl used here, I love how this car turns out: Quote Link to comment Share on other sites More sharing options...
Haakon Posted December 5, 2010 Author Report Share Posted December 5, 2010 And yeah, some new plan on the stereo, I'm now going to use 3" fullrange speakers on the dash, 7" midbass drivers in the doors and a single 10" subwoofer for a 5-channel setup in EMMA car audio competitions. Do I think I will miss some output going from 4x11" subs to a single ten? Not when the single ten is a DD9510G 9510 with fullrange placed on top Say hello to 150+db from a single 10" subwoofer:http://www.youtube.com/user/Ziggetyzag26#p/search/1/-ZN0Ve_CUk4 Quote Link to comment Share on other sites More sharing options...
little rich Posted December 5, 2010 Report Share Posted December 5, 2010 DD Quote Link to comment Share on other sites More sharing options...
Haakon Posted December 5, 2010 Author Report Share Posted December 5, 2010 I agree Used to have 2 1508 eight inch subs, they were mental So much fun outplaying friends systems with 2z12" and such I'm using this amp on it, should be sufficient Quote Link to comment Share on other sites More sharing options...
Soad7-PL Posted December 8, 2010 Report Share Posted December 8, 2010 great lupo 3liters.Where you bought a subframes to your recaro for the 3L?My Lupohttp://forums.clublupo.co.uk/index.php?showtopic=46751&st=0&p=579948&fromsearch=1entry579948 Quote Link to comment Share on other sites More sharing options...
dubsy Posted December 8, 2010 Report Share Posted December 8, 2010 DD for emma thats gonna take some setting up trust me Quote Link to comment Share on other sites More sharing options...
little rich Posted December 8, 2010 Report Share Posted December 8, 2010 F**k EMMA, lets crack windscreens Quote Link to comment Share on other sites More sharing options...
One life. Live it! Posted December 9, 2010 Report Share Posted December 9, 2010 F**k EMMA, lets crack windscreens love that quote Rich!! Mmmm.. Perhaps a vinyl made up with that on haakon?! (I think it would make the SQ guys a little worried! ) Quote Link to comment Share on other sites More sharing options...
Haakon Posted December 10, 2010 Author Report Share Posted December 10, 2010 DD for emma thats gonna take some setting up trust me Yes and no Only thing is, somewhere between 99 and 100% of all DD setups you see is made for either dbdrag or just playing rap or drum+bass really loud Even more so than Fi, but I wont have to convince you that a BL or BTL can sound soo good in the right box Even if half of those who has them, use them for the same as the DD mentioned I got this DD from Joakim Skovlund, who if you look up the results for the Emma finals for 2009, was the european champion in Advanced Unlimited for 2009, beating the runner up with something like 20 points at the finals, and all of it on the sound judging, they both had full score on installation.. He's now running a DD Z18 as a sq sub in that car I used to have a pair of DD1508 8" subs, but in twice the size box as recommended by DD, they sound really good, probably not as loud as others because of power handling in the big box, but very tight with good definition and extension. But i 9500 series in a large box can take the extra strain and abuse, and the power handling is just ridiculous But we'll see how it goes, I have plenty of mdf so building a group of test boxes of different sizes and kinds is just fun If it does not work out, I still have the utopias and plenty of them, hehe Quote Link to comment Share on other sites More sharing options...
Haakon Posted December 10, 2010 Author Report Share Posted December 10, 2010 F**k EMMA, lets crack windscreens Emma - we'll see how it goesESPL - feeling well about thisDBdrag - now were talking Psychlone - DBdrag with added points for RTA score and installation? Hello!! Quote Link to comment Share on other sites More sharing options...
Haakon Posted December 10, 2010 Author Report Share Posted December 10, 2010 great lupo 3liters.Where you bought a subframes to your recaro for the 3L?My Lupohttp://forums.clublupo.co.uk/index.php?showtopic=46751&st=0&p=579948&fromsearch=1entry579948Hi! As you probably know, the 3L has different subframes than all the other Lupos. But it is the same as in the following cars: VW Polo 6N and VW Golf mk3. If you check with the parts nr from recaro, they say that they do not have subframes for the 3L, but I can guarantee you that Polo 6N and Golf 3 seats/subframes fit perfectly. The seats and frames I use now, came from a Golf 3. I've seen your car, it looks great! How is the space between the front wheel and the coilovers? Since the 3L has a wider front track the front wheels stick out more than a regular Lupo, Im running 7x16 ET35 now, but they rub on the wheelarches, they should have been ET40 to clear them, but then there will not be enough clearance on the inside... 3L only problem Quote Link to comment Share on other sites More sharing options...
Haakon Posted December 10, 2010 Author Report Share Posted December 10, 2010 http://www.youtube.com/watch?v=SMq1BrkrO-IAll i need now is a subwoofer cat Quote Link to comment Share on other sites More sharing options...
Haakon Posted December 11, 2010 Author Report Share Posted December 11, 2010 (edited) Finally we got the "normal" winter weather here on the west coast of norway, 2-4 degrees plus, and rain So the loop finally thawed and I could take som (crappy) pics of the carbonvinyled bonnet:Difficult to get a pic of the carbon-effect in the rain, this was the best I could get for now: Edited December 11, 2010 by Haakon Quote Link to comment Share on other sites More sharing options...
Soad7-PL Posted December 11, 2010 Report Share Posted December 11, 2010 Hi! As you probably know, the 3L has different subframes than all the other Lupos. But it is the same as in the following cars: VW Polo 6N and VW Golf mk3. If you check with the parts nr from recaro, they say that they do not have subframes for the 3L, but I can guarantee you that Polo 6N and Golf 3 seats/subframes fit perfectly. The seats and frames I use now, came from a Golf 3. Thats great info form me, Just i looking to for this subframesbecause I just buy two recaros Idealsitz C81 for about 80 euros with subframes to honda. I've seen your car, it looks great! How is the space between the front wheel and the coilovers? Since the 3L has a wider front track the front wheels stick out more than a regular Lupo, Im running 7x16 ET35 now, but they rub on the wheelarches, they should have been ET40 to clear them, but then there will not be enough clearance on the inside... 3L only problem In 3L with wheels it is a problem... I have on the front 7j and ET33 and they a litle rub...I dont know how is the space between wheel and gewinde, its enought . Mayby in next season I`ll put 7,5j and ET25 and take a litlle negative in front. Quote Link to comment Share on other sites More sharing options...
Haakon Posted December 13, 2010 Author Report Share Posted December 13, 2010 Ive ordered these upper and lower door panels from germany now, £40 each for upper and €60 each for lower, delivered Fiberglass, prepped for painting. Score! Quote Link to comment Share on other sites More sharing options...
Haakon Posted January 20, 2011 Author Report Share Posted January 20, 2011 So yeah, not much happening to the car is this norwegian winter weather Took some pics today:Not very appealing to do anything is this weather, the garage in the background is unheated and uninsulated. Freezing inside there. Did however knock up a test box for the new sub despite the coldness one day:Some pretty strong magnets on the DD subwoofer Quote Link to comment Share on other sites More sharing options...
Haakon Posted January 21, 2011 Author Report Share Posted January 21, 2011 Doorpanels came in the mail from Germany today Quote Link to comment Share on other sites More sharing options...
Haakon Posted January 22, 2011 Author Report Share Posted January 22, 2011 And this is how they look with speakers: Quote Link to comment Share on other sites More sharing options...
Haakon Posted January 31, 2011 Author Report Share Posted January 31, 2011 Did some more vinyl wrapping today, now its the interior's turn Some in-progress pics:Also testfitted the doorpanels, they needed a bit of cutting to sit where they are supposed to, but they should look good when properly fitted:Plenty of space between the panel and the window when rolled down: Quote Link to comment Share on other sites More sharing options...
Haakon Posted January 31, 2011 Author Report Share Posted January 31, 2011 And a tip for those who may want to get these door cards, the upper ones do not come with any means of fastening them, so you will have to pry off the brackets from your old ones and glue them in place. So don't sell your old ones to get these You need the parts from them. Well, doorhandles and such as well when I come to think of it Quote Link to comment Share on other sites More sharing options...
Haakon Posted March 8, 2011 Author Report Share Posted March 8, 2011 So yeah... nothing much happening here I'm afraid... Well sort of maybe, the ignition switch actually wore out (after nearly 400.000km of use, and it being used accordingly), so I had to order a new ignition mechanism along with new keys. When we finally got the old one out, it had actually broken off inside, the tap that goes into the electrical part/switch of the ignition had snapped off.. And when we changed it, it turns out that it had taken the electrical part with it, so that needs to be replaced also...so another week of waiting for parts at least..On a brighter side, I finally broke the piggybank and melted the Visa card, so now I have a brand new large format (A1) photo printer So I can print on photo paper, canvas, banner material, and off course adhesive vinyl, so now I can make full colour stickers and car graphics/wraps This thing weighs 105kg, measures 140x120x60cm and prints from rolls of media @ 24" width (61cm).First "little" test print Thinking about making some custom stickerbomb sheets, could be cool maybe? Quote Link to comment Share on other sites More sharing options...
StevesLupoS Posted March 8, 2011 Report Share Posted March 8, 2011 Full roof sized stickerbomb vinyl would be really cool mate, seen some sheets on ebay but their no where near big enough ! ! ! Nes controller looks well cool Quote Link to comment Share on other sites More sharing options...
Haakon Posted April 25, 2011 Author Report Share Posted April 25, 2011 I had some free moments during easter to do some work on the car. The fiberglass doorpanels I got from germany did not fit well at all, so alot of cutting, sanding and filler action the last days.Finished terminating/soldering the rca cables at the front end at least, will have to wait until all the amps are fitted to know where to cut the cables at the other end, they will be made to size. No coils of rca cables bunched up because they are too long. So this was step one: The company I ordered the RCA plugs from managed to send one red to few, and one black to many.. So I put it on this end instead of in the back.)Almost all wires in VAG cars are wrapped in this feltcovered tape like on the antenna cable shown here:So I got hold of a OEM roll of tape, and used it on the connectors to isolate them (and stop them clanking about)Finished up and connected to the P99RS pre-out wiring loom it looks like this:Will work some more on the finish on the doorpanels during the week, they will be painted glossy silver metallic just like the car when they are done. Quote Link to comment Share on other sites More sharing options...
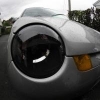
Haakon Posted May 3, 2011 Author Report Share Posted May 3, 2011 So now I have a set date I have to be finished by, June 2, big car meet then. So no time to sit about and think, time to get to work!I want the 3" fullrange drivers close to where the stock tweeters are/were located in the dash, close to the corners. So I found my Bosch "dashboard muncher" and got to work:does this;They fit pretty well:considering their mounting depth/magnet assembly:Other side:Next step here is to make the cutouts a little neater, and make a small sealed box underneath. Will probably make this from small pieces of damplifier pro formed together to make a small compartment. Will then make speaker baffles and grilles in the style of the stock tweeter grill, only larger. Quote Link to comment Share on other sites More sharing options...
Haakon Posted May 9, 2011 Author Report Share Posted May 9, 2011 Working on sealing up the doors now to make it a sealed box for the midbass drivers (or at least as sealed as one can get).The lower parts of the doora has a really big opening behind the doorpanel:so I made a cardboard template that filled this out:and transferred the template to a 8mm thick plastic sheet:This will be fastened with industrial 3M VHB doublesided tape around the edges, and then a layer of Second Skin Damplifier Pro over the panel and its edges to seal it properly up.Routered some speaker rings today, and I'm sitting inside now waiting for the fiberglass/polyester base to harden..Took a few pics while making the base for the speaker mounts:Step one; ducttaping where the base is going to sitStep two: masking everywhere you are going to make a mess and spill resin: (done this before )Cut some fiberglass fabric to form the base:Coating it with polyester resin and waiting for it to harden: This morning it was ready to be cut approx to size:Making the other one this afternoon Quote Link to comment Share on other sites More sharing options...
Recommended Posts
Join the conversation
You can post now and register later. If you have an account, sign in now to post with your account.