

Trx 33
-
Posts
324 -
Joined
-
Last visited
Content Type
Profiles
Forums
Calendar
Everything posted by Trx 33
-
Yeah, i've done about 1.3K miles in it already and a fair few of those miles were 'carefully driven'
-
Oddly since i put the old custom chrome back box on it seems to run a bit better but its not perfect, throttle lag is still very much present but i'm starting to think its just the way it is. The car is getting easier to drive, not sure if its just me getting accustomed to it though.
-
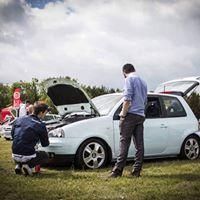
Been a little while since an update but here we go. Silver is no longer on the road. Brakes have had it - rear drivers piston has popped, fluid has leaked into the drum and ruined the whole assembly. That explains the worsening brakes and absolutely crap hand brake. I have also sheared off both the rear brake lines when dropping the beam off to fit my Powerflex bushes (which i didn't do). Currently trying to find a sport rear beam to do a disc conversion but it's proving quite difficult to find one Aside from that setback i've put new callipers, Brembo discs and EBC greenstuff pads on the front along with HEL braided lines. I'll get the system bled once i manage to source and fit a beam. Seeing as i cant get any further with the silver one i've been cracking on with the black one, mainly just maintenance, putting things back together and fixing what was broken. So far since the MOT she's had: Oil filterShell helix 5w40 oilFuel filter4 New NGK spark plugsRe-fitted custom chrome back boxPipercross panel filter cleanedFixed loose indicator stalksRe-fitted steering column coverPainted front emblem A good clean in & outPinned seat air bag wired back upOld tint residue removedDrivers window seal re-positioned to fitDrivers dual window controls fixedFlip key fobE38 Tax disc holder8 Ball gear knobGear gaiter re-fittedTemporary radio fittedBlack coolant capSome other bits i've most likely forgotten
-
Bump strip removal Badge painting Air freshener(s) Twin reverse lights Polo 6R aerial Windscreen sealant Full clean in + out Replace missing bits (screws, fixings etc.)
-
'Twas me, and HERE is the fog light guide
-
How to: Retrofit front fogs
Trx 33 replied to Trx 33's topic in The Archive - "How to" and "Information"
I should probably give some credit and thank mattarosa for some little chunklets information when i was starting this -
A couple of sport running issues
Trx 33 replied to Trx 33's topic in Car Care, Maintenance and Mechanical
I've monitored the on VCDS and it seems to be ok, ill have another look when i get a chance though. I'll try to get a video of the lag at some point too -
WU52 KKR lives! (for now)
-
Engine code AUB I've just serviced the engine - new spark plugs, fuel, air, oil and cabin filters, topped off with shell helix 5W40 oil, i've also flushed the fuel system with red line fuel system cleaner and have been running it with premium JET fuel and Shell V-PowerI have removed and cleaned the EGR valveReplaced coil packReplaced HT leadsReplaced throttle bodyThrottle body aligned via VCDSNew batteryNO FAULT CODESProblems: The car doesn't start brilliant - turns over quite a few times before it fires upThere seems to be a flat spot when accelerating around 2k rpm sometimes, where it feels like all engine power just goes then comes back a moment laterLingering when the revs are coming downLag when revving - on my 1.4 non sport you can repeatedly bash the throttle and the revs will correspond. On the sport, if you bash the throttle the revs just mush around with no definition to themThe car is always noticeably smokey out of the exhaust regardless of the weather or how long the car has been runningThe car really struggles past 90mph, especially in 5th gear and if i'm giving it some, however it will happily cruise up to and past that speedIt seems as if when you have the accelerator pedal fully depressed and then ease it back a bit the car picks up a littleI know this engine is renowned for having throttle lag issued but it just seems that this is an abnormal amount of lag If anyone has had any of these problems and has managed to rectify them or just has any suggestions ill have a look into them as i'd like to get this car running 100% or near enough I've put a hell of a lot of effort (and money) into this car getting it roadworthy and running and ill be damned if i can't get it at least 90%
-
So much kick-assery
-
I've put up a detailed how to HERE if you decide to retrofit
-
Not a problem Regarding lifetime, they are LED so the actual light emitting diode should last ages, i have had them fitted for just over 2 years and one has failed in the past month but this was due to the build (and a little bit of rough handling), it was always a bit dodgy from the start though. If you bend the legs out and remove the white back casing there will be a resistor and a standard wire leg, the resistor snapped off on mine. In all honesty, i cant really complain for the price though.
-
Has anyone relined a headliner? (+Door card Q.)
Trx 33 replied to amyyb's topic in Interior and In-Car Entertainment
There's loads of stuff in the how to section, have a read through there. But THIS is the one you want -
Just a quickie because i've heard it being asked 100000000000 times Thin piece of wire or string - some people say dental floss, i used a guitar string. Saw through the adhesive/foam Toffee wheel in the drill - erase the remaining foam and adhesive Residue Remover Debadged.
-
I've just bought a complete Mk2 bootlid and i intend to fit it to my Mk1. This is a non central locking bootlid so wiring will have to be transferred and a new lock and handle will need to be purchased. However to be able to use my existing key, regardless of which handle is fitted, the lock and barrel will have to be switched OR modified. I have done the latter and modified the lock to be fully functional with my existing key. This is how it was done: I removed the handle from the boot to do this but it can be done with it still fitted. 6 Nuts is all that is holding it in so its not too hard to remove and makes life a lot easier later on. First things first, you will need to remove the e clip and lock arm There will be a C shaped clip retaining the next part, i have already removed it in the above picture. This clip is the difficult one to re-install as it is retaining a spring plate. Be careful when removing this as the springs are under pressure and WILL want to fly everywhere. Once that clip is removed all of the other parts should just slip out. When i extracted these i made sure to keep them lined up but they should all slip together one way so it really doesn't matter, i was just being extra cautious. The business end is pictured on the left of the above, this is a 2 piece assembly, once the sheath is removed all the teeth should pop out. This is the bit you will need to swap with your existing part so that your original key will work correctly in your new lock. If however you are attempting to modify it, there are a few things to note, the modified lock will NOT be as secure as the original as it will now fit YOUR key as well as the donor cars key and any other key in between. The less modification needed to make YOUR key work, the more secure the lock will be. I was lucky as very little modification was required. When the key is inserted, all of the teeth should be flush with the body. As you can see in the picture above there is about 3 teeth that are not flush when MY key is inserted. All that is needed is for the teeth to be ground down flush, i did this with my dremel but it could also be done with a file. Test that it slides in the barrel when the key is inserted before you refit it and assemble in reverse order.
-
Those are the led 501 sidelights THESE are the fogs
-
They do seem to come out blue in the pictures however the fogs and nightbreakers come out a lot whiter than they actually are, these 501's are actually really white but its up to you, £3-4 you cant really complain
-
Just a thought but could you put a little silica sachet behind the back cap of the headlight? like the sachets you get in shoe boxes?
-
Lights: Black: Headlights - Osram Nightbreaker H7 Fogs - OEM+Yellow tinted lens Sidelights - Afore mentioned eBay LED+lens 501's Silver: Headlights - Philips blue vision ultraFogs - AP Xenon H3Sidelights - Afore mentioned eBay LED+lens 501's
-
THESE are my favourite sidelights, i have them in my Mk1 & Mk2 Arosa's Not sure if they'll match the xenons but i cant imagine they'd be far off
-
Well it took a bit longer than expected but its passed its MOT and i've got 300 miles out of it so far. It doesn't run perfect - laggy throttle and weak 4/5 gear, struggles to get past 100 but its pokier than my other one. Plans are to get new front fenders, get a decent head unit and some subs in, sort out the interior and drop it on some klutch sl1's but i think ill wait until i get a solid 1k miles out of it before i start trusting it enough to spend too much on it
-
Don't use comic sans Use a normal font size Stalk ebay Look for people breaking GTI'sI waited about 5 months to find one after deciding i wanted one. It's just a waiting game.
-
They are also for the sport, they come on engine code AUB. I got a spare set from a fabia which was gettinh broken with that engine code.
-
Little tip if your greasing coilovers, use a cheap paint brush and you will get a perfect coat of grease, not too much, not too little, as well as an even coat. I always keep a cheap paint brush in my grease tub, makes greasing threads quick, easy and virtually mess free I would advise greasing the top of the struts around the nut and the hex in the shaft as my first set of coilovers rusted badly there, ended up rounding the hex, had to hammer a torx bit in to get any grip so any kind of protection to stop this is a must.
-
How to: Retrofit front fogs
Trx 33 replied to Trx 33's topic in The Archive - "How to" and "Information"
I'm sure they could all be fitted this way, all of the earthing points are the same and it doesn't matter where it goes through the firewall as long as it goes through safely (existing grommet or purpose fitted grommet). The only way to know for sure is to check the connection on the relay board which is a 10 minute job. The GTI should be able to be fitted this way as long as you are prepared to make the lights fit into the grill somehow. If i was going to attempt this i would try using Mk2 Arosa fog lights and grills but this is just on speculation as i have yet to se a GTI up close. Something i noticed while fitting these was on either side of the connector, there was a painted white dash above the fog light pin slot. I'm assuming this was from the factory during quality inspection when checking if the right loom(s) had been fitted. This may be just on my car but if not, it is another way to identify the slot.
