MiniGreen Posted June 16, 2014 Report Share Posted June 16, 2014 I've owned my little loop for a good couple of months now, but I think it's time I started one of these up! Gives me another excuse to get some mods going too..So, I first bought her when she was on 68k and is a 1.4s 75bhp.So far the only modifications I have done to Daisy is FK Coilovers, and will post some pictures of before and after! I must find my DSLR camera which I have lost though, as the photos aren't great!Just ordered myself my wheels too!The first day I bought her and got her home.Interior shotEngine Bay nice and clean..Then these beautys came..Got them fitted and sits okay for now.. more lows once I have my new wheels!First proper clean in a while.. (Cleans up alright actually, will be removing the bump strips soon!)Finally got around to removing the lupo badges, looks so much smoother and cleaner in my eyes.. Quote Link to comment Share on other sites More sharing options...
MiniGreen Posted June 16, 2014 Author Report Share Posted June 16, 2014 Well, tonight I found my camera after looking for it for hours! And had a little play around, nothing amazing but I really liked the photo and thought I'd upload for you guys:) 1 Quote Link to comment Share on other sites More sharing options...
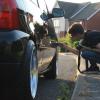
MiniGreen Posted June 20, 2014 Author Report Share Posted June 20, 2014 So, the big day was Sunday.. yes, I finally have got rid of my steels and now am rolling on new shoes!!And today me and a friend spent the day cleaning and took the chance to take a few snaps of each others cars.. thought I'd share a couple of pics! Quote Link to comment Share on other sites More sharing options...
Jamesstrutt Posted June 21, 2014 Report Share Posted June 21, 2014 (edited) Looks really smart mate, are those wheels Lensos? So, the big day was Sunday.. yes, I finally have got rid of my steels and now am rolling on new shoes!!And today me and a friend spent the day cleaning and took the chance to take a few snaps of each others cars.. thought I'd share a couple of pics! Edited June 21, 2014 by Jamesstrutt Quote Link to comment Share on other sites More sharing options...
MiniGreen Posted June 21, 2014 Author Report Share Posted June 21, 2014 Looks really smart mate, are those wheels Lensos?No mate, they're Dare RS wheels:) Quote Link to comment Share on other sites More sharing options...
shee Posted June 21, 2014 Report Share Posted June 21, 2014 what is the wheel specs? Quote Link to comment Share on other sites More sharing options...
depthmvm Posted June 22, 2014 Report Share Posted June 22, 2014 what is the wheel specs?Slandered staggered Dare RS wheels, 7j Fronts & 8j Rears, ET maybe 20 Quote Link to comment Share on other sites More sharing options...
Ant0889 Posted June 22, 2014 Report Share Posted June 22, 2014 looks very nice on the wheels! paint work looks lovely as well, what do you use? oh how I wish I had pop out windows! Quote Link to comment Share on other sites More sharing options...
MiniGreen Posted June 22, 2014 Author Report Share Posted June 22, 2014 Slandered staggered Dare RS wheels, 7j Fronts & 8j Rears, ET maybe 20Ooo, so close! ET 20 on the front and ET 15 on the rear:) Quote Link to comment Share on other sites More sharing options...
MiniGreen Posted June 22, 2014 Author Report Share Posted June 22, 2014 looks very nice on the wheels! paint work looks lovely as well, what do you use? oh how I wish I had pop out windows!Oh, thanks! It's got the odd nick then needs work but it is a daily haha;) Previous owner scratched up the rear bumper! The answer to 'what I use'.. well this time I cleaned it with Auto Glymn products finishing with show shine spray to get rid of any greasy marks that may of been left before. But not too long ago my dads friend who details cars clay bar'd and machine polished it:) Quote Link to comment Share on other sites More sharing options...
MiniGreen Posted June 22, 2014 Author Report Share Posted June 22, 2014 Well today went a lot better then planned.. but was also very much under-planned haha. Very chuffed with the progress though and I've never done anything like this before so was all good fun haha.The hardest thing was getting these damn curves, was very much trial and error.. many many times. lolSooo yeah, as you can see.. not yet finished but the main starting point is there and it's a very tight fit so was quite impressed although may have to make some changes due to the plans with this set up:) Quote Link to comment Share on other sites More sharing options...
MiniGreen Posted July 3, 2014 Author Report Share Posted July 3, 2014 So, I've finally got around to getting on here again.. and in this time I've managed to complete my boot build, a couple of little tweaks are needed, but I'm hugely happy with the overall outcome!Here come pics! Quote Link to comment Share on other sites More sharing options...
amckenzie Posted July 3, 2014 Report Share Posted July 3, 2014 Looking rad man! love the boot build 1 Quote Link to comment Share on other sites More sharing options...
Ant0889 Posted July 3, 2014 Report Share Posted July 3, 2014 install looks good!hope you dont mind some constructive criticism however -sub needs a good cleani'd lose the seat bases, ruins the lookcan you tuck the amp wires any other way?can you recess the sub?looks ace otherwise, the lupo/arosas have so much space without the rear seats! Quote Link to comment Share on other sites More sharing options...
bboy33 Posted July 3, 2014 Report Share Posted July 3, 2014 Hello, I agree with the opinion of Ant0889, you should put the amp wires somewhere else.For my part, they are hidden under the first board, but my problem is that suddenly, the sub seems a little lonely in the middle lol.Why do not you connect the + and - "bridged" to your amp mode?(if the pic bothers you, I can remove it)otherwise good job. Quote Link to comment Share on other sites More sharing options...
MiniGreen Posted July 3, 2014 Author Report Share Posted July 3, 2014 (edited) install looks good!hope you dont mind some constructive criticism however -sub needs a good cleani'd lose the seat bases, ruins the lookcan you tuck the amp wires any other way?can you recess the sub?looks ace otherwise, the lupo/arosas have so much space without the rear seats!No, I don't mind constructive criticism mate!Sub needs a clean, indeed it does! Its sat around ever since I sold my Classic mini, it's only a temp sub until I get a new one.The seat bases indeed do ruin the look and I agree! They'll be coming out I think:)The amp wires, hm that's not a bad idea. I thought about this when I was doing it.. and might re-do them to tidy them up abit.Will be having a think about this! Edited July 3, 2014 by MiniGreen Quote Link to comment Share on other sites More sharing options...
MiniGreen Posted July 3, 2014 Author Report Share Posted July 3, 2014 Hello, I agree with the opinion of Ant0889, you should put the amp wires somewhere else.For my part, they are hidden under the first board, but my problem is that suddenly, the sub seems a little lonely in the middle lol.Why do not you connect the + and - "bridged" to your amp mode?(if the pic bothers you, I can remove it)otherwise good job.I wondered what that bridged mode meant! I've never wired to this amp! So I should wire the negative in the other screw to achieve the bridge? Quote Link to comment Share on other sites More sharing options...
bboy33 Posted July 3, 2014 Report Share Posted July 3, 2014 Yes that's right.For example :Is it your amp ?http://www.kenwood-electronics.co.uk/products/car/amplifiers/KAC-7252/ Quote Link to comment Share on other sites More sharing options...
MiniGreen Posted July 3, 2014 Author Report Share Posted July 3, 2014 Yes that's right.For example :Is it your amp ?http://www.kenwood-electronics.co.uk/products/car/amplifiers/KAC-7252/Yeah that's the amp:) And I've bridged them now! What's the difference if you don't mind me asking? Quote Link to comment Share on other sites More sharing options...
bboy33 Posted July 3, 2014 Report Share Posted July 3, 2014 Normally, the amp should generate more power to the sub. 1 Quote Link to comment Share on other sites More sharing options...
Recommended Posts
Join the conversation
You can post now and register later. If you have an account, sign in now to post with your account.