

dirk1978
-
Posts
152 -
Joined
-
Last visited
-
Days Won
8
Content Type
Profiles
Forums
Calendar
Posts posted by dirk1978
-
-
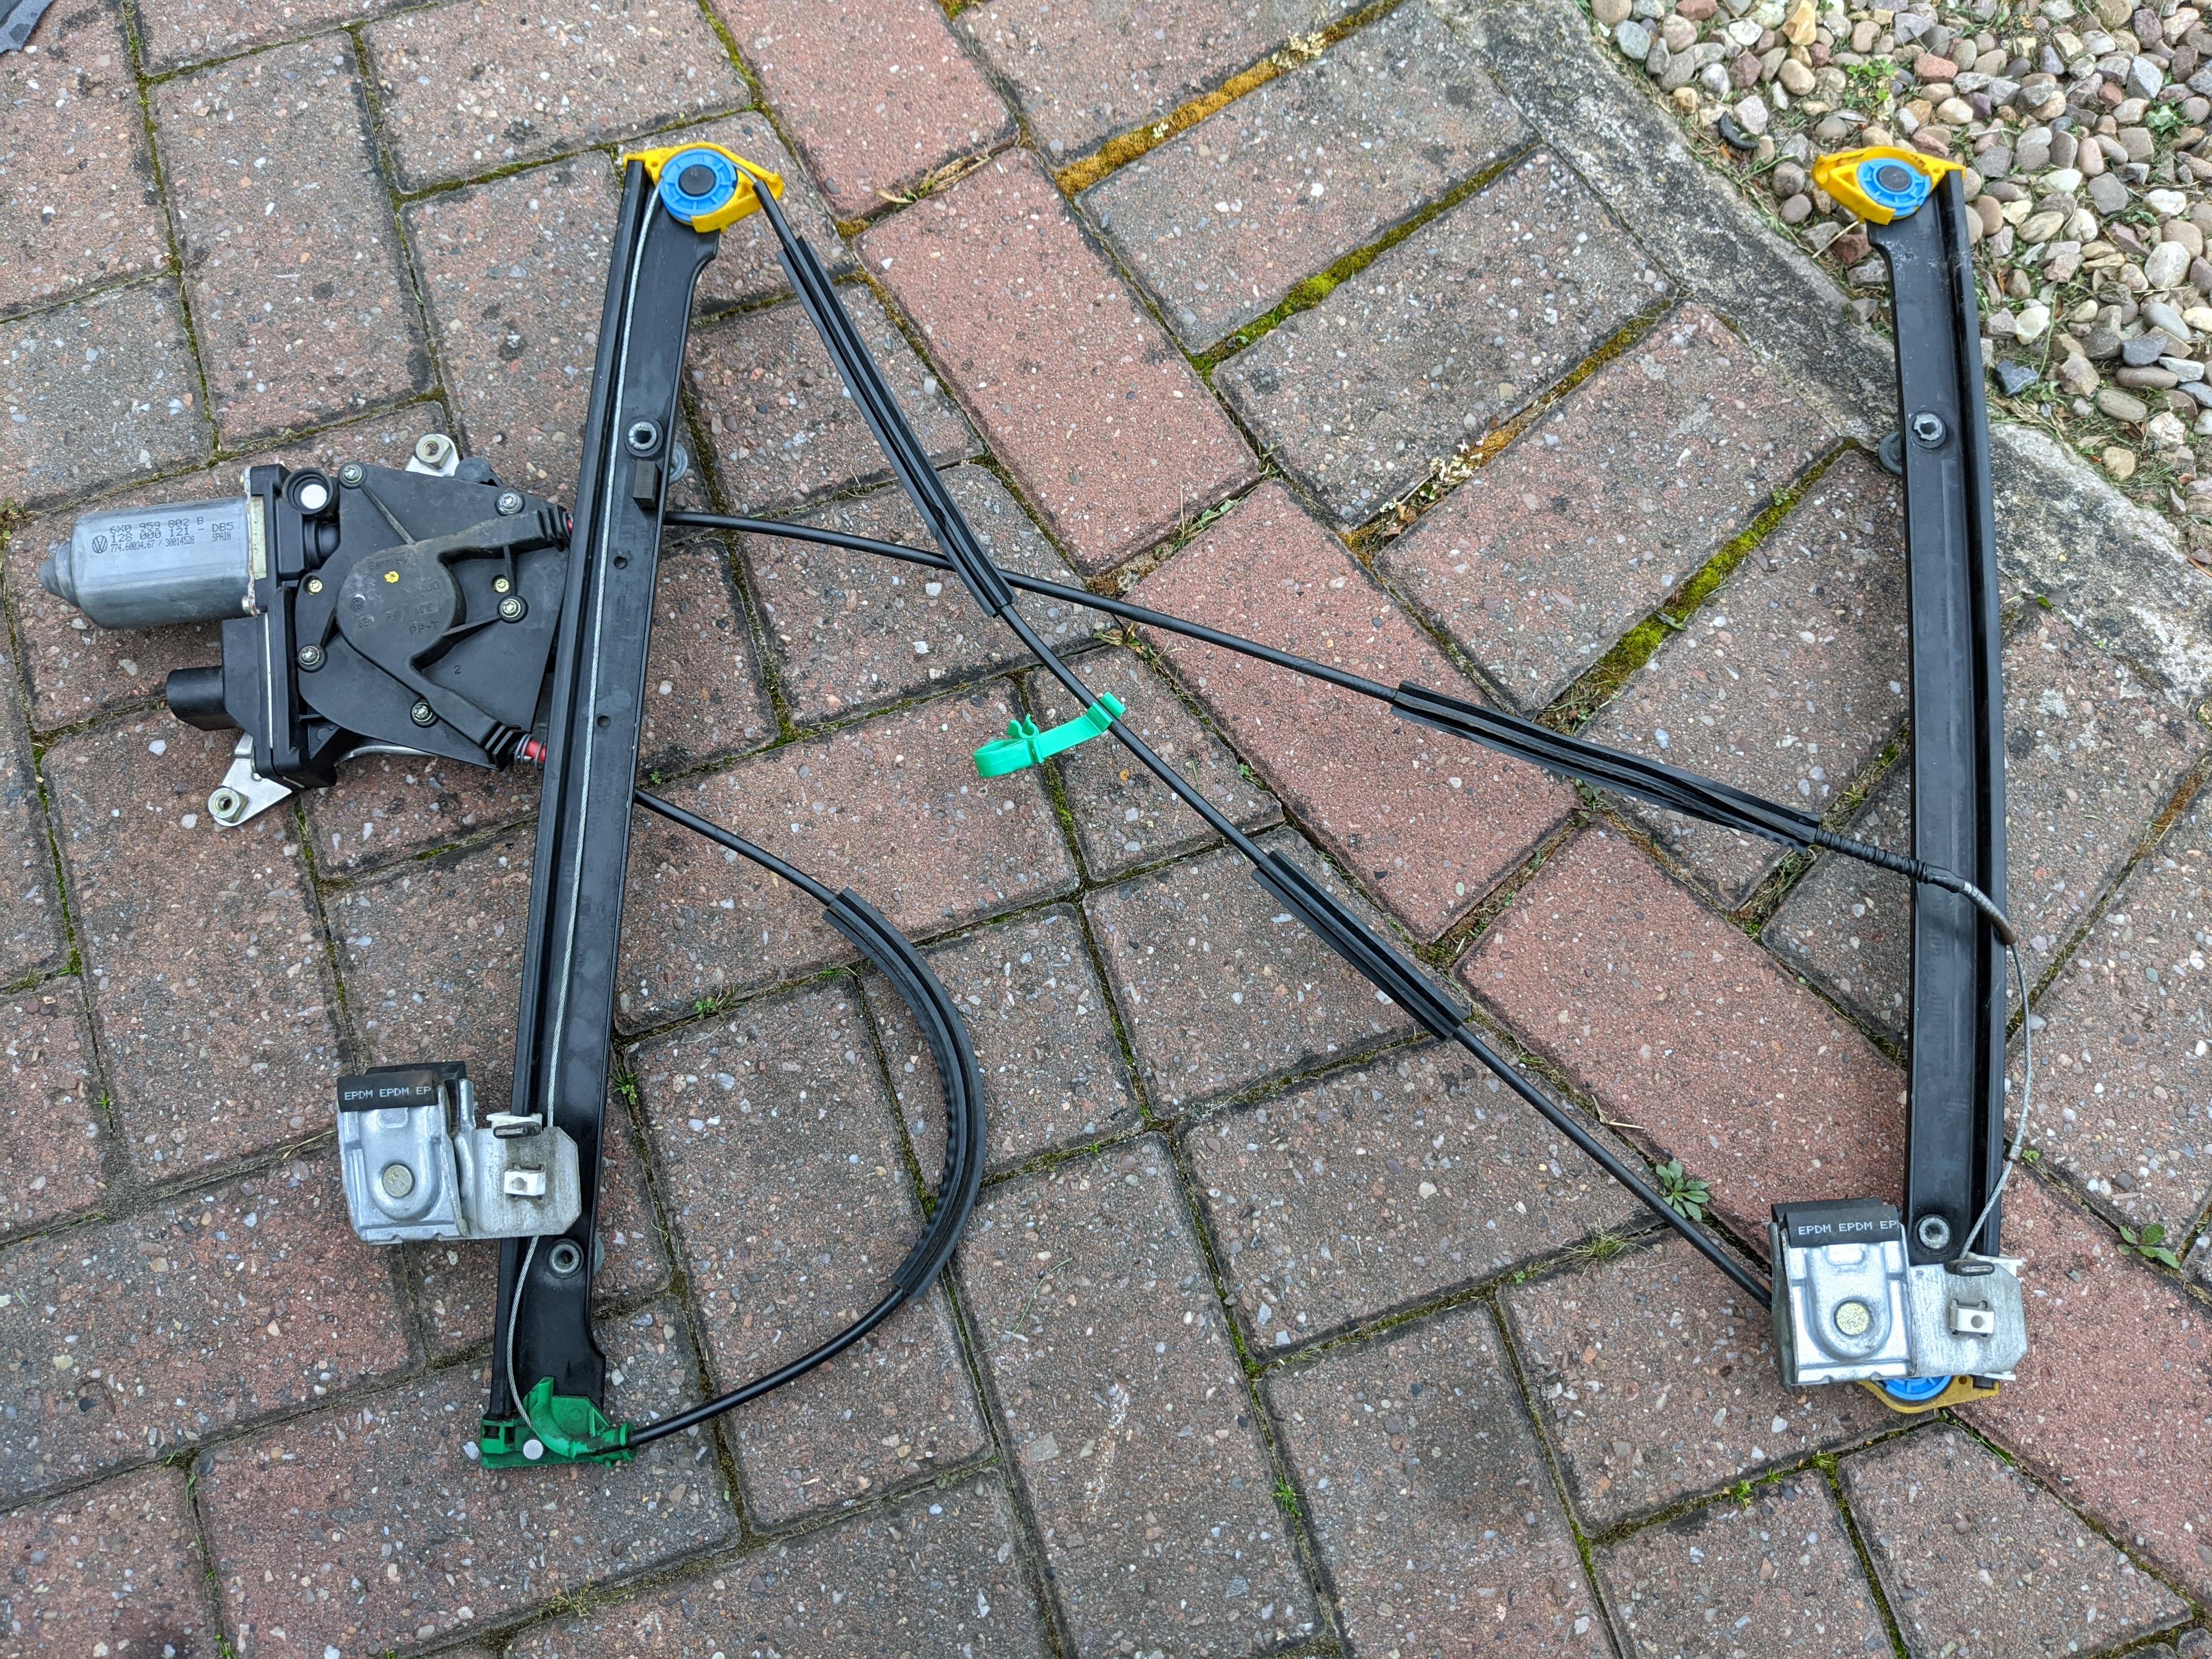
Right learning all the time, this mechanism is apparently the electric window regulator I assume because it regulates the opening and closing of the window rather than being an electronic regulator which is what I assumed other people were talking about.
This one seems too cheap but it does say with motor for cars with electric windows. But the photo doesn't look quite right?
https://www.ebay.co.uk/itm/193484677001
Then on other places they're more expensive which would feel a bit more reassuring. Then again some of these places just overprice certain items.
https://www.mister-auto.co.uk/front-window-regulator/bolk/09461400/
Has anyone bought one recently?
-
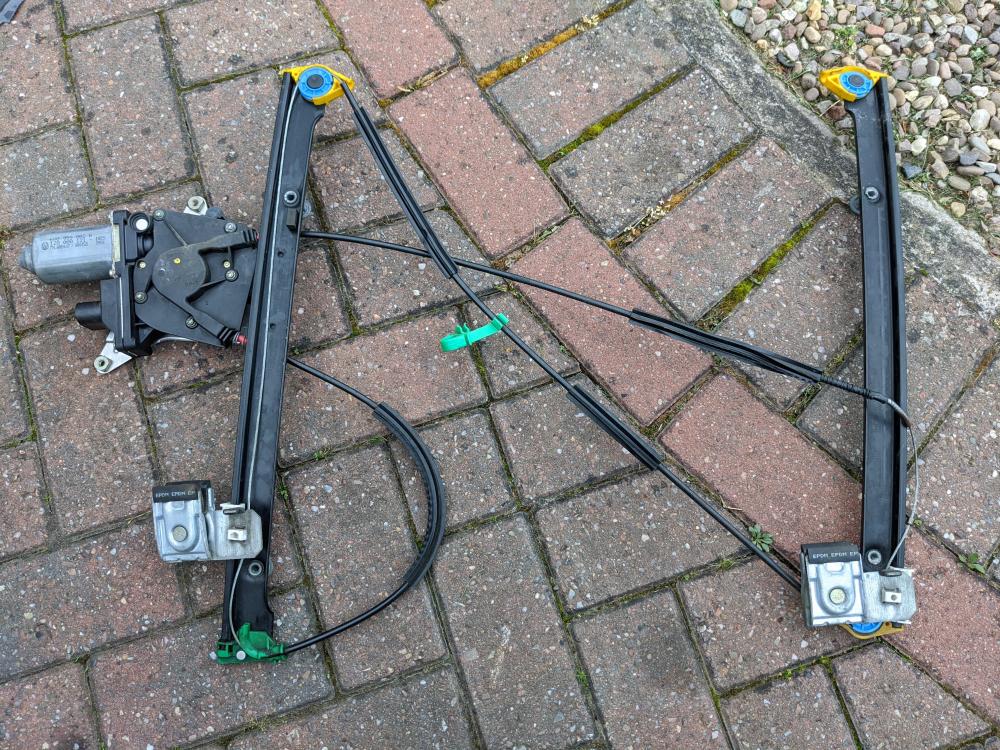
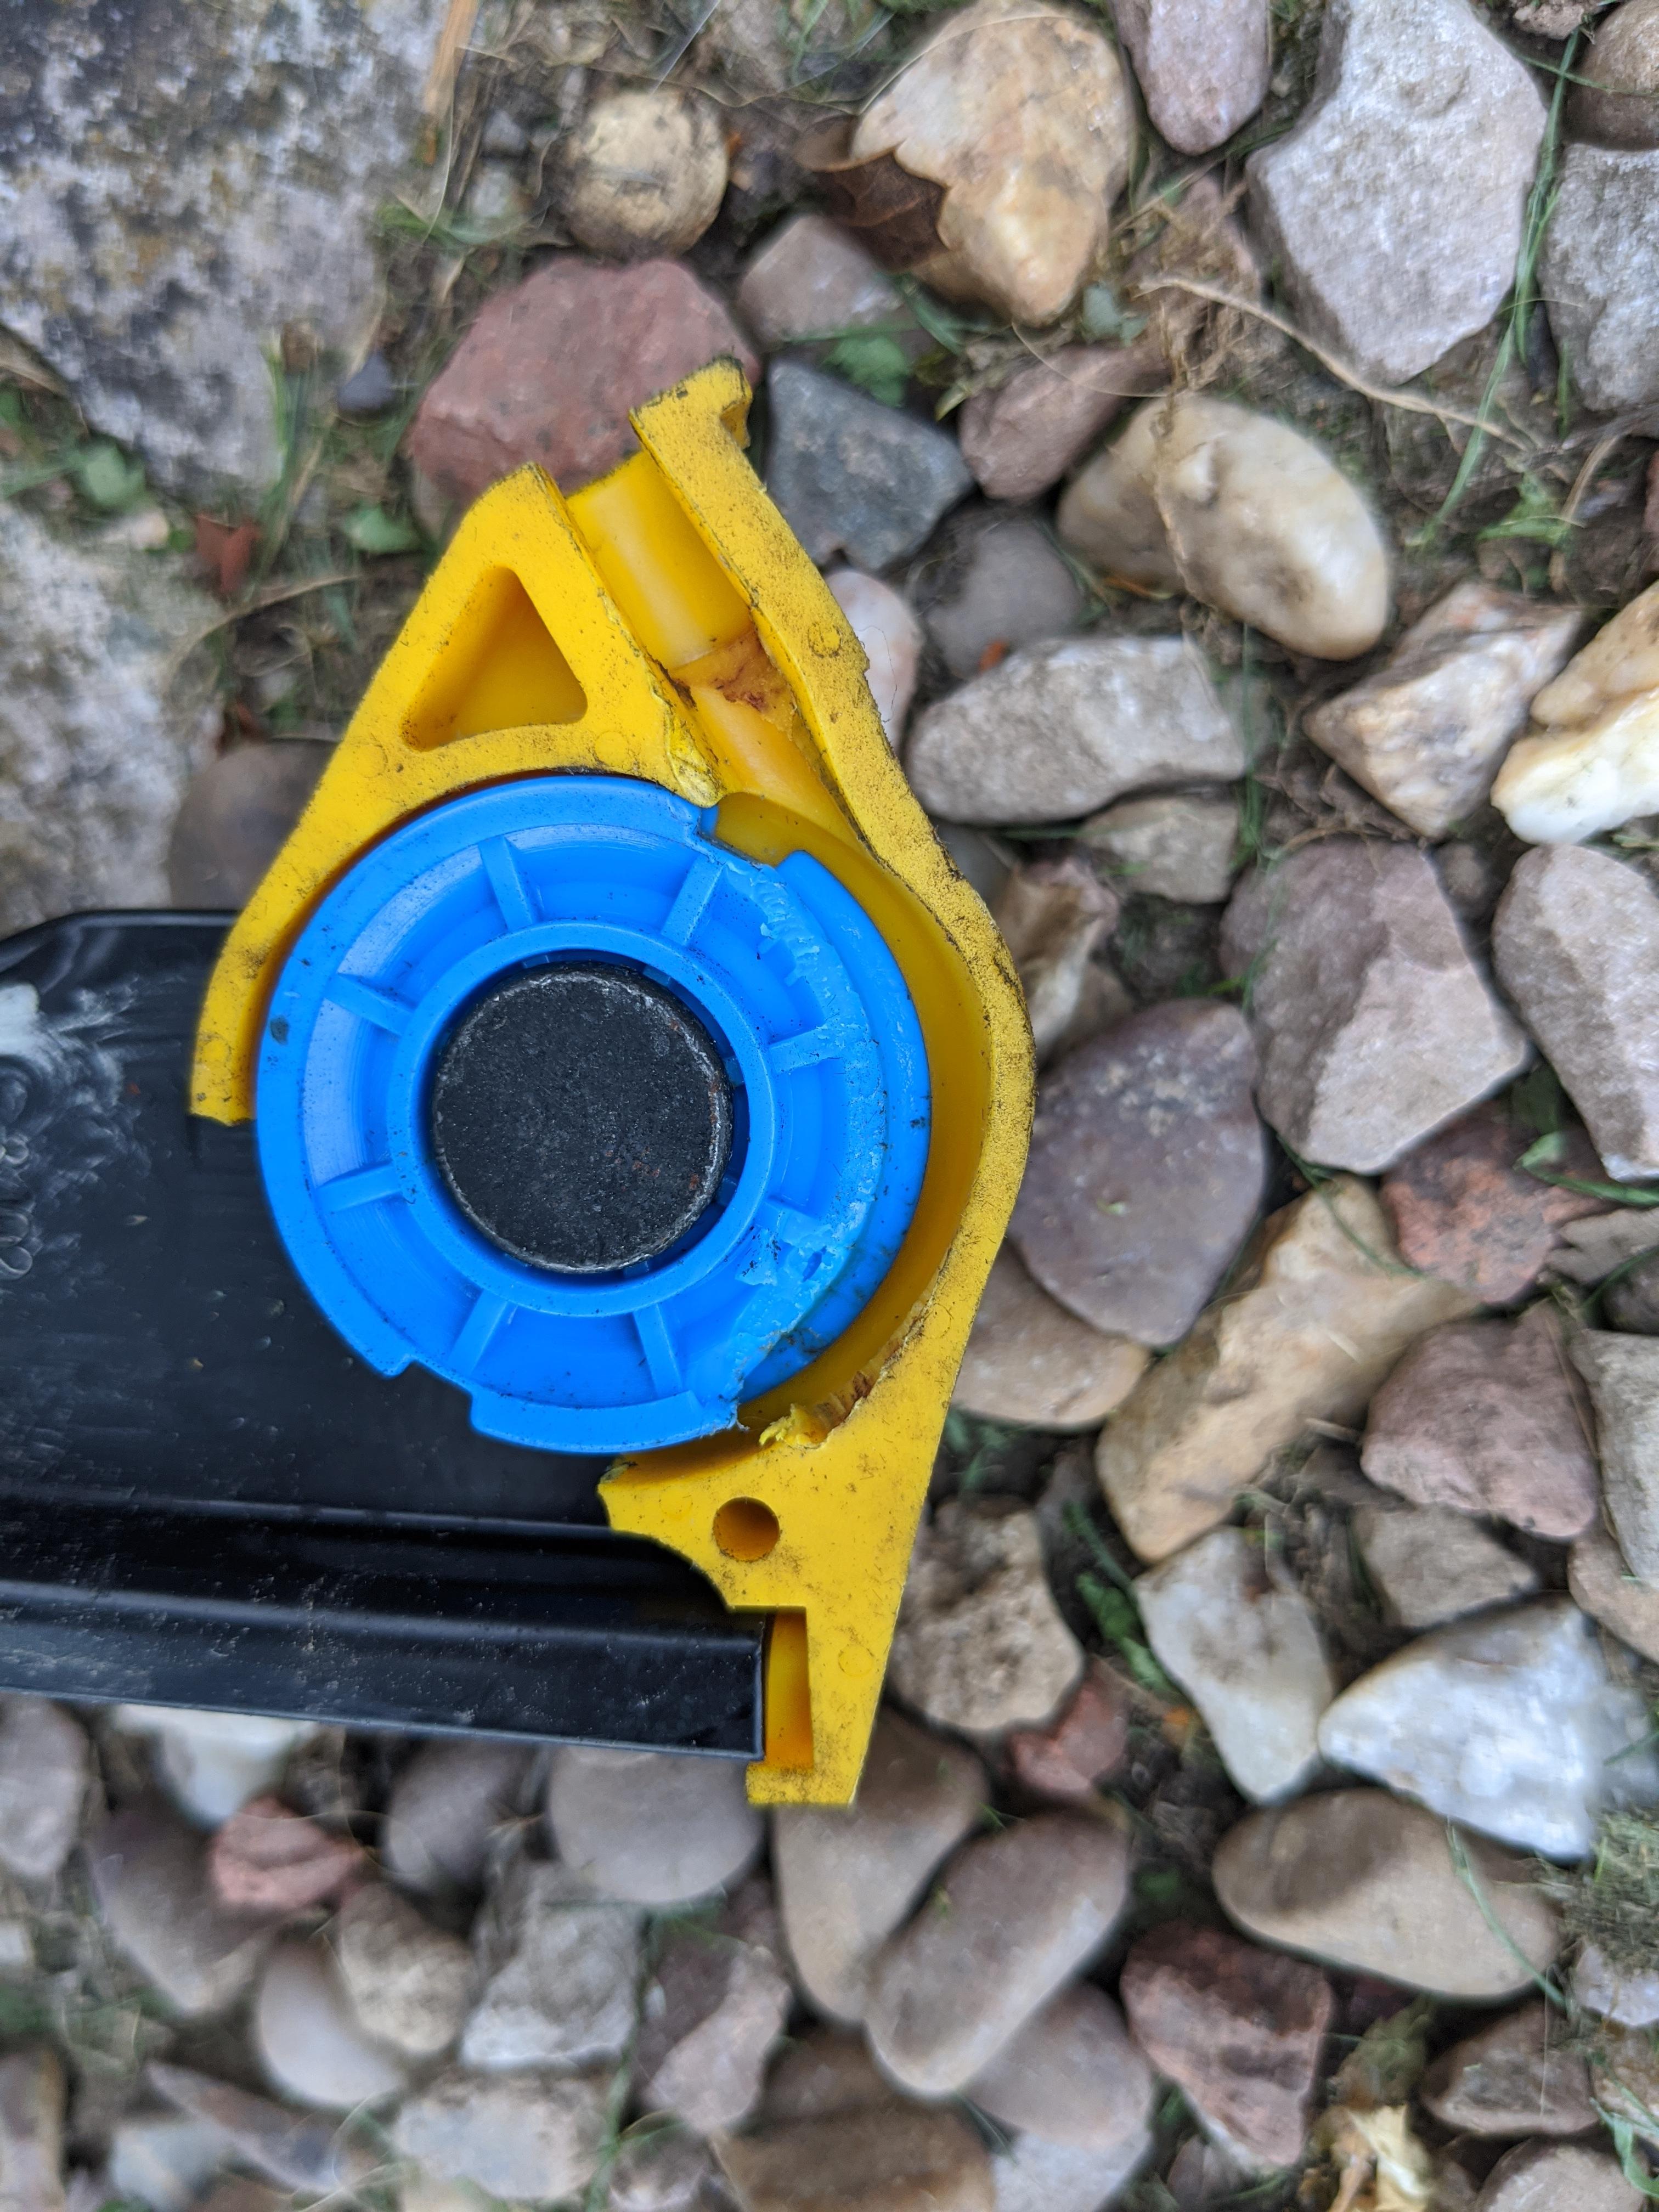
Just went out in the car and tried to wind the electric window down but heard a bit of a straining noise then it fell down and wouldn't go back up. Got the door stripped down and taken the mech out and I'm pretty sure that blue roller has snapped a bit off and the cable should wind around it. Any ideas where I can get either a repair kit or a replacement part? Should the cable that normally goes around it look like that or has it also been damaged?

-
 1
1
-
-
Just now, Rich said:
You threw the original springs?
I've been looking without putting any effort in for some of those for a while.
Yes 😳 I honestly didn't think anyone would have any need for them.
-
Even the original spring isn't under that much tension. I've just thrown my old ones away so can't measure but I'd imagine that it wouldn't really be a problem that it can move around now as long as it sits OK when it comes under load.
-
Not sure where you get the tightening sequence from these days. It always used to be Haynes manuals? New bolts should have the settings maybe.
Although not sure it matters on a 1L engine. You can probably reuse the old bolts and tighten in stages from the inside out in a clockwise motion until about 50 lb ft. Obviously being careful and stopping instantly if it starts feeling a bit wrong e.g. not getting tighter.
-
41 minutes ago, Rich said:
Smartziz.
Get him in the next one.
Who's that?
-
Any feedback welcomed. What would you like to see in the next one?
-
1
-
-
Which engine?
I've done plenty of head gaskets. I'd never call them tricky. Unless there's something about your particular engine I don't know about it's just head off, clean the surface (get it checked for warping at an engine shop) and put a new gasket on. Head bolts are just following the instructions. Then it needs a new cam belt for reassembly.
-
1 hour ago, Aji Potter said:
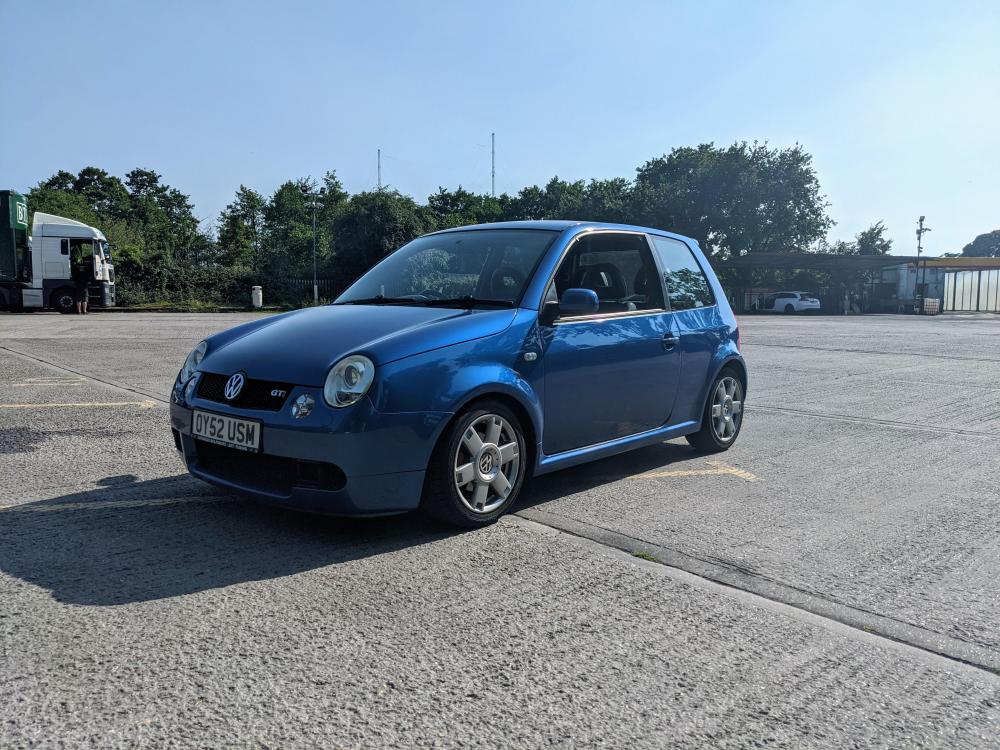
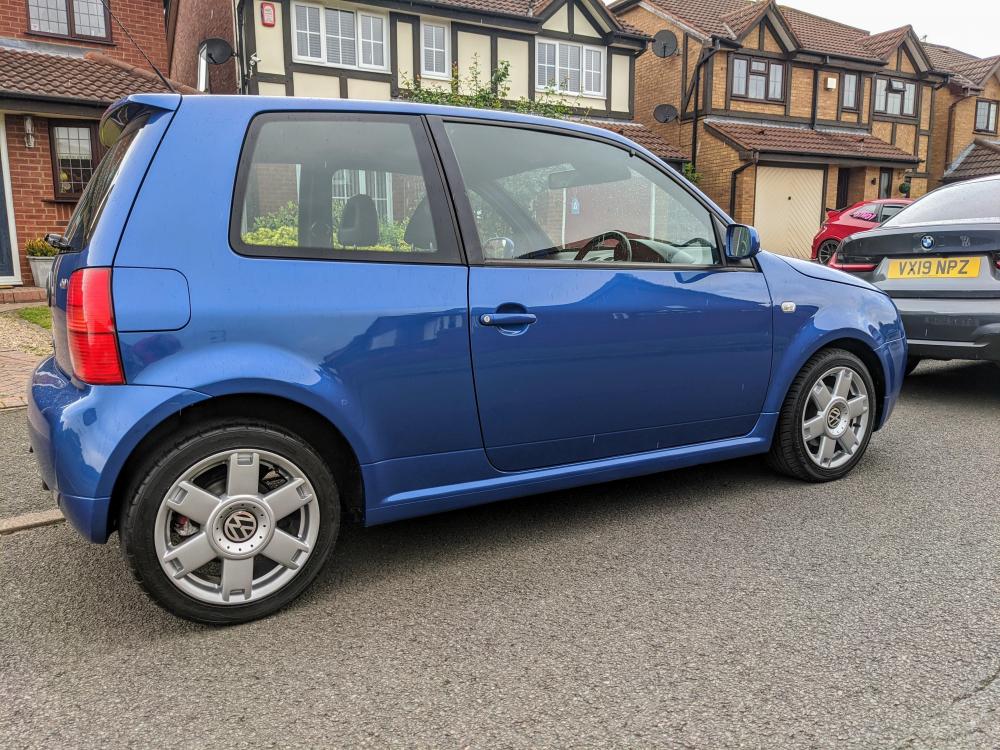
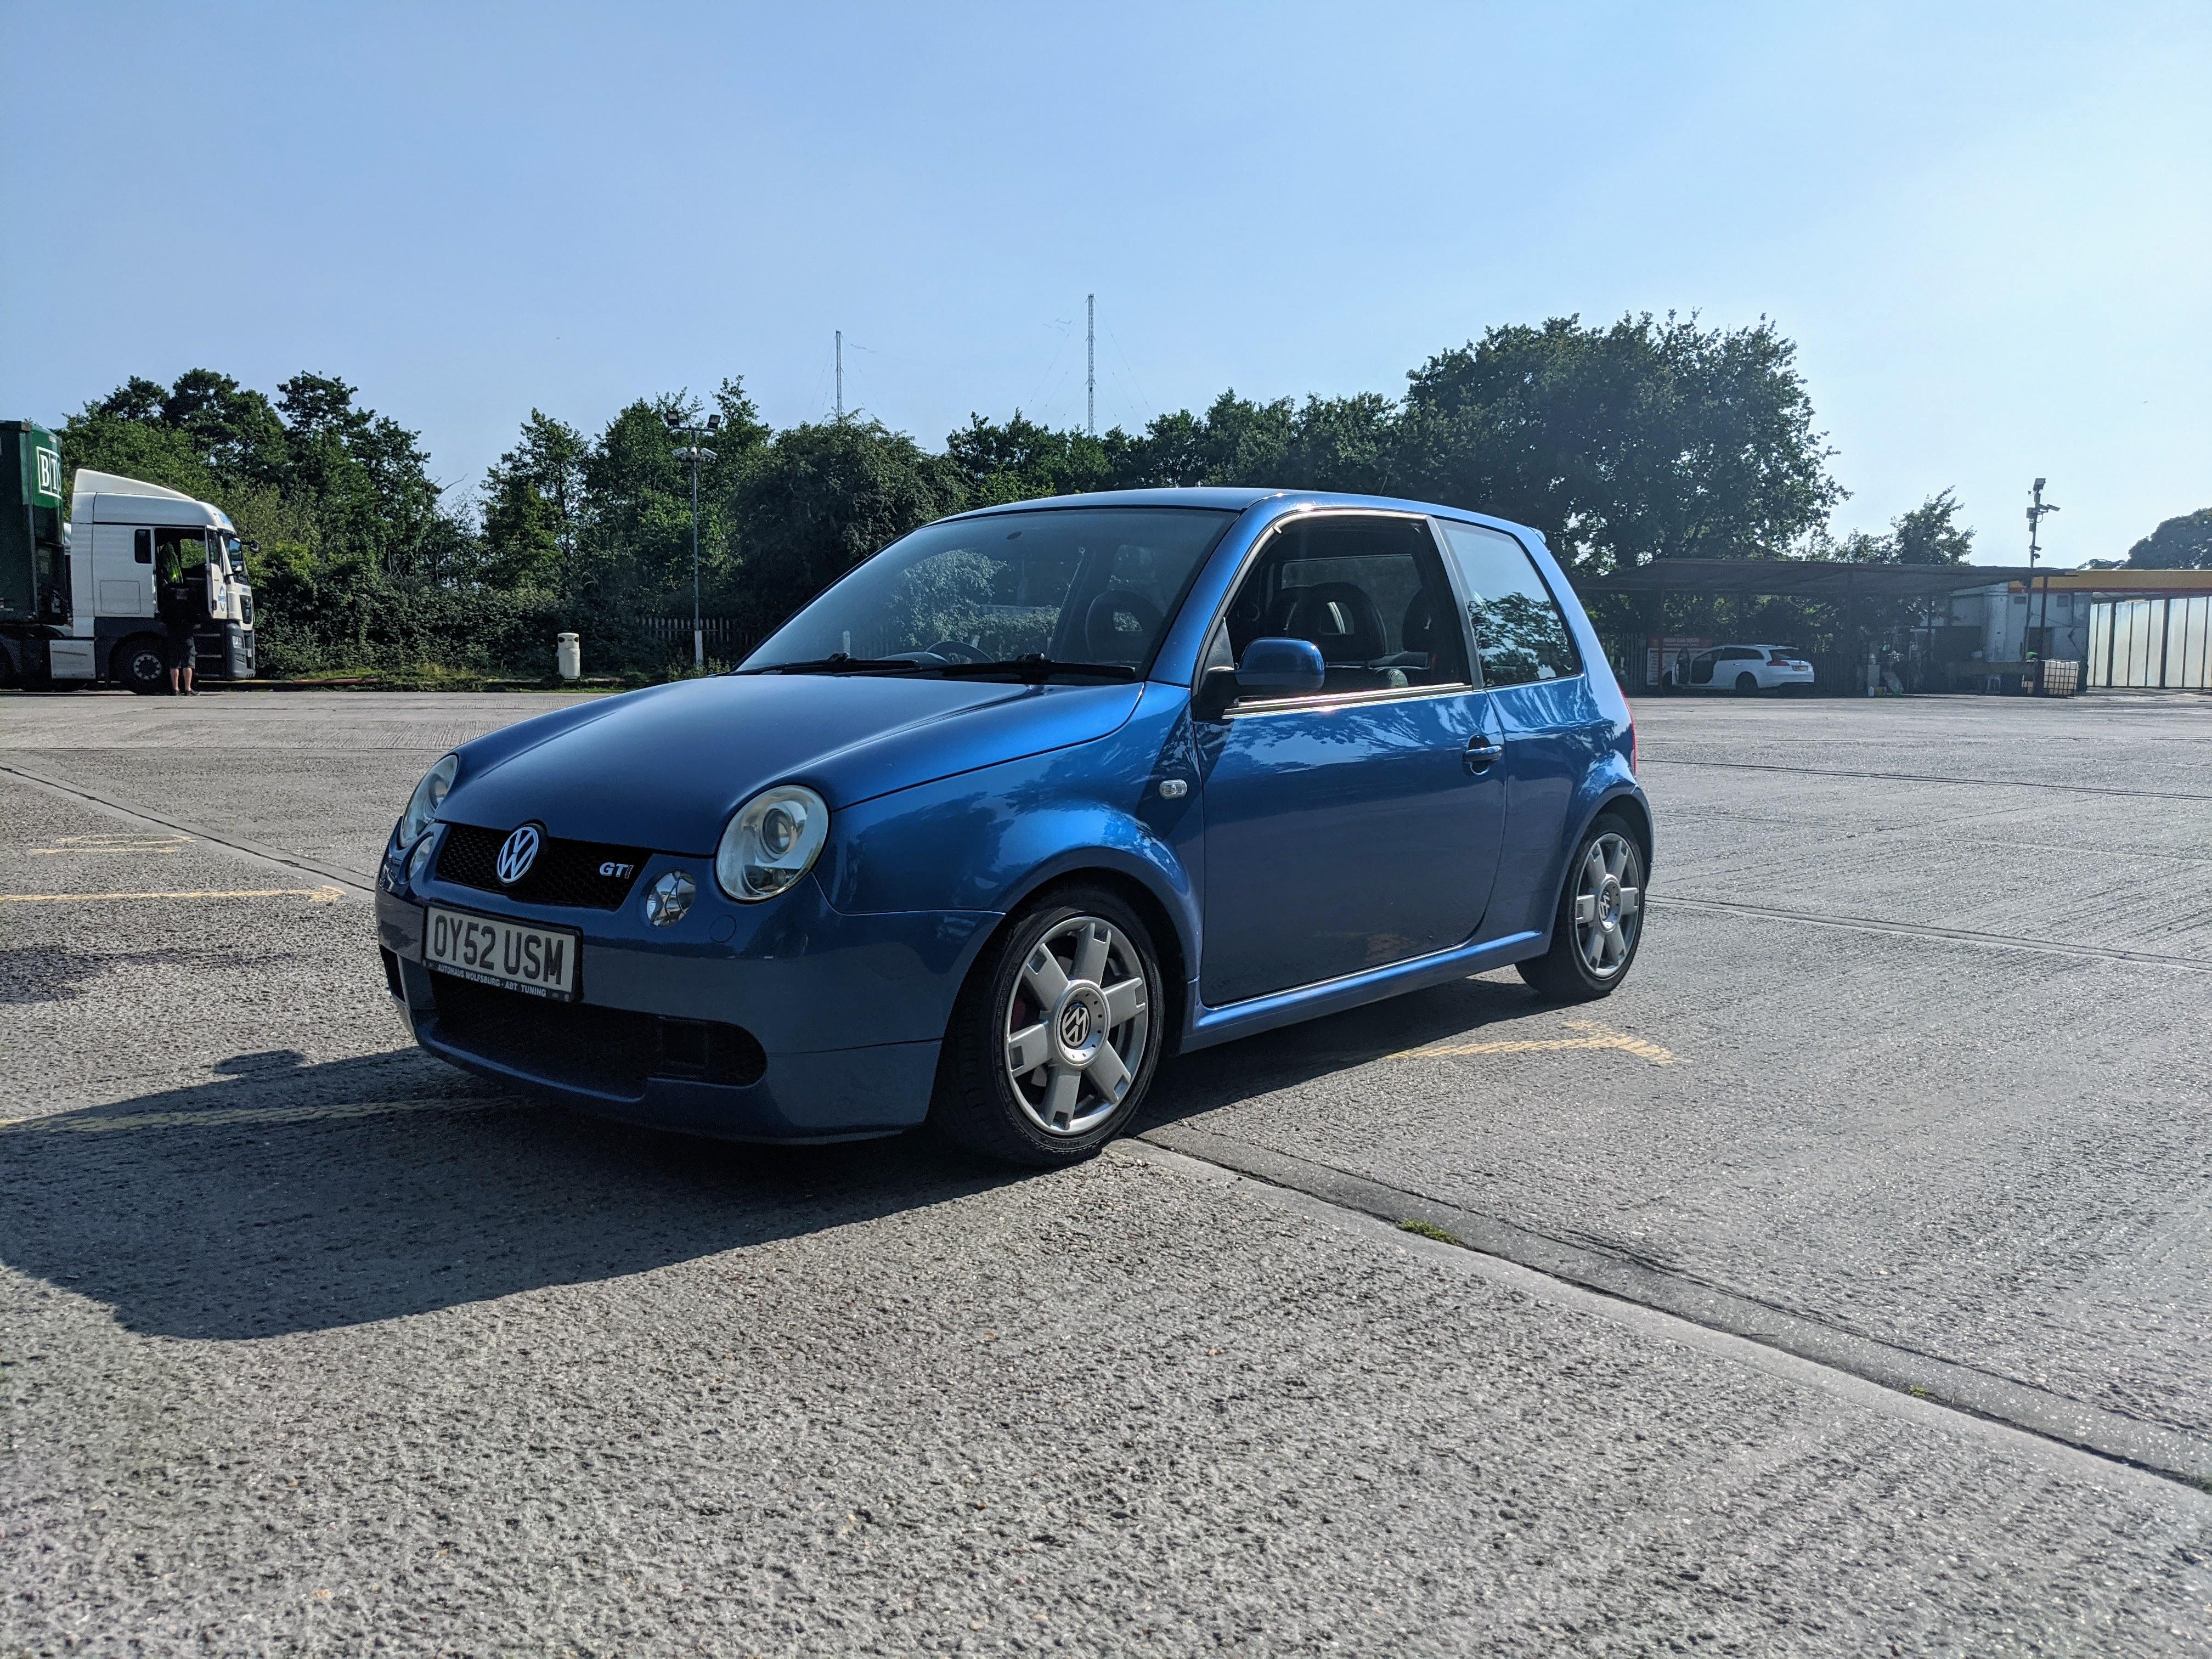
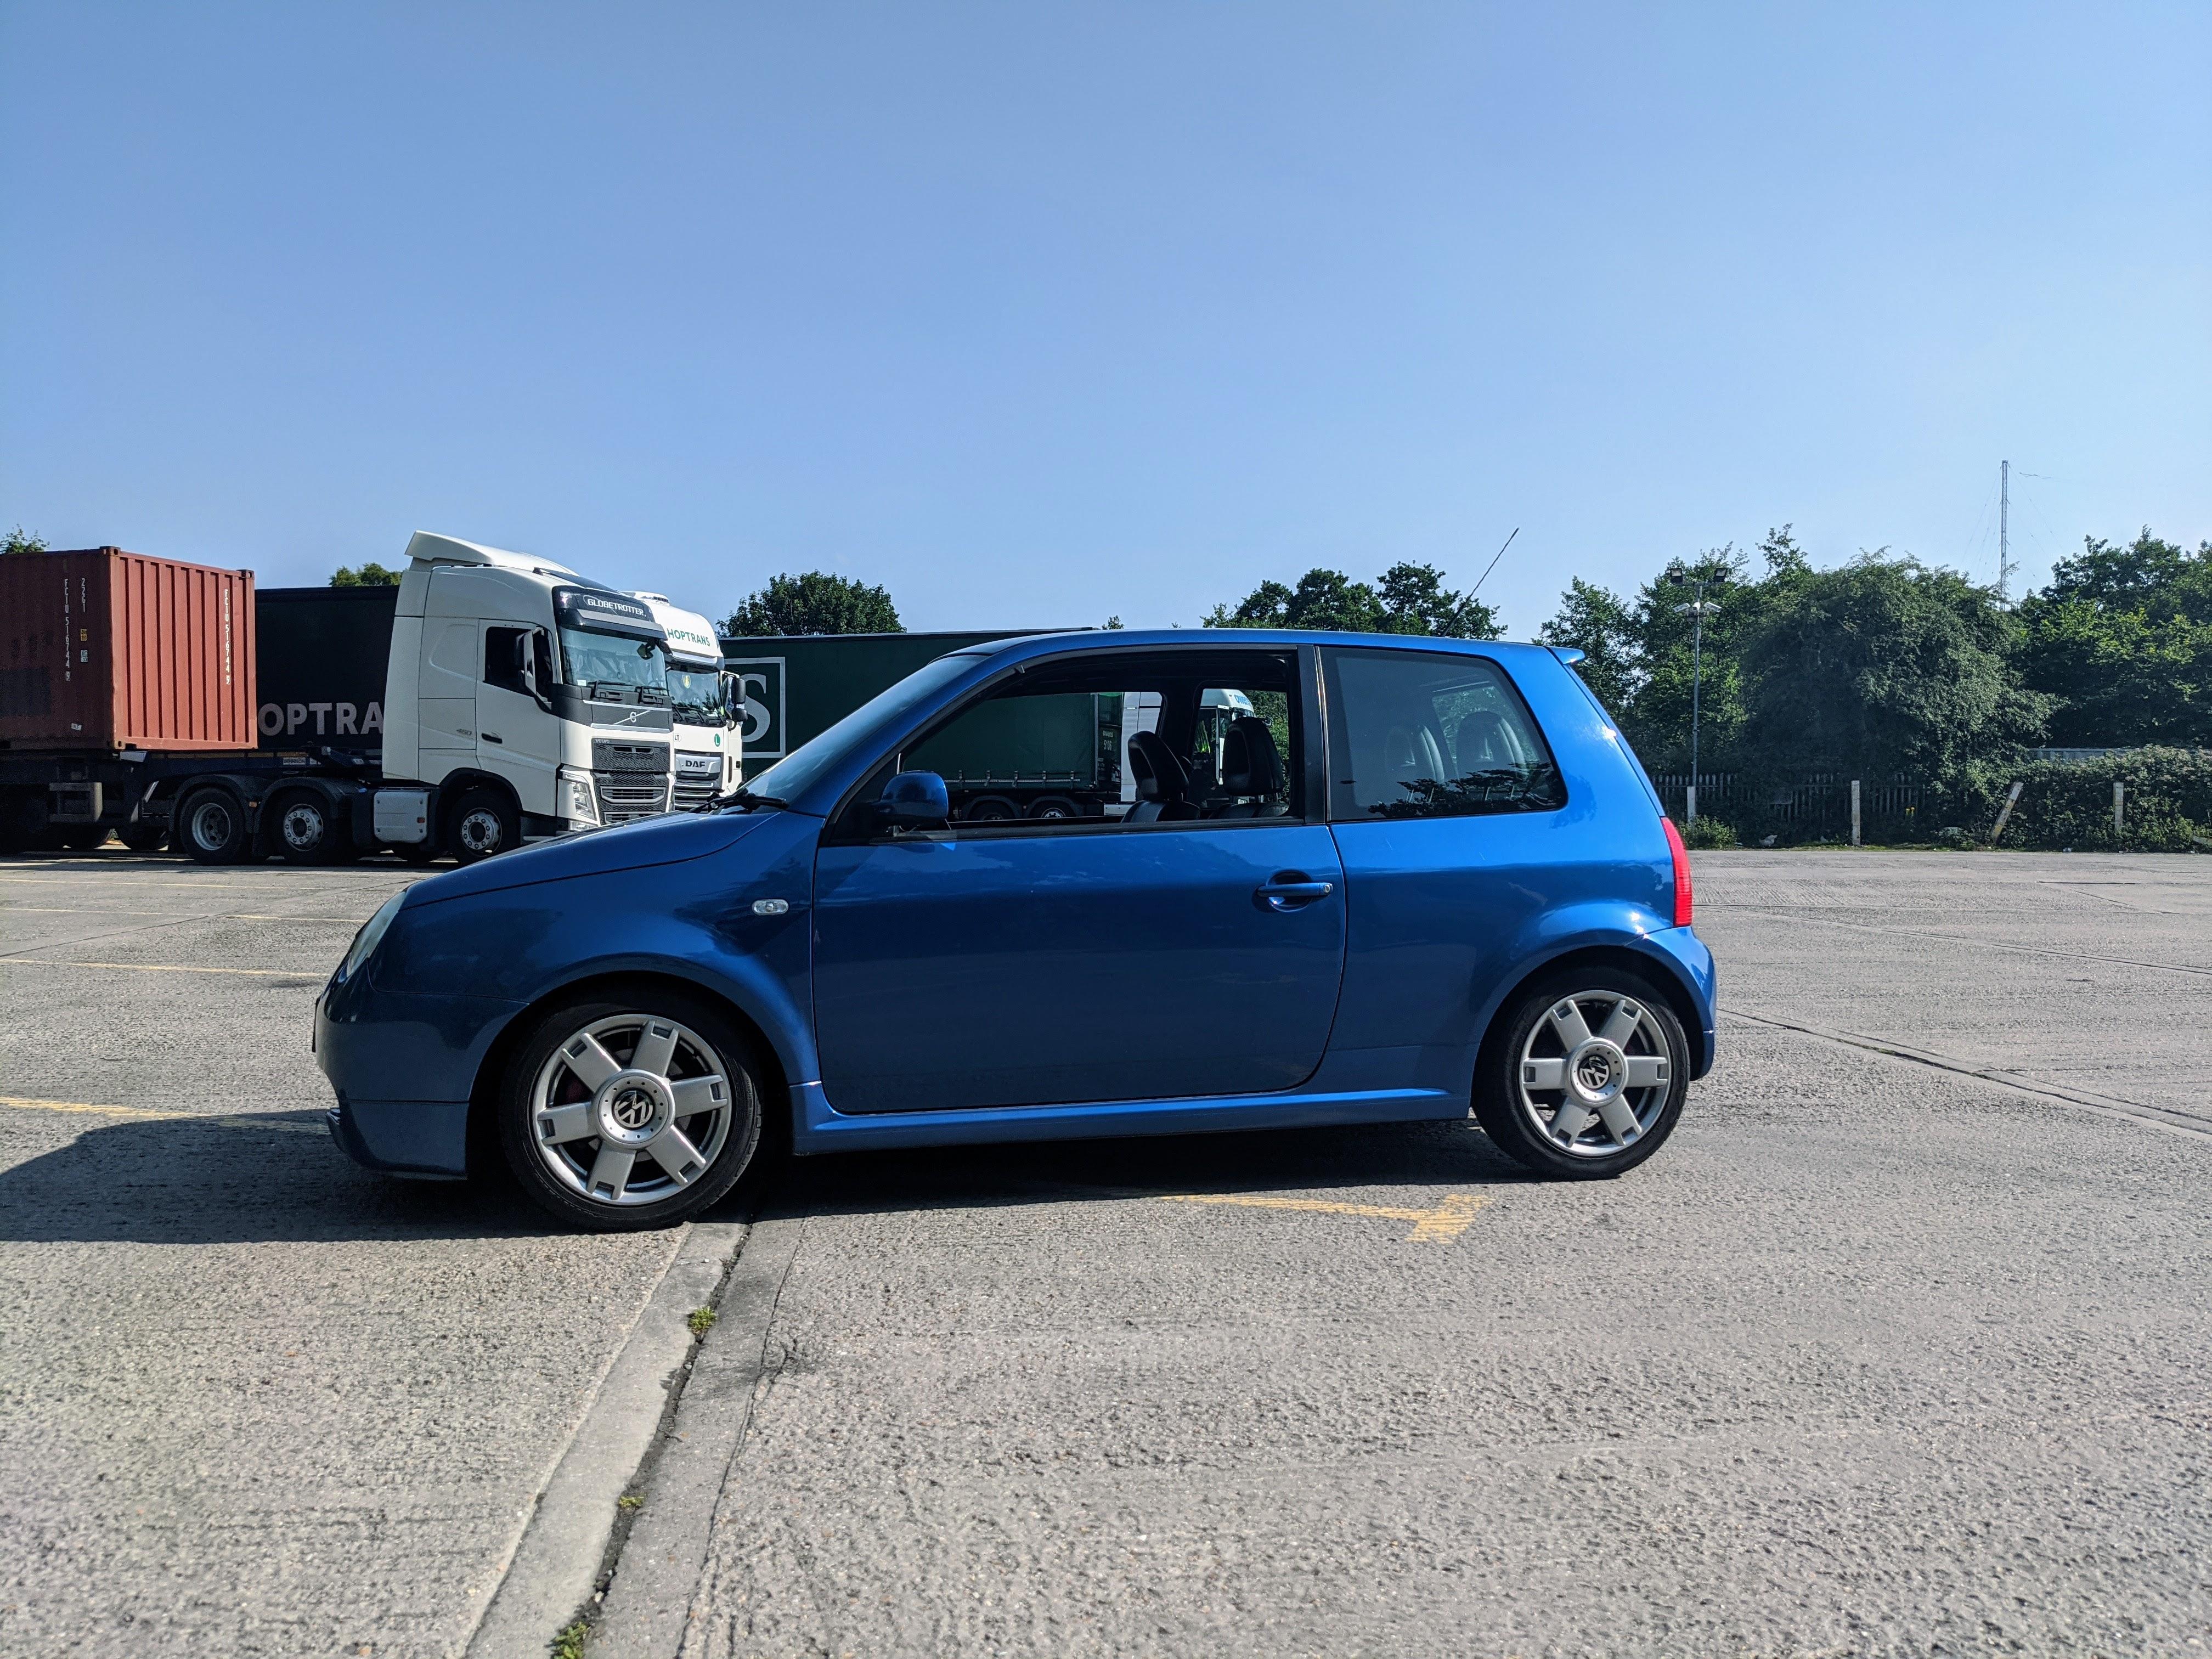
where did you take these pictures? i like this background
this galaxy-blue is wonderful
My pictures? My driveway.
Raven blue 🙂
-
2 minutes ago, Skajme said:
You can get them on ebay for about £30, they come in primer. Pretty expensive but its an option and they're easy enough to paint
Thanks. Just assumed they wouldn't be available. Now to work out which is left or right.
-
Any condition. To be refurbed anyway.
-
Still need this
-
7 minutes ago, mk2 said:
Me too. @RAB has played with way too much mechanical stuff obviously...
")
Merc only started using them around 2002, so obviously vdub thought that the lupo gti was a worthy candidate. Polos and golfs of that era certainly have the old clutch system. I don't like them. It doesn't rest well with me, that the complete internals are spinning away at the same RPMs as the engine, and not doing any work. Nothing wrong with the old clutch design that's been around for decades. Clunky, not elegant, but works very well. My fav are the vane compressors. Hardly any moving parts and ever so reliable. Smaller too.
My 2007 early mk2 Octavia VRS had them and the aircon guy who replaced the whole system when it failed described how they worked to me because they were fairly new.
-
3 minutes ago, Rich said:
Looking good.
Riding well?
Brilliant. Top tip on the Vogtland. Thanks.
-
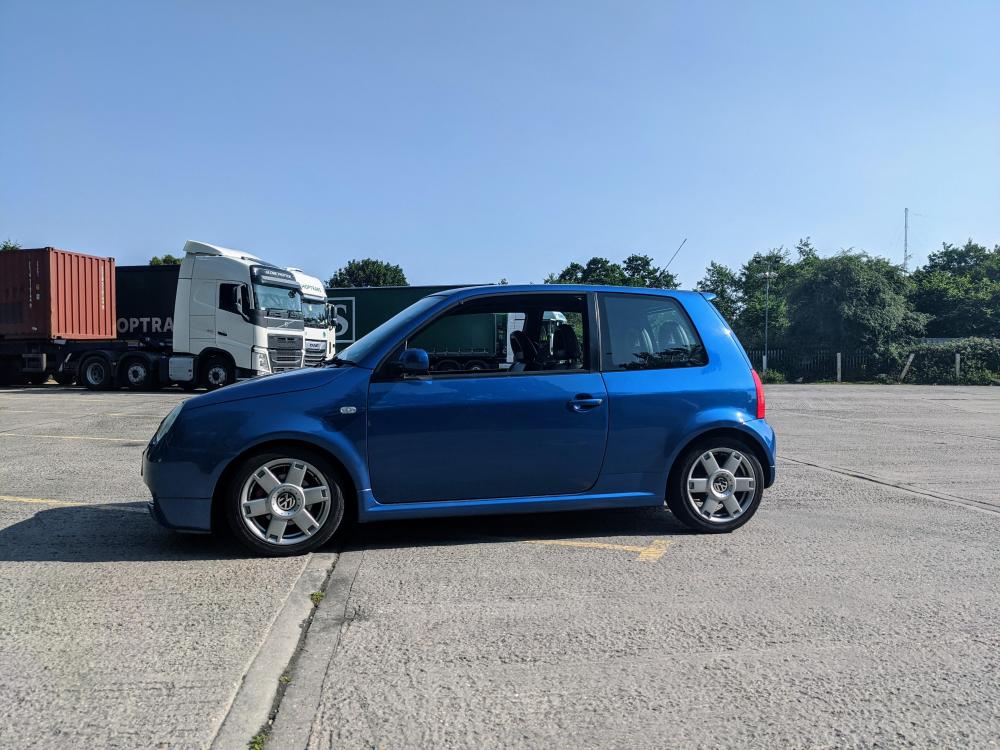
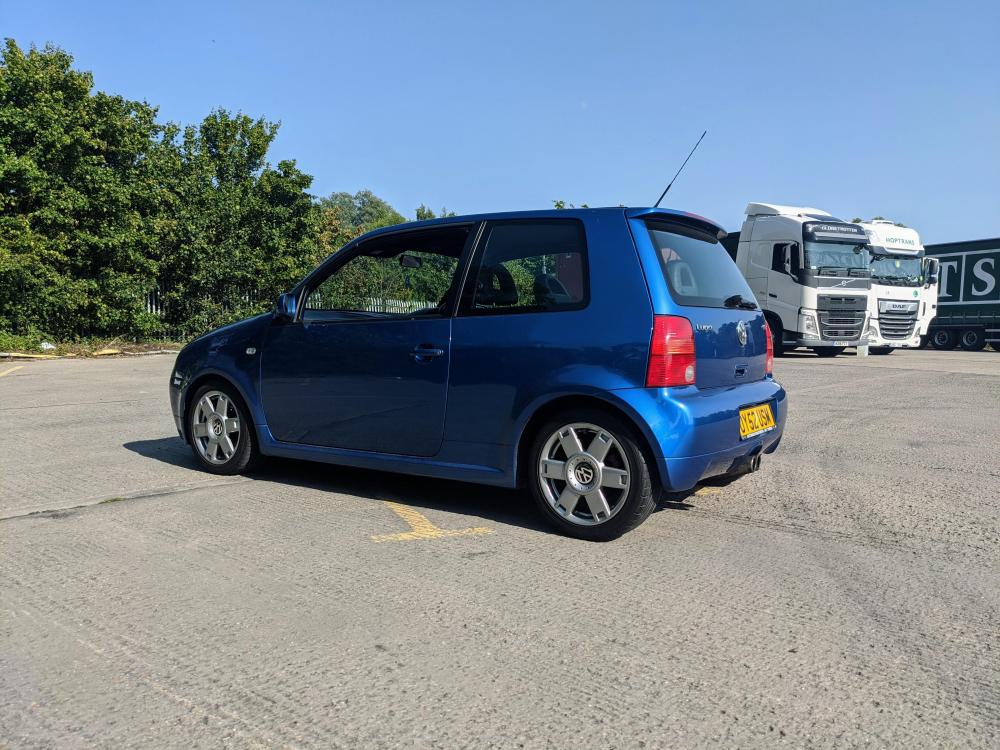
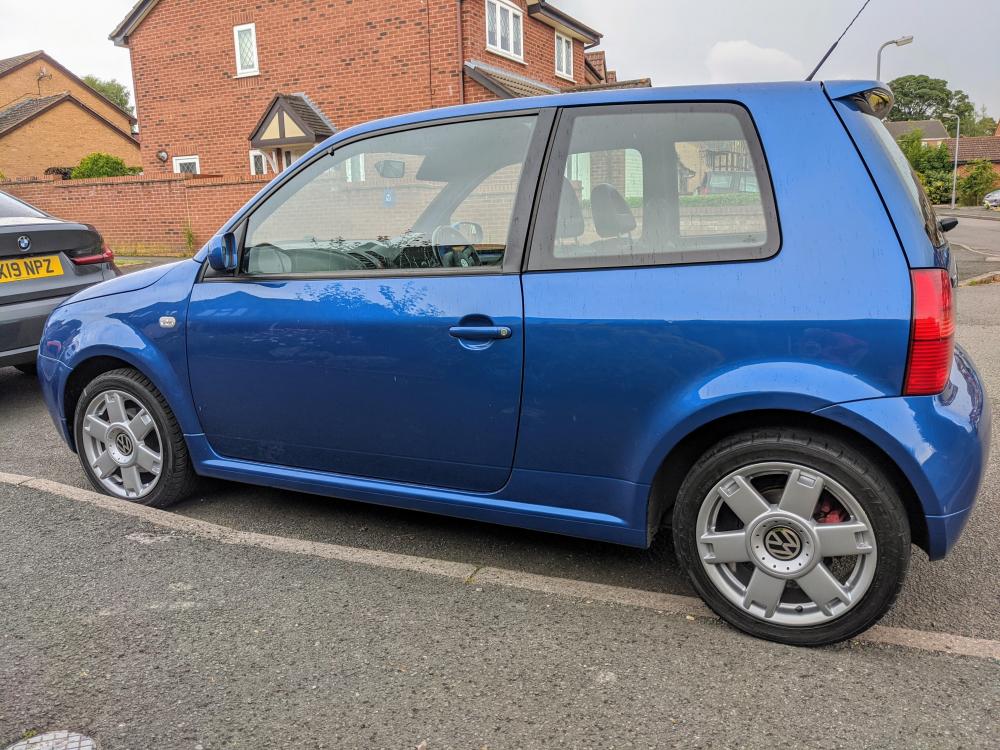
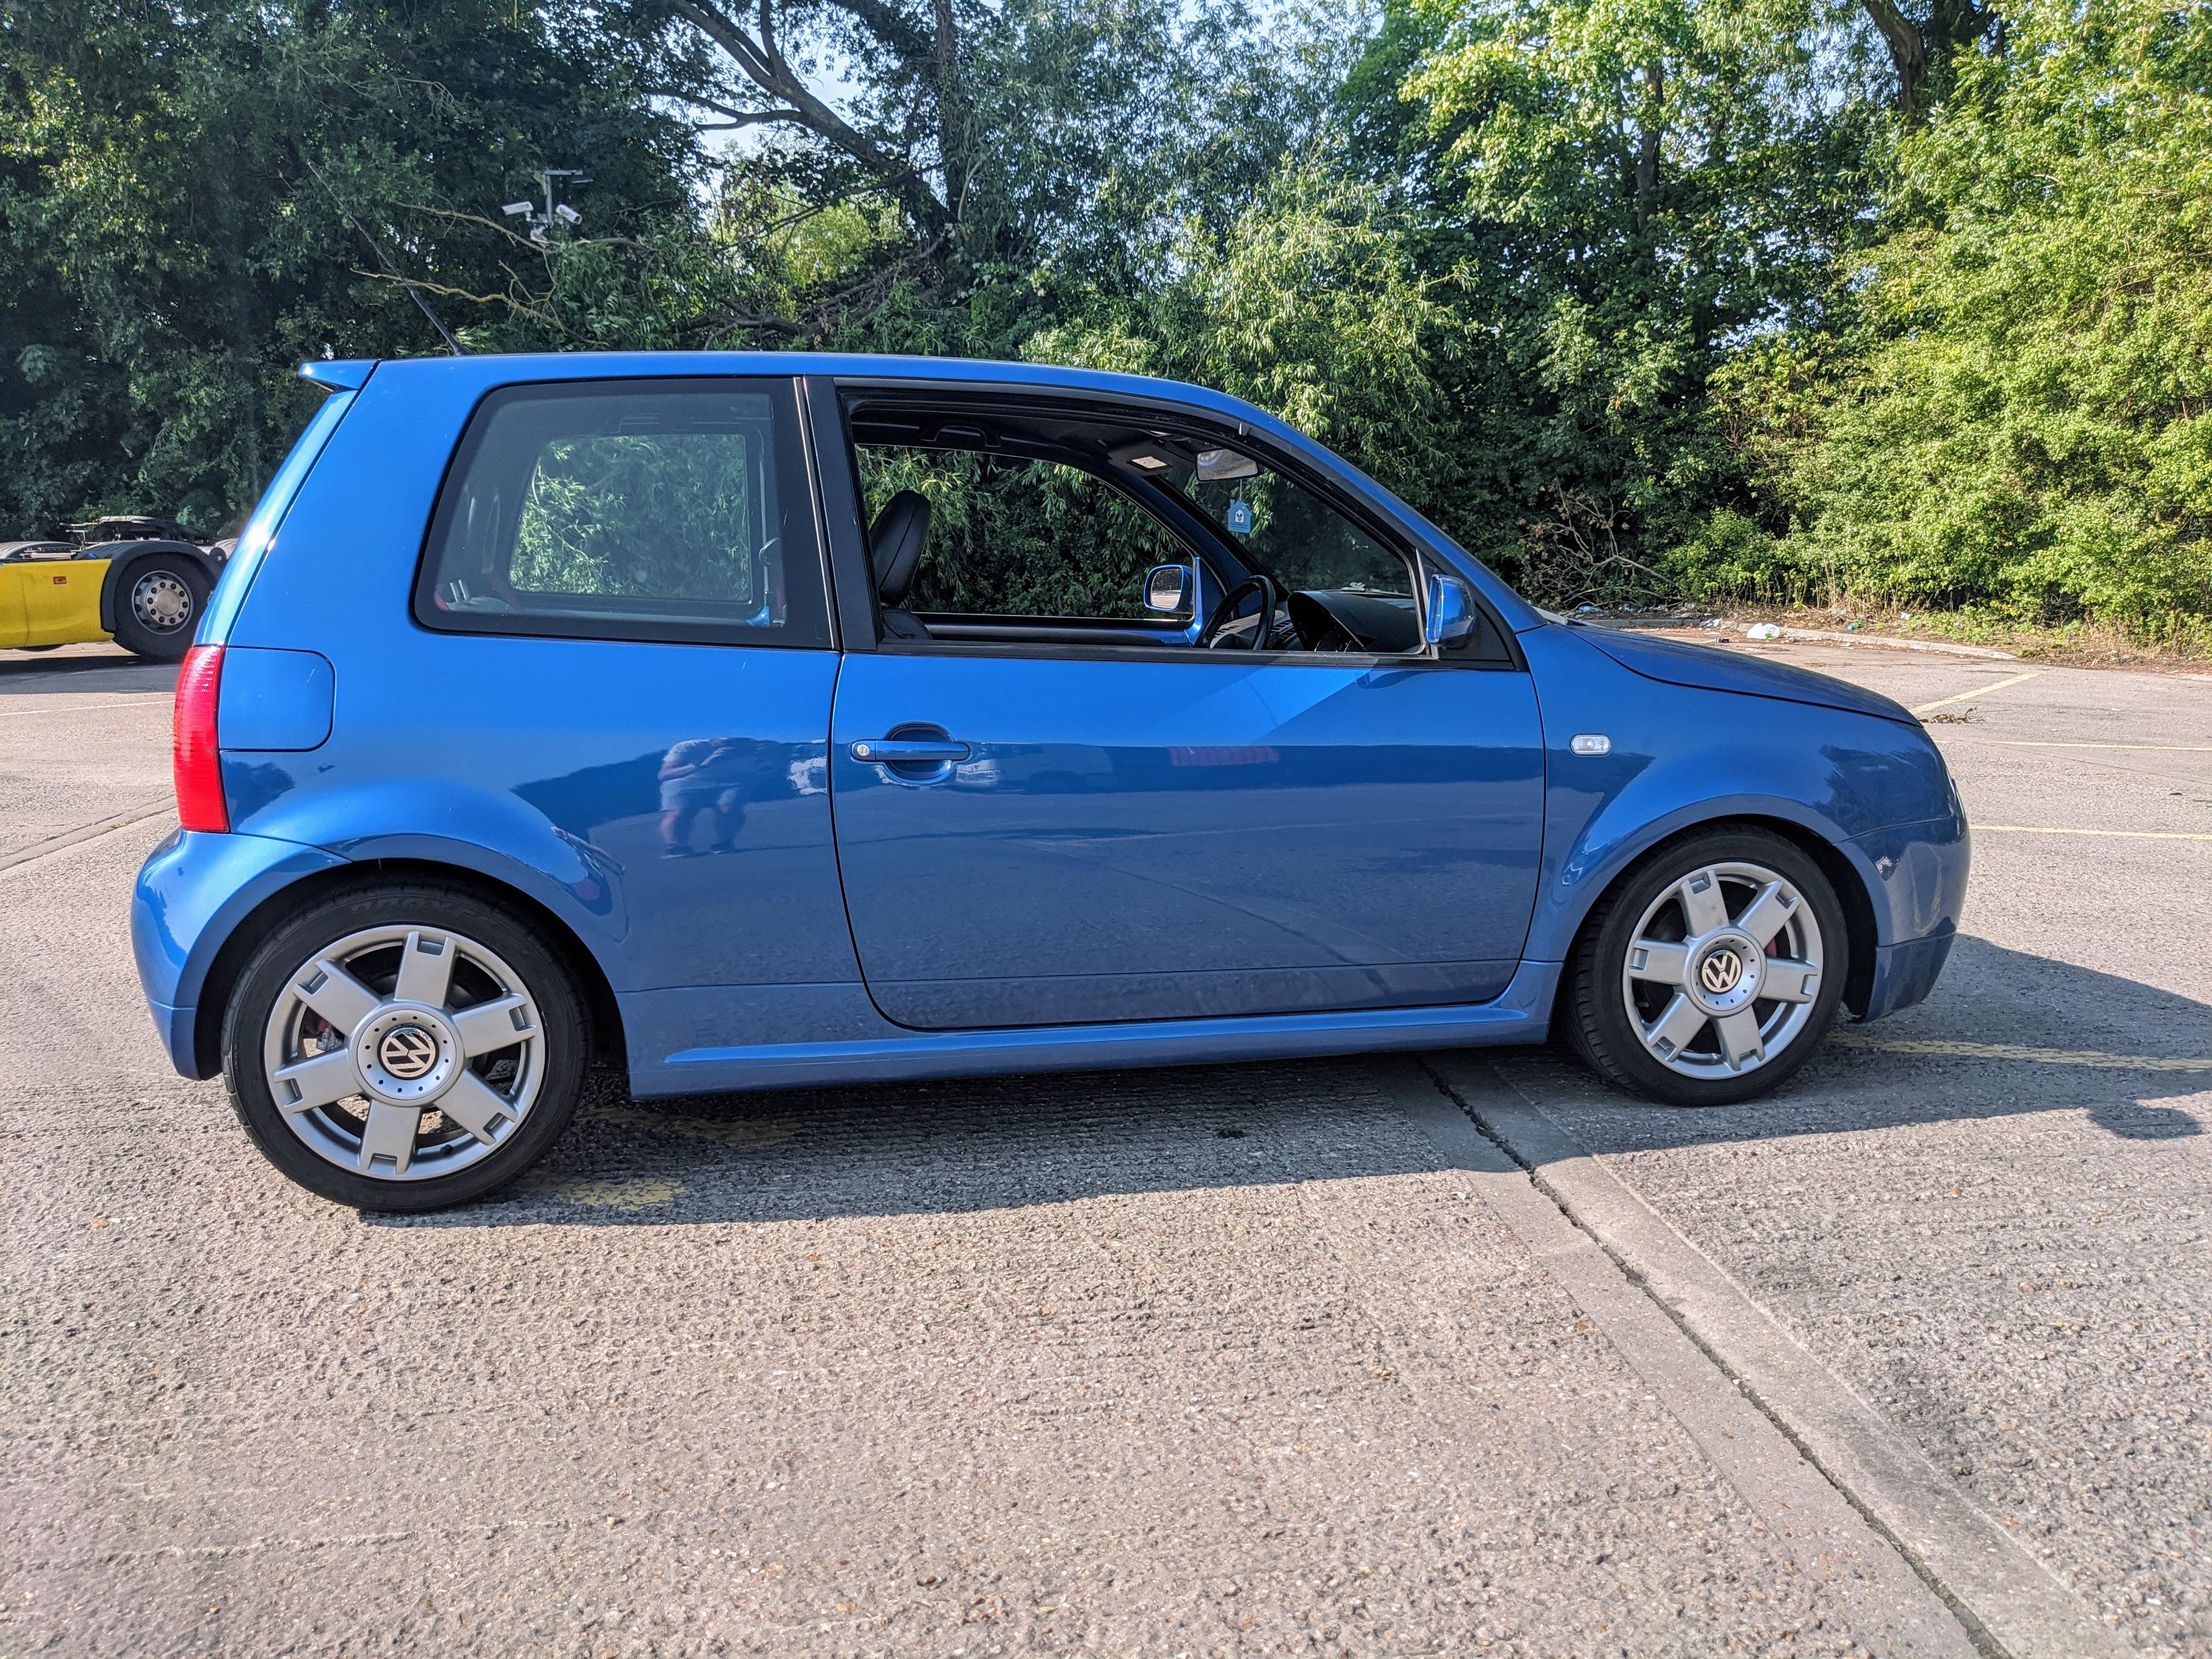
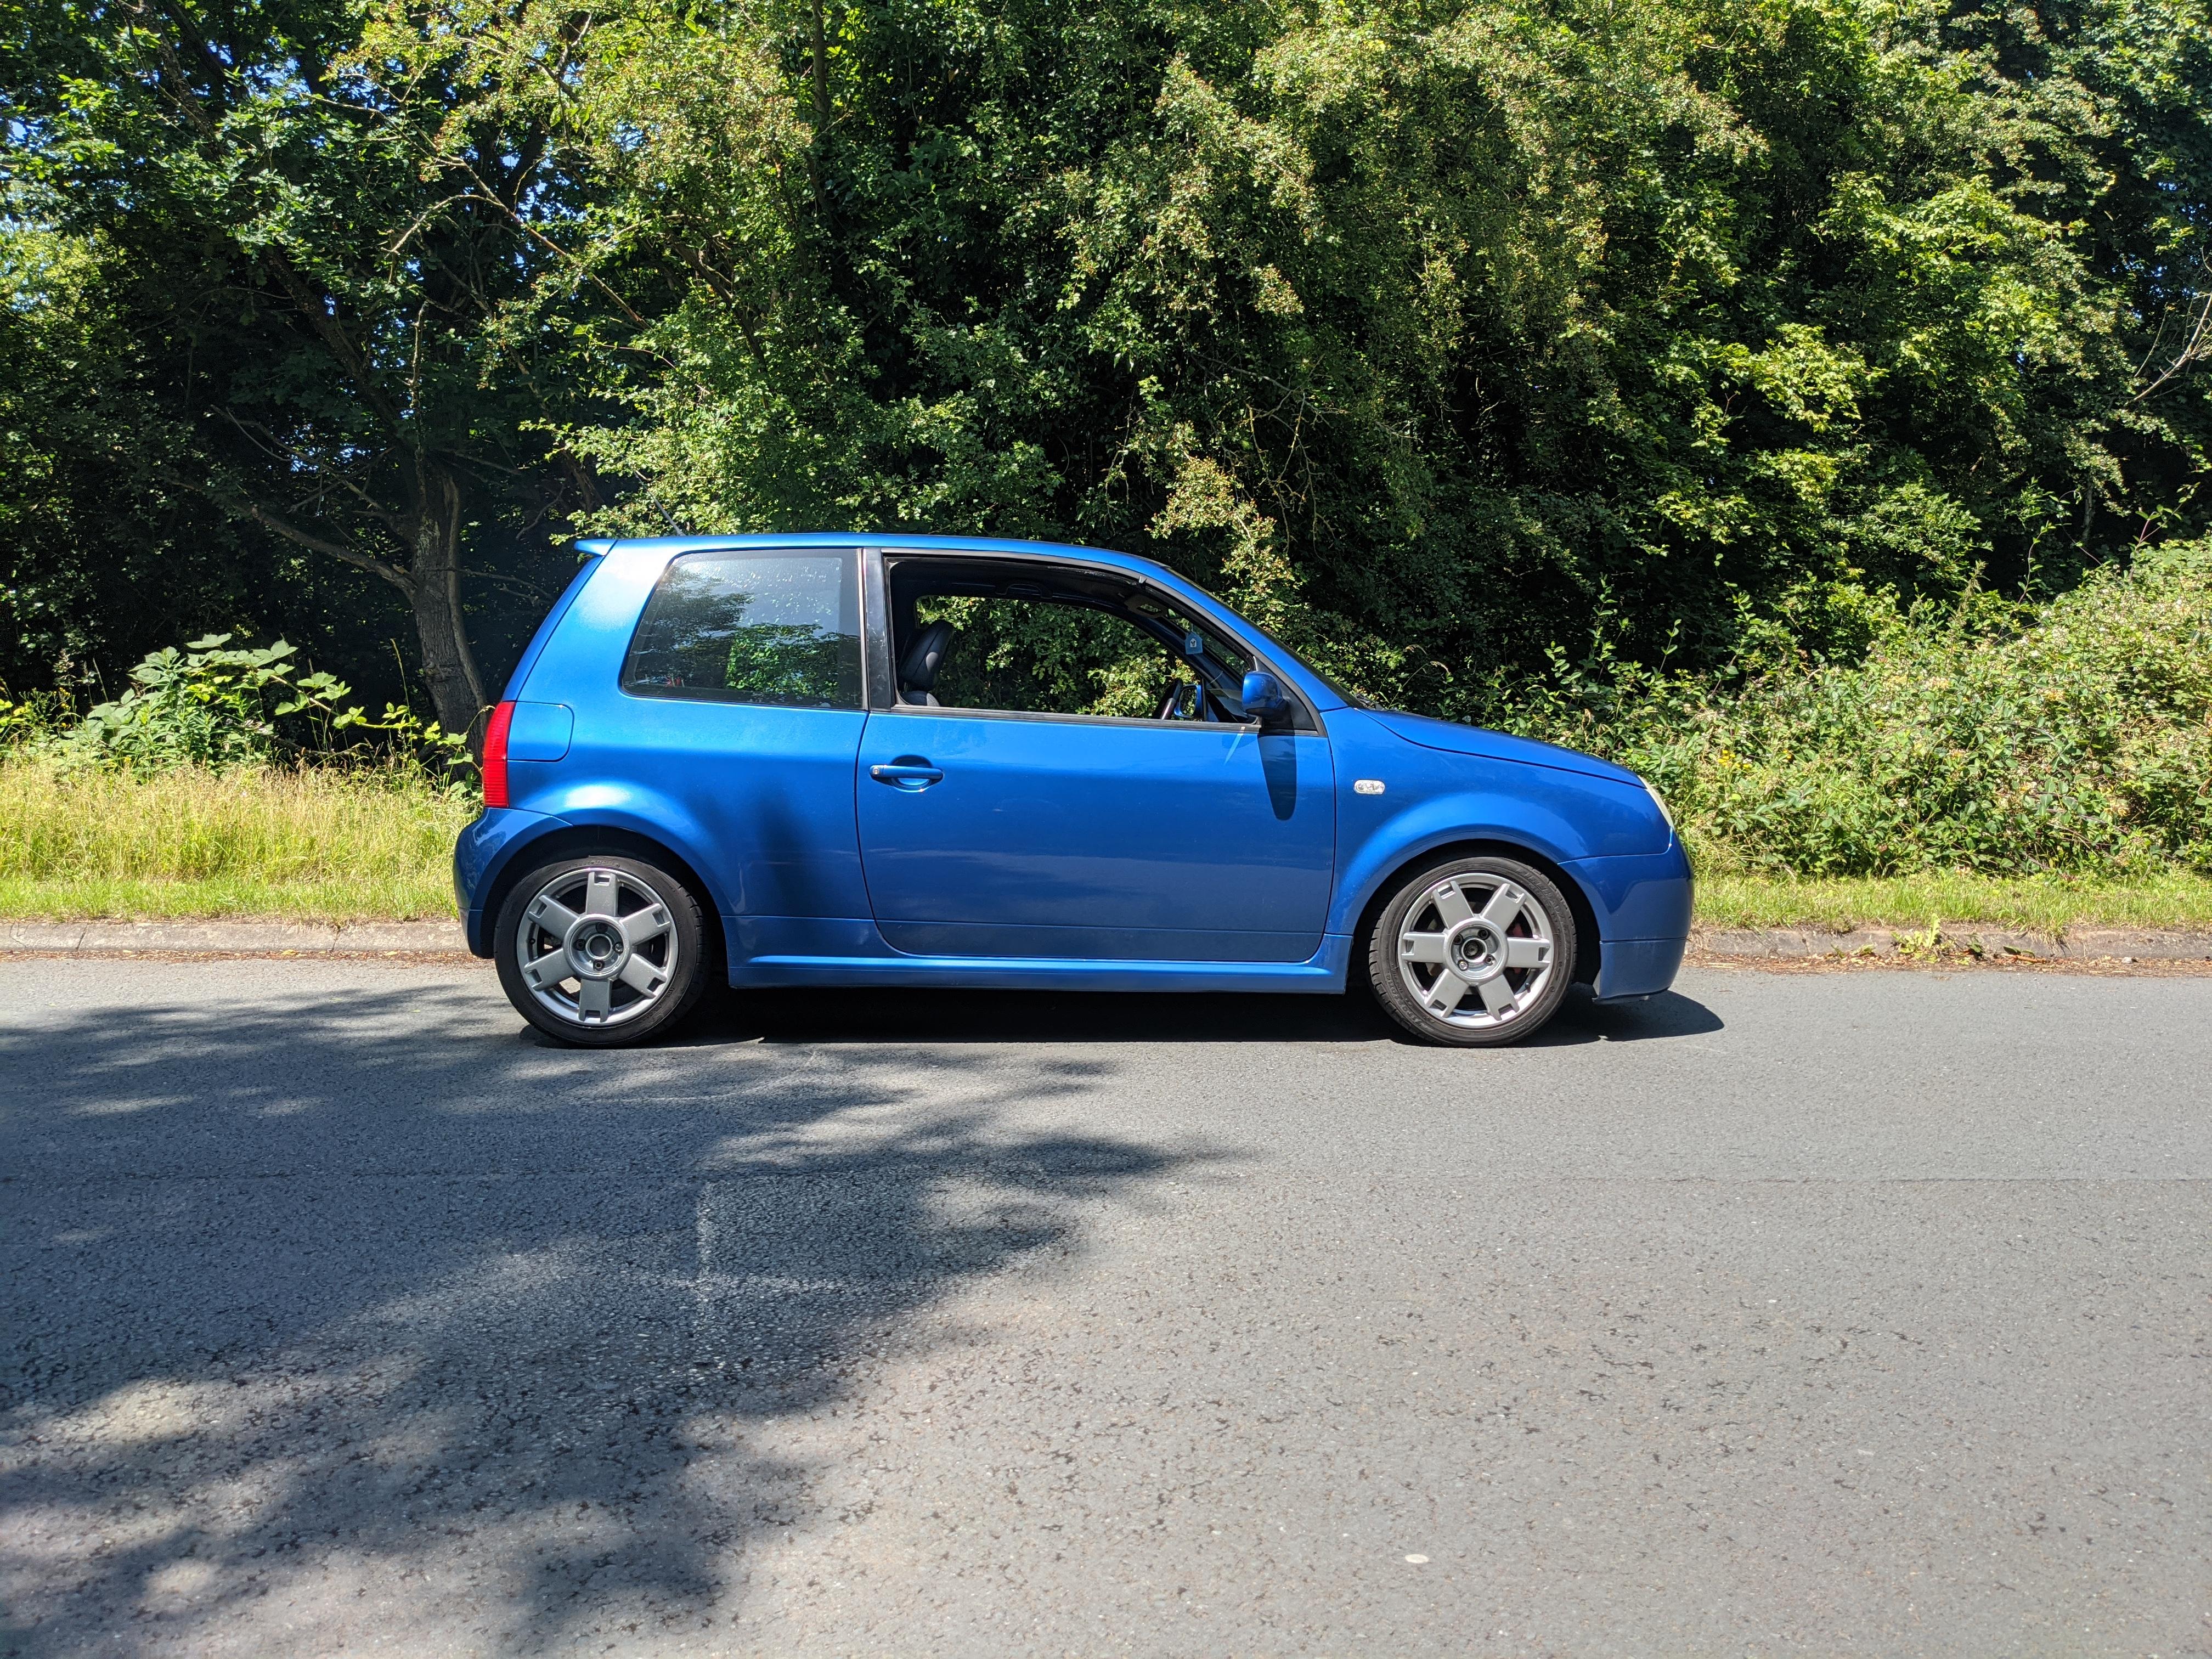
What does everyone think of the drop?


-
2
-
-
So the GTI has a variable displacement compressor? I thought they were quite a recent thing.
-
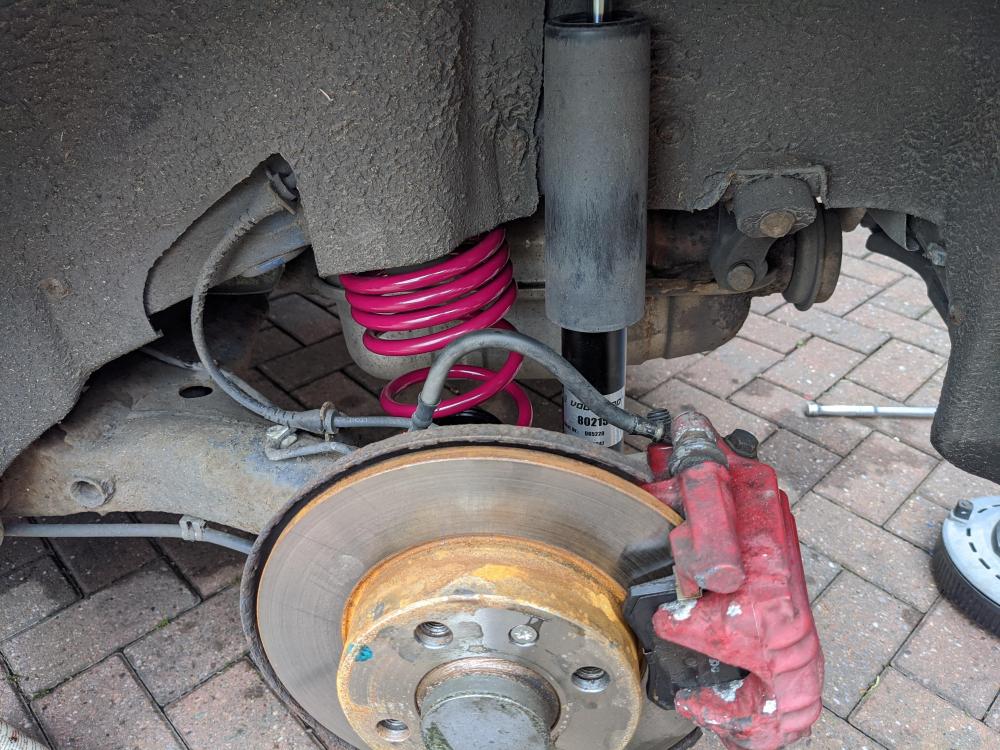
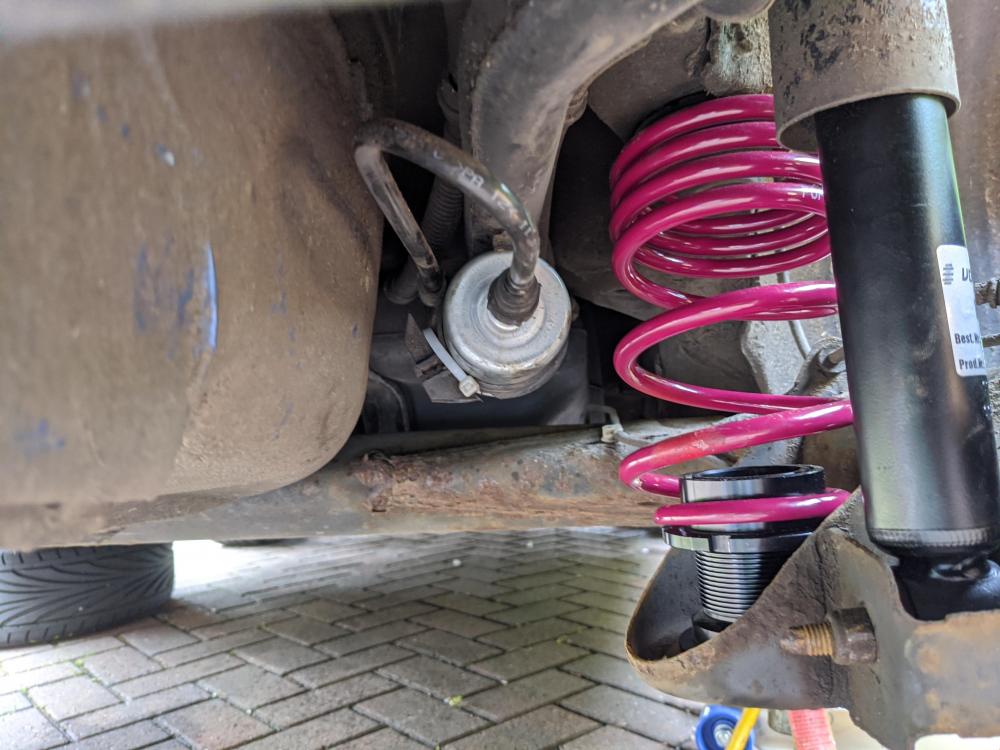
Got the fronts on and tried to get the car to a height I like. I always wanted a slight drop to make it look a bit more in keeping with what other cars look like these days. The height of the standard GTI can look silly sometimes.
There's a huge amount of adjustment in the camber so until I can get it aligned I've just pulled the top out to the end. That's where it was on the OE struts anyway.
The clips for the ABS cable wouldn't go into the lugs on the new struts so I cable tied one of the bungs to a lug.

This was with the rear on the (I think) highest setting and the front just guessed at. I've since taken about 5mm off the rear. I'll have to see how it settles.

It feels utterly amazing compared to before though. It's at least as comfortable as the original springs and has no harshness at all. I can glide over my local speed bump at the same speed as before and it feels like a modern car. Don't know if the Vogtland are really good or if the originals were really bad.
-
What's the cheapest/best/easiest method these days?
Nothing's broken it's just not cold and after 18 years I reckon it just needs charging.
Are the Halfords kits any good? Easy to do on a GTI?
-
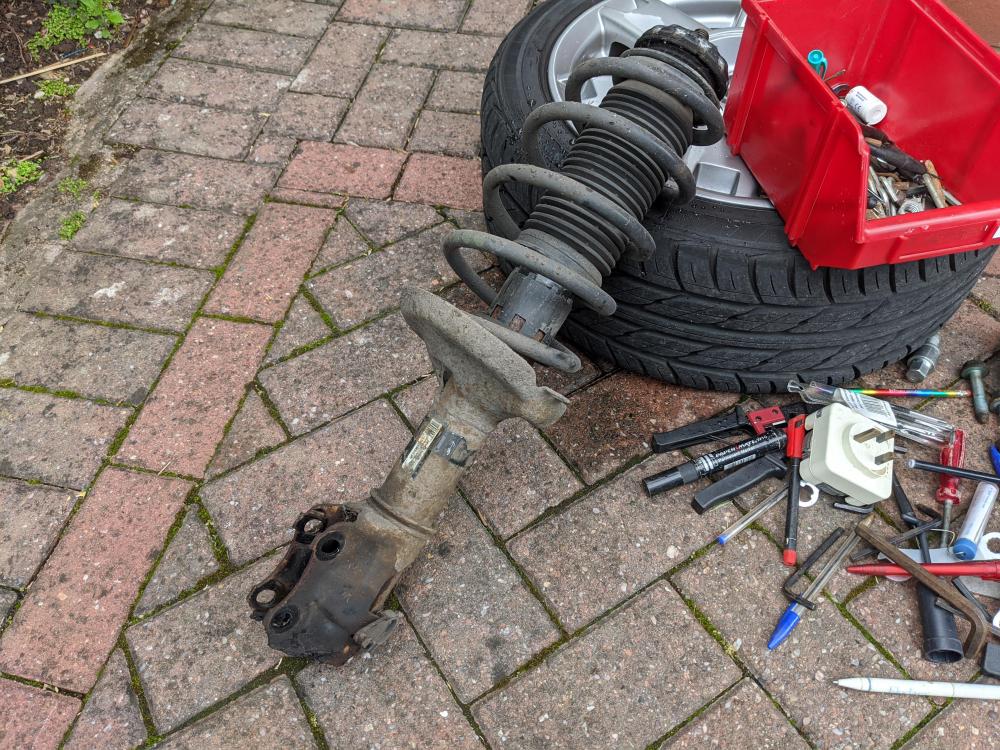
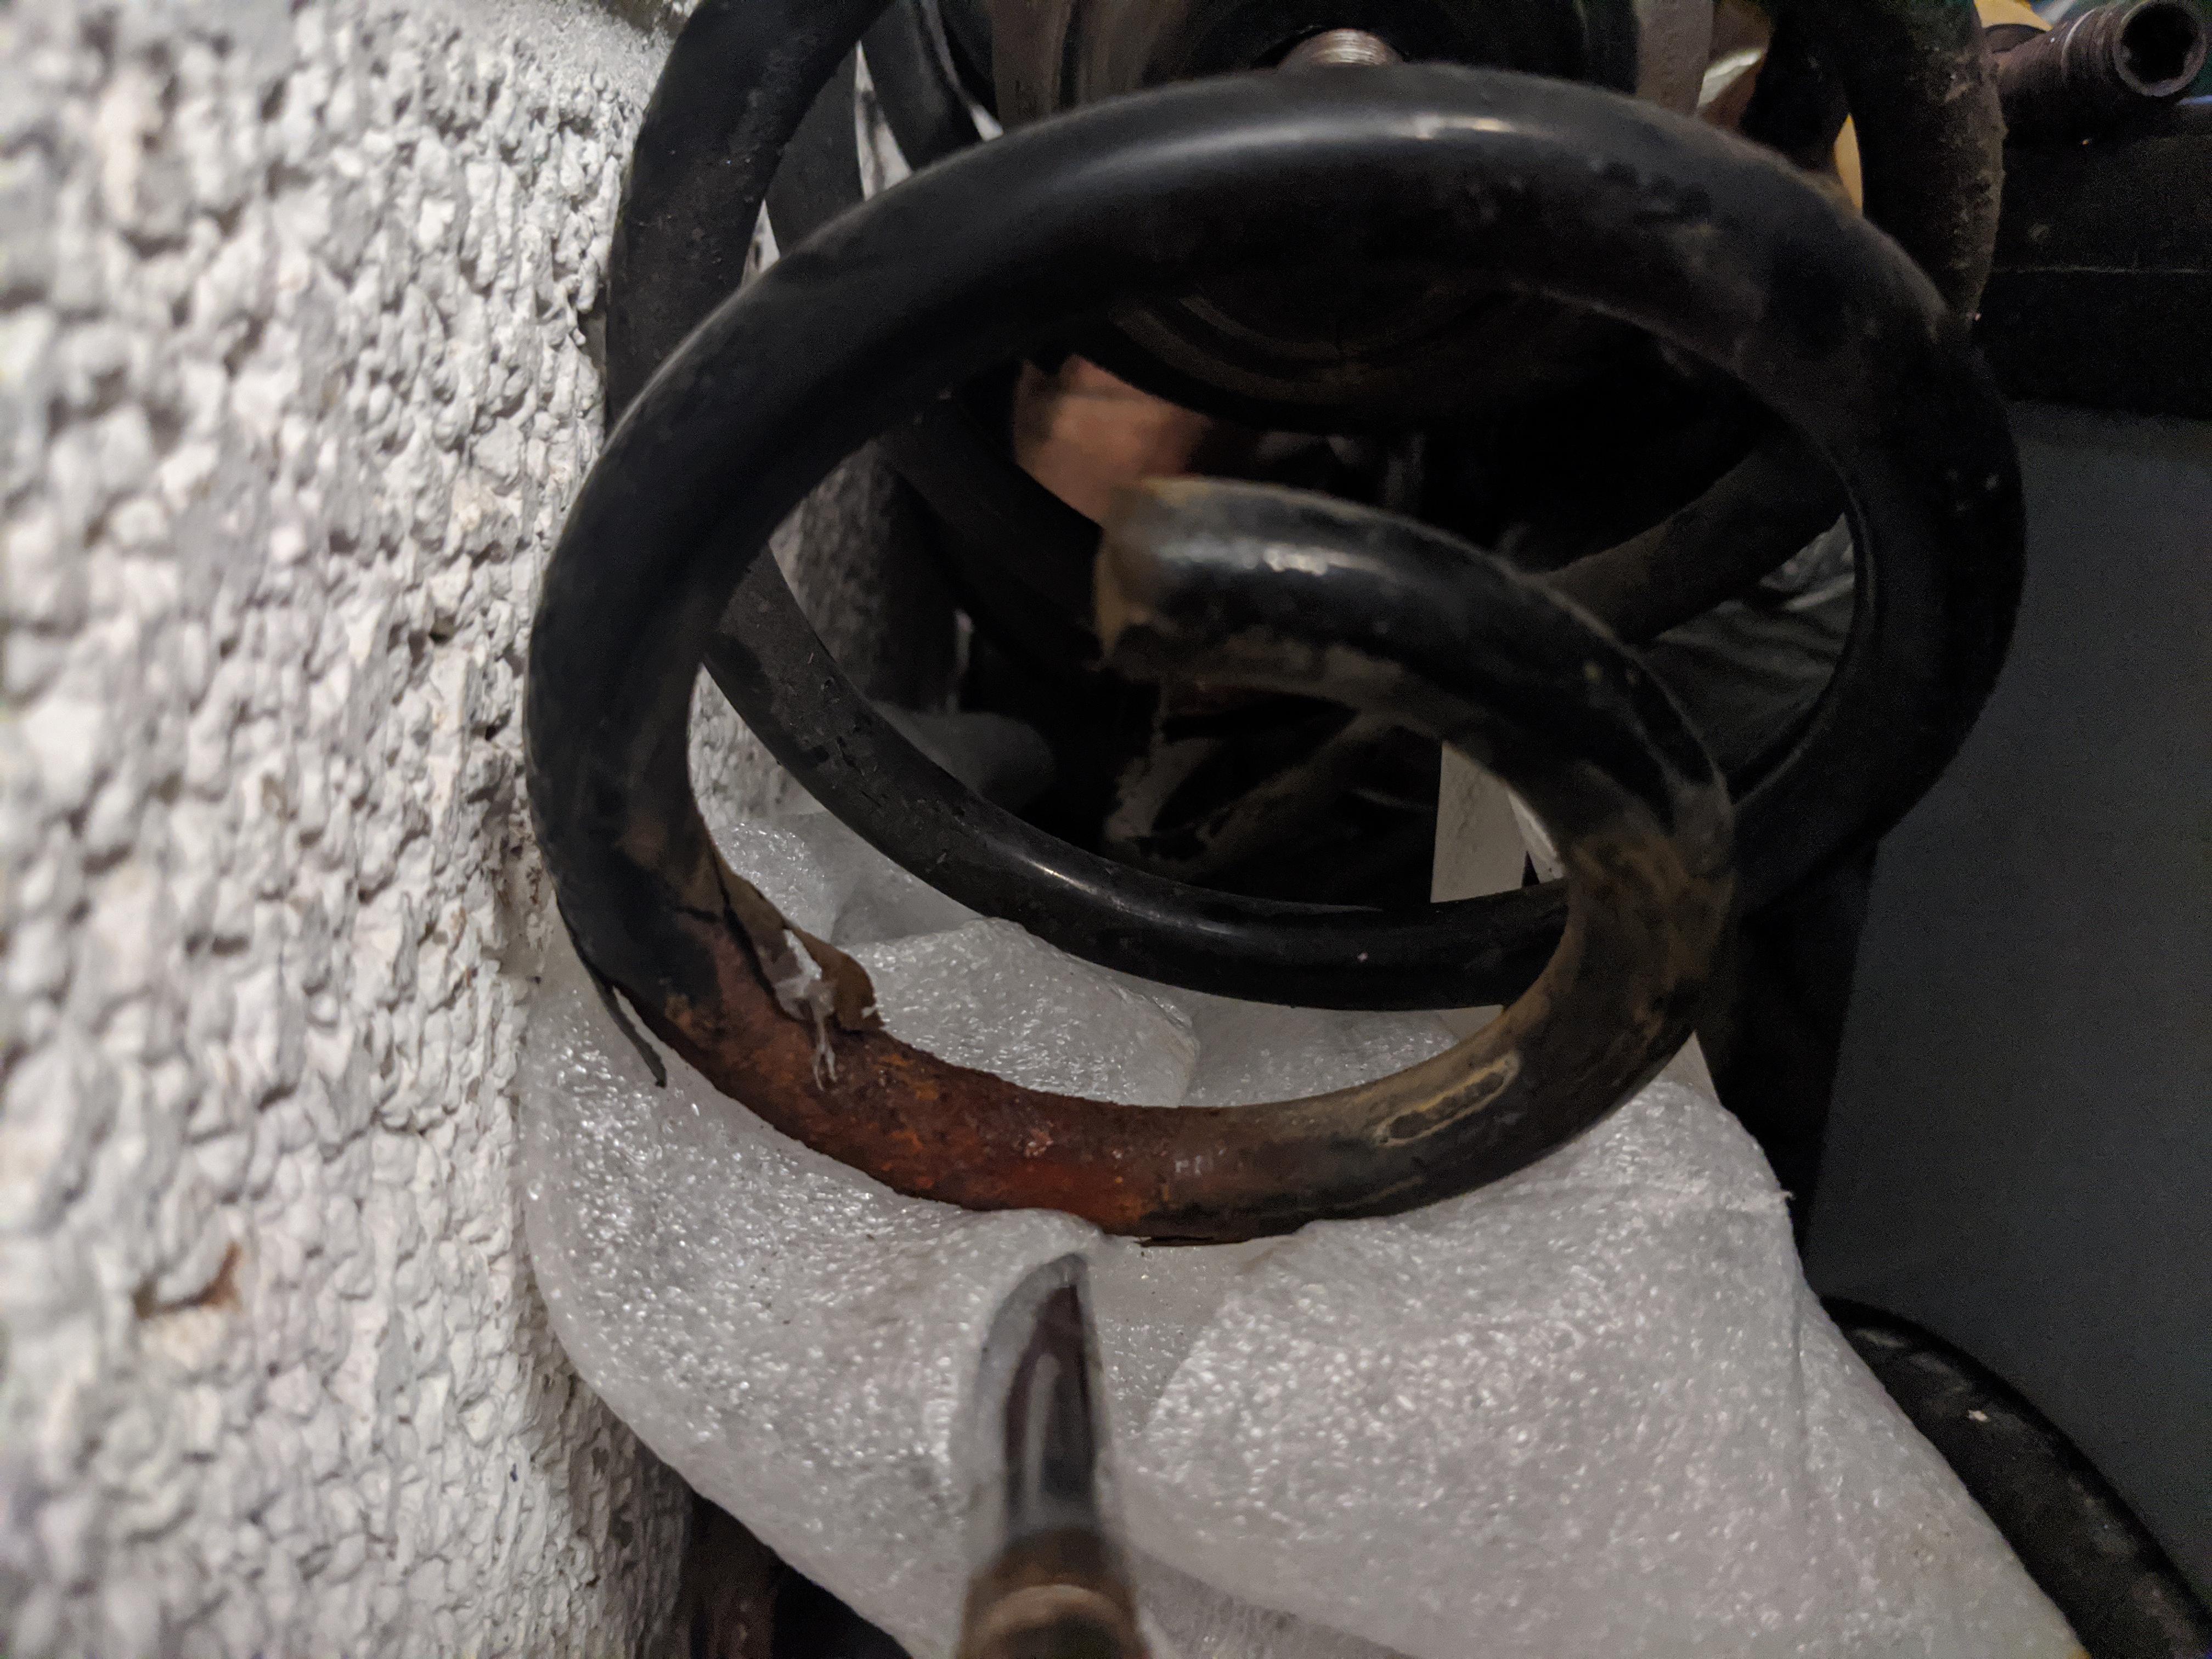
Today:
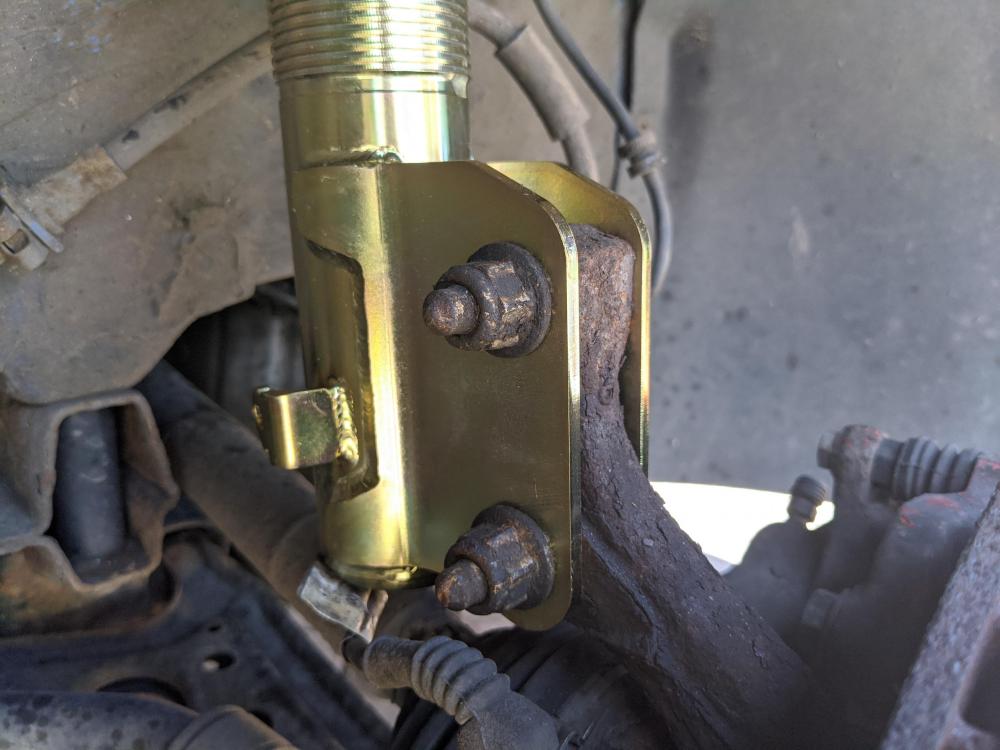
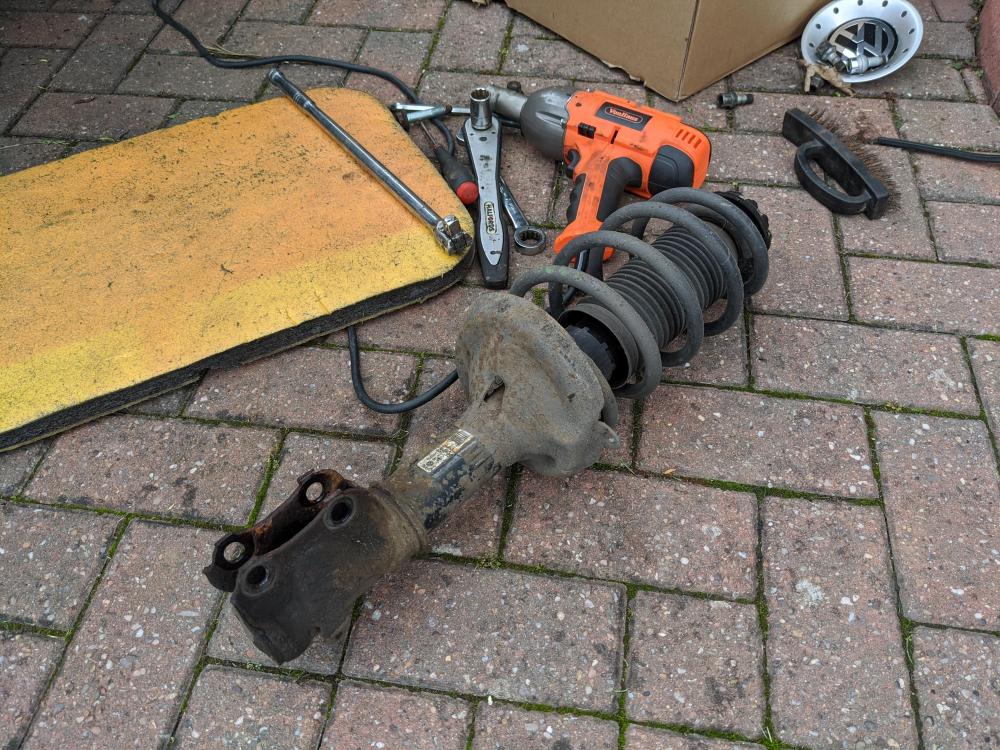
I used my impact driver to get the top nut off but it wouldn't reach far enough down to get the nut off which holds the strut mount bush on the top. So I ordered 2 tools for same day Amazon delivery: good adjustable spanner for the 21mm top of a plug socket and a 7mm Allen key to brace the strut middle.
I couldn't get enough on the allen key because it had to go in lengthways so I was stuck again. Then I realised my impact driver could fit on top of the plug socket and both top nuts were off in seconds.
The idiots at Mapco only sent 1 top mount so I've ordered 2 from ecp for delivery tomorrow.
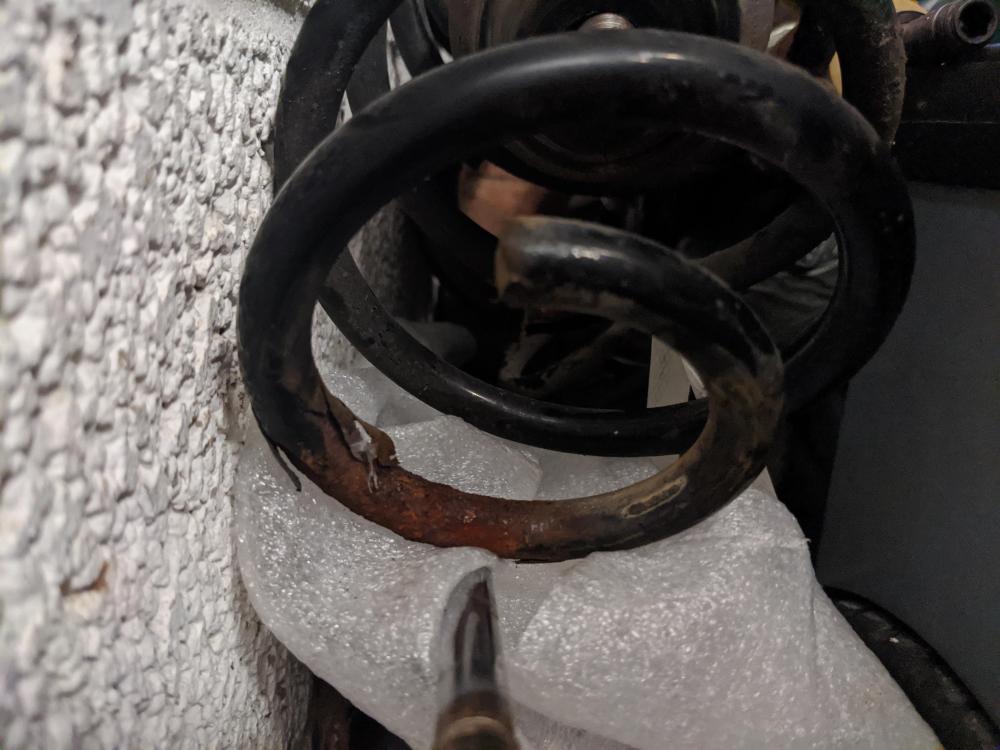
Looking at the springs, the contact point with the spring hat was very corroded. Definitely needed changing. The bushes were best changed too.
-
1 hour ago, Blue Loop said:
Give those calipers a lick of paint while you're there!
Separate project
I've got some spares which I'm stripping down to get painted properly and then will swap over. I need to source the fronts to do the same with those.
-
1
-
-
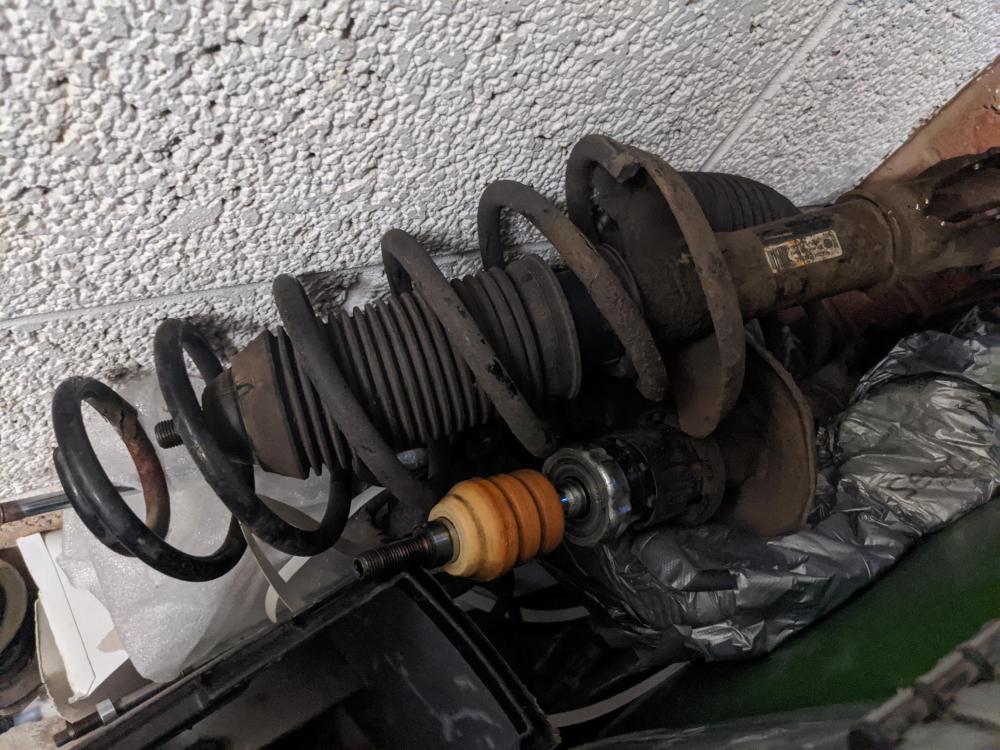
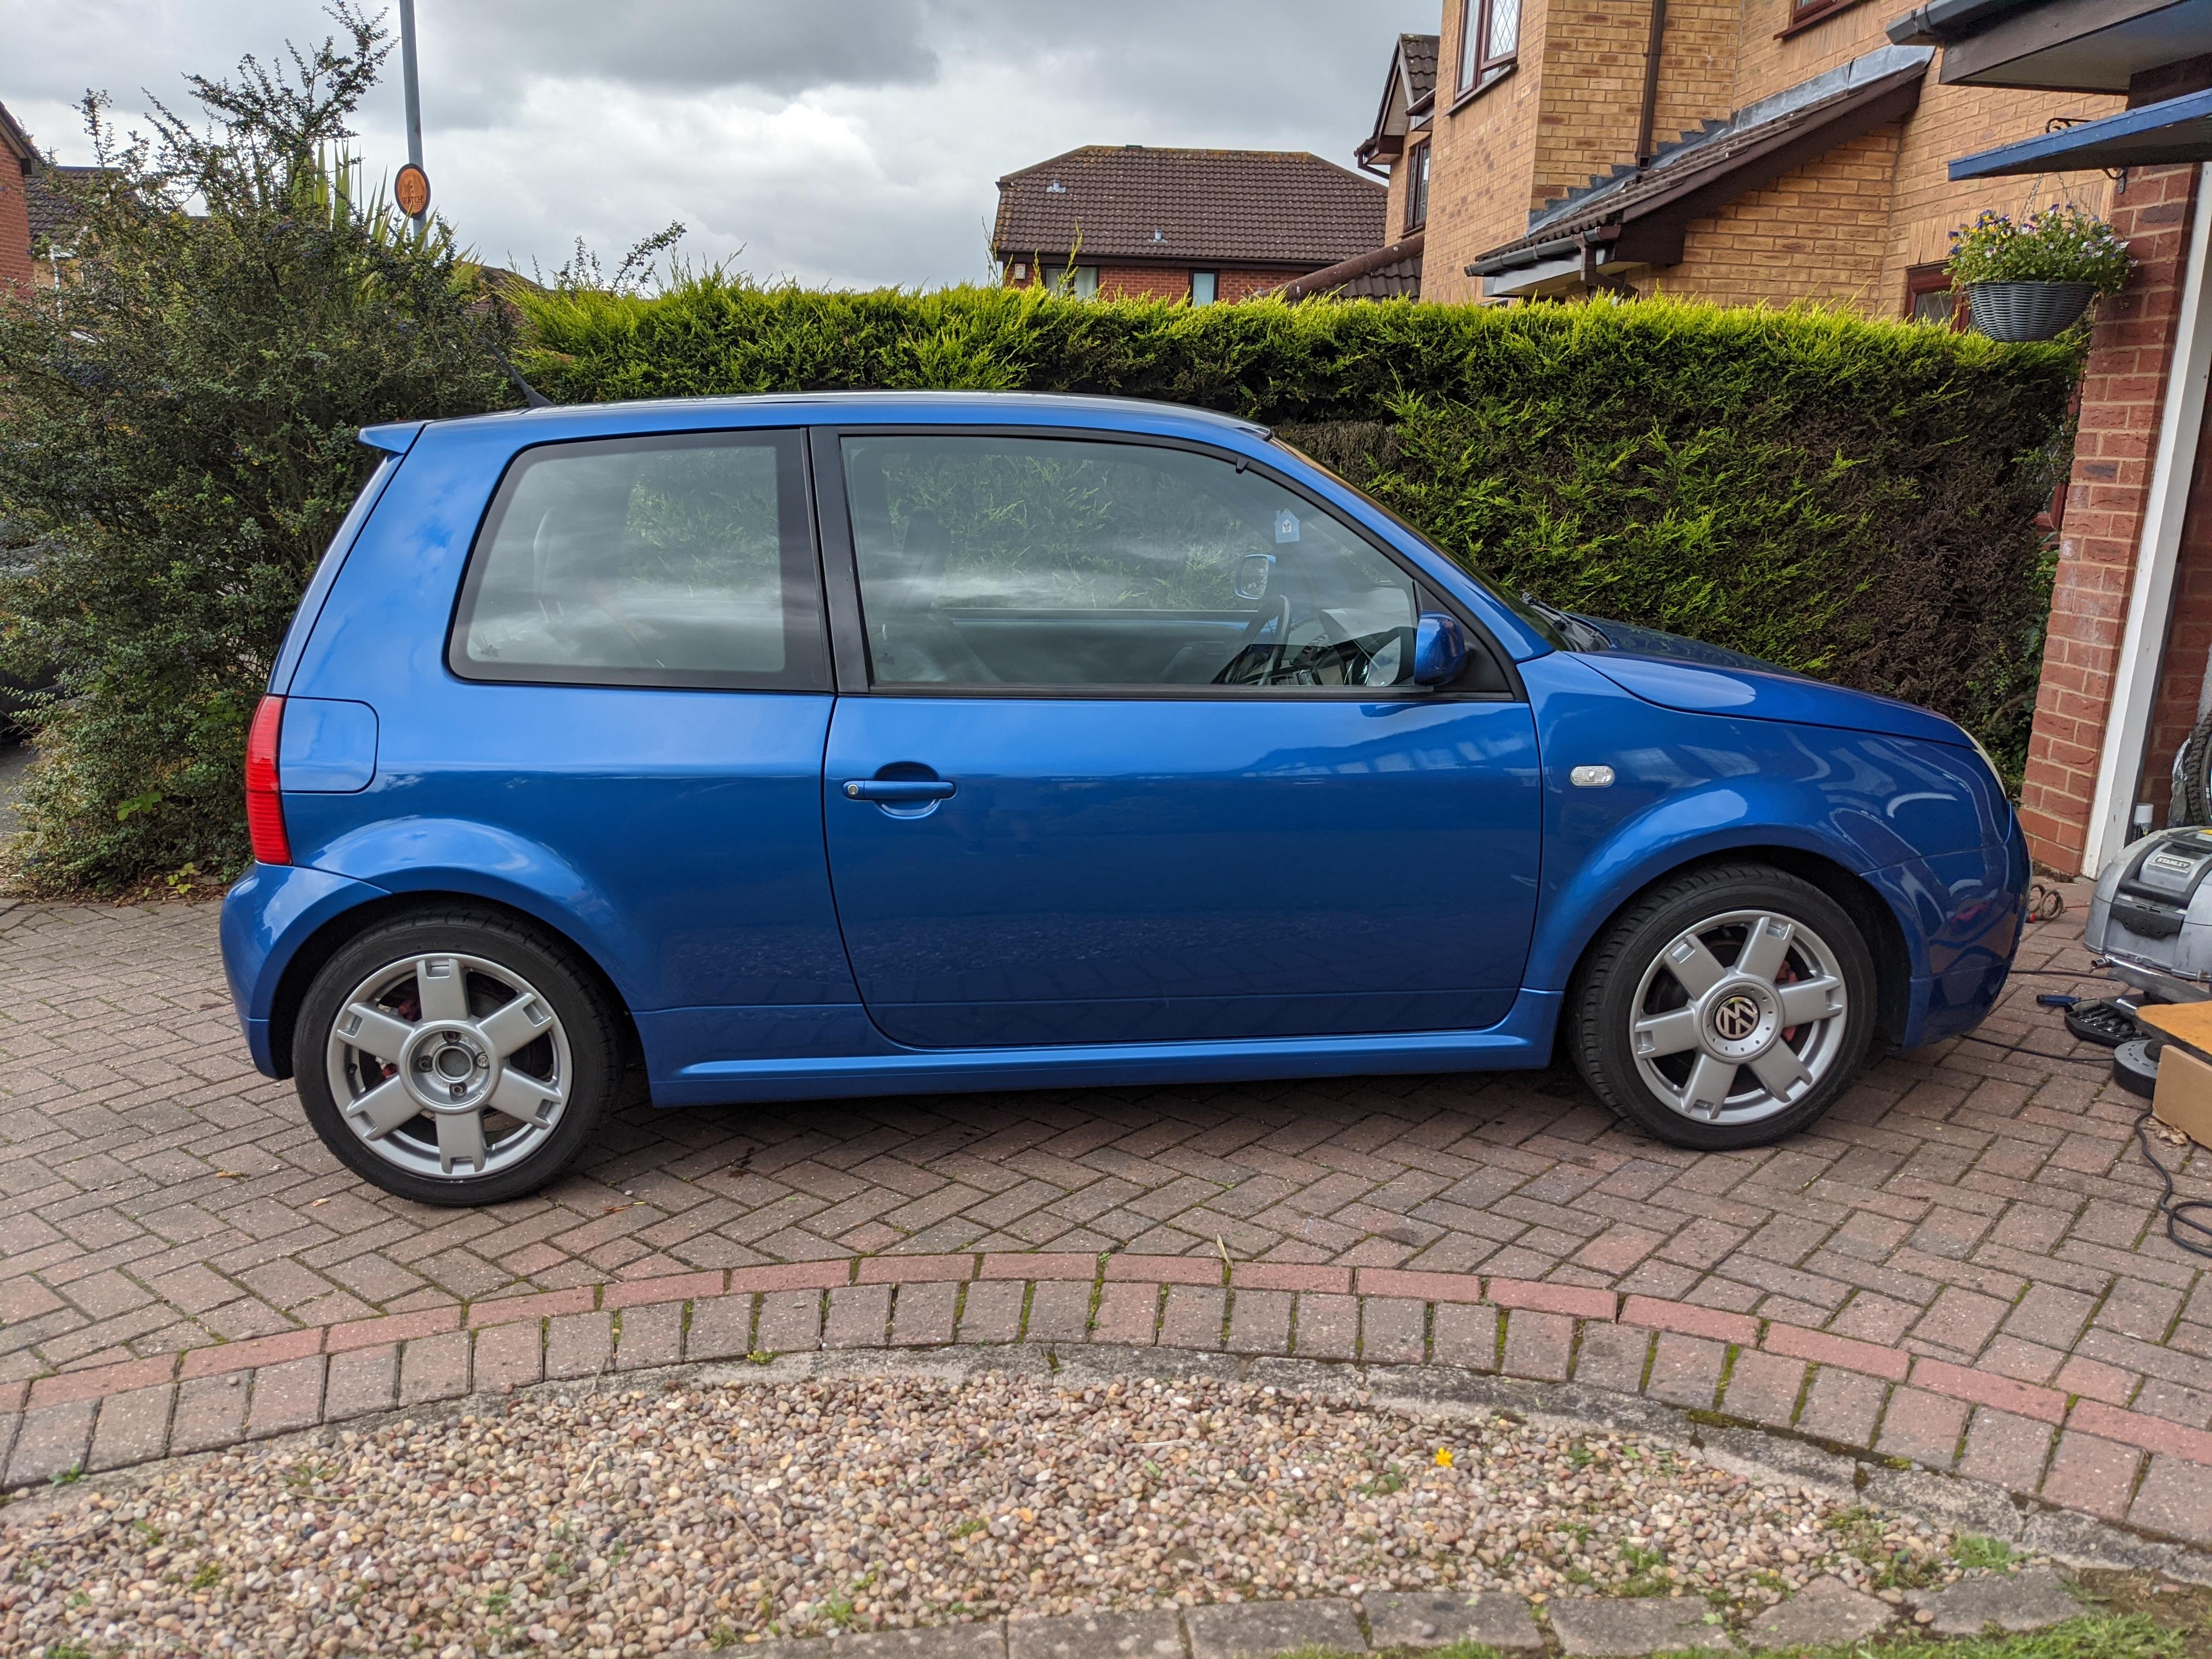
Started fitting the coilies today.
The rear suspension was ridiculously easy. The rear beam is very pliable. I can see why a rear ARB would help.
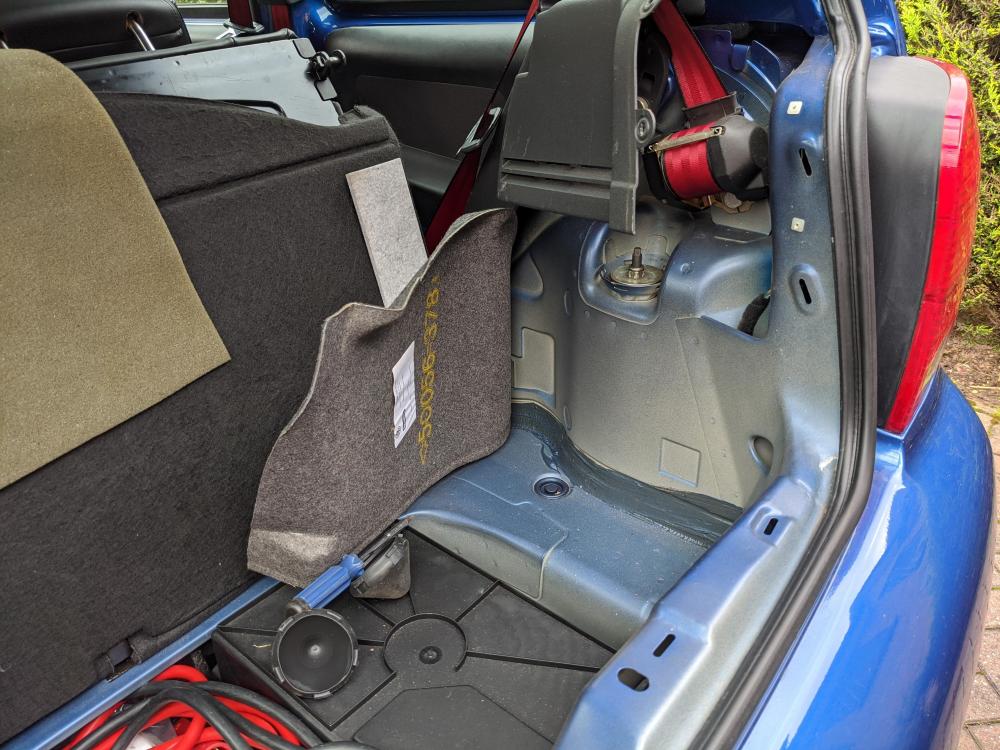
I just whipped the rear wheels off, undid the top strut mounts in the boot and allowed the whole subframe to drop a lot but kept it from hitting the ground by using the jack.
I put the new springs in with the bottom adjustor set to what I would expect to be the highest position.
The fronts would have been easy but the lack of a 7mm allen key and 21mm socket I can get a spanner around scuppered me. I got the struts out using the impact driver but it's no good to get the top bush off too. I'm also waiting for the top bushes to arrive which should have been last week.
The rear is already looking better though.

-
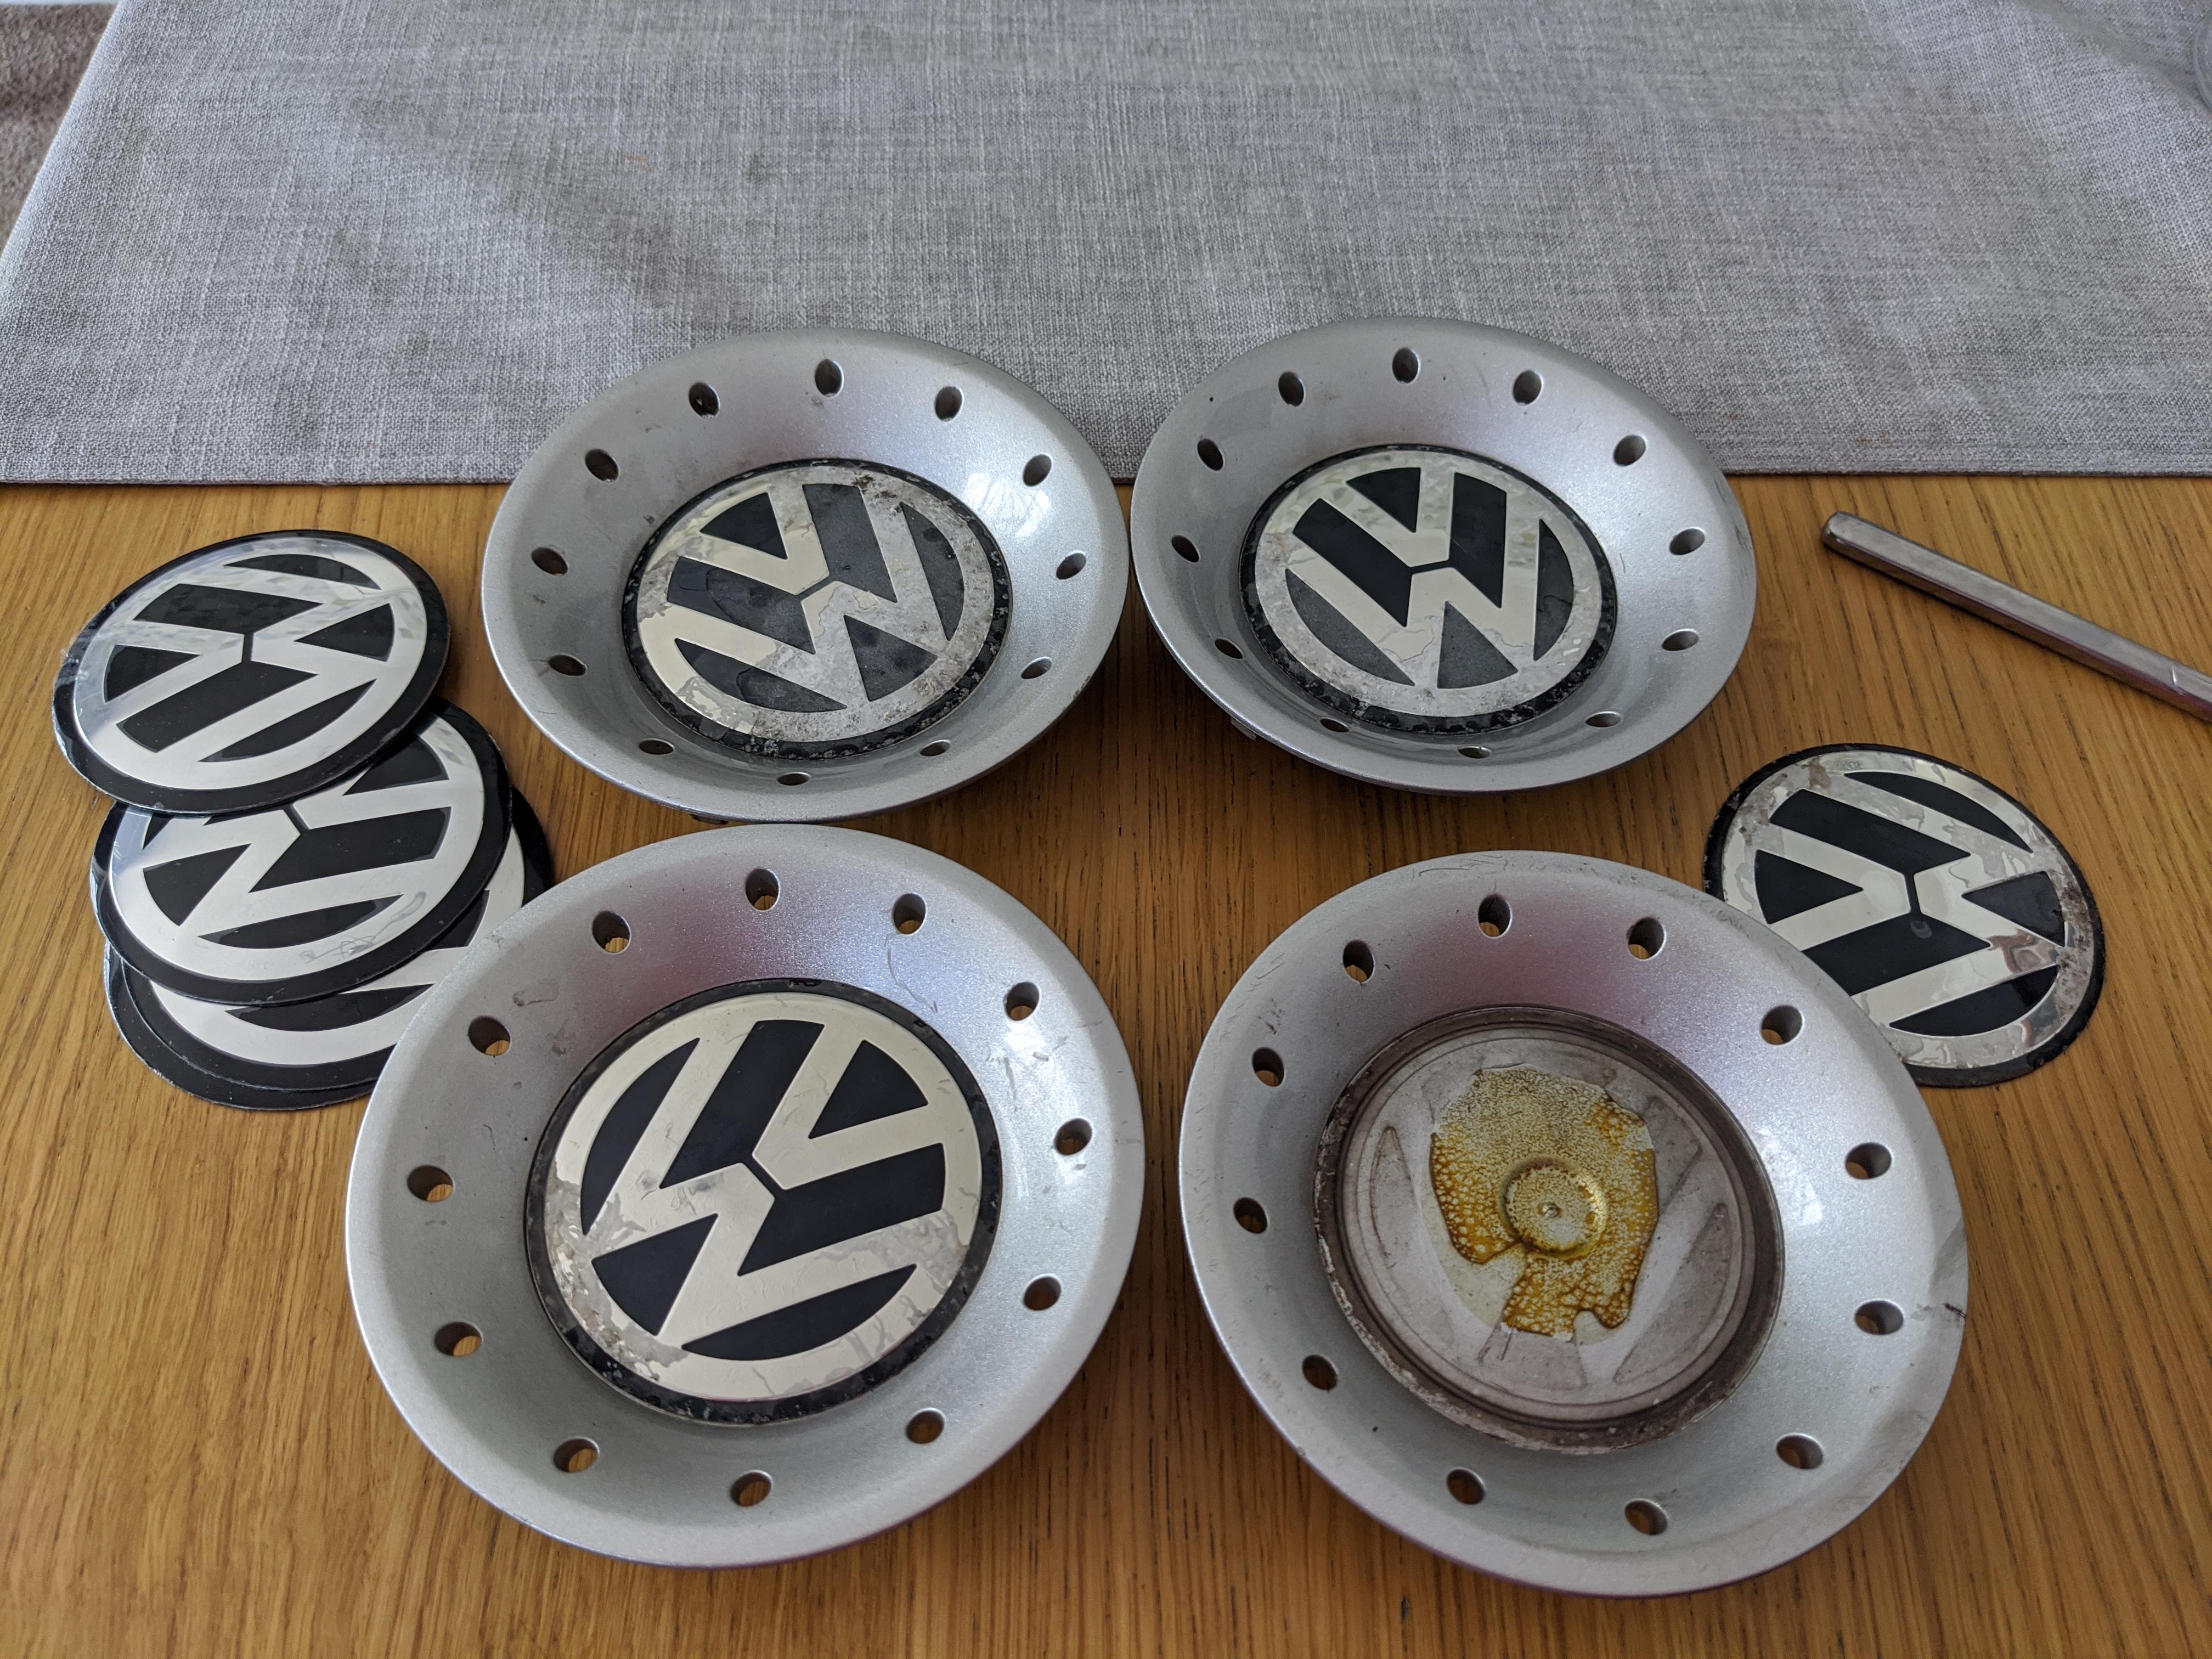
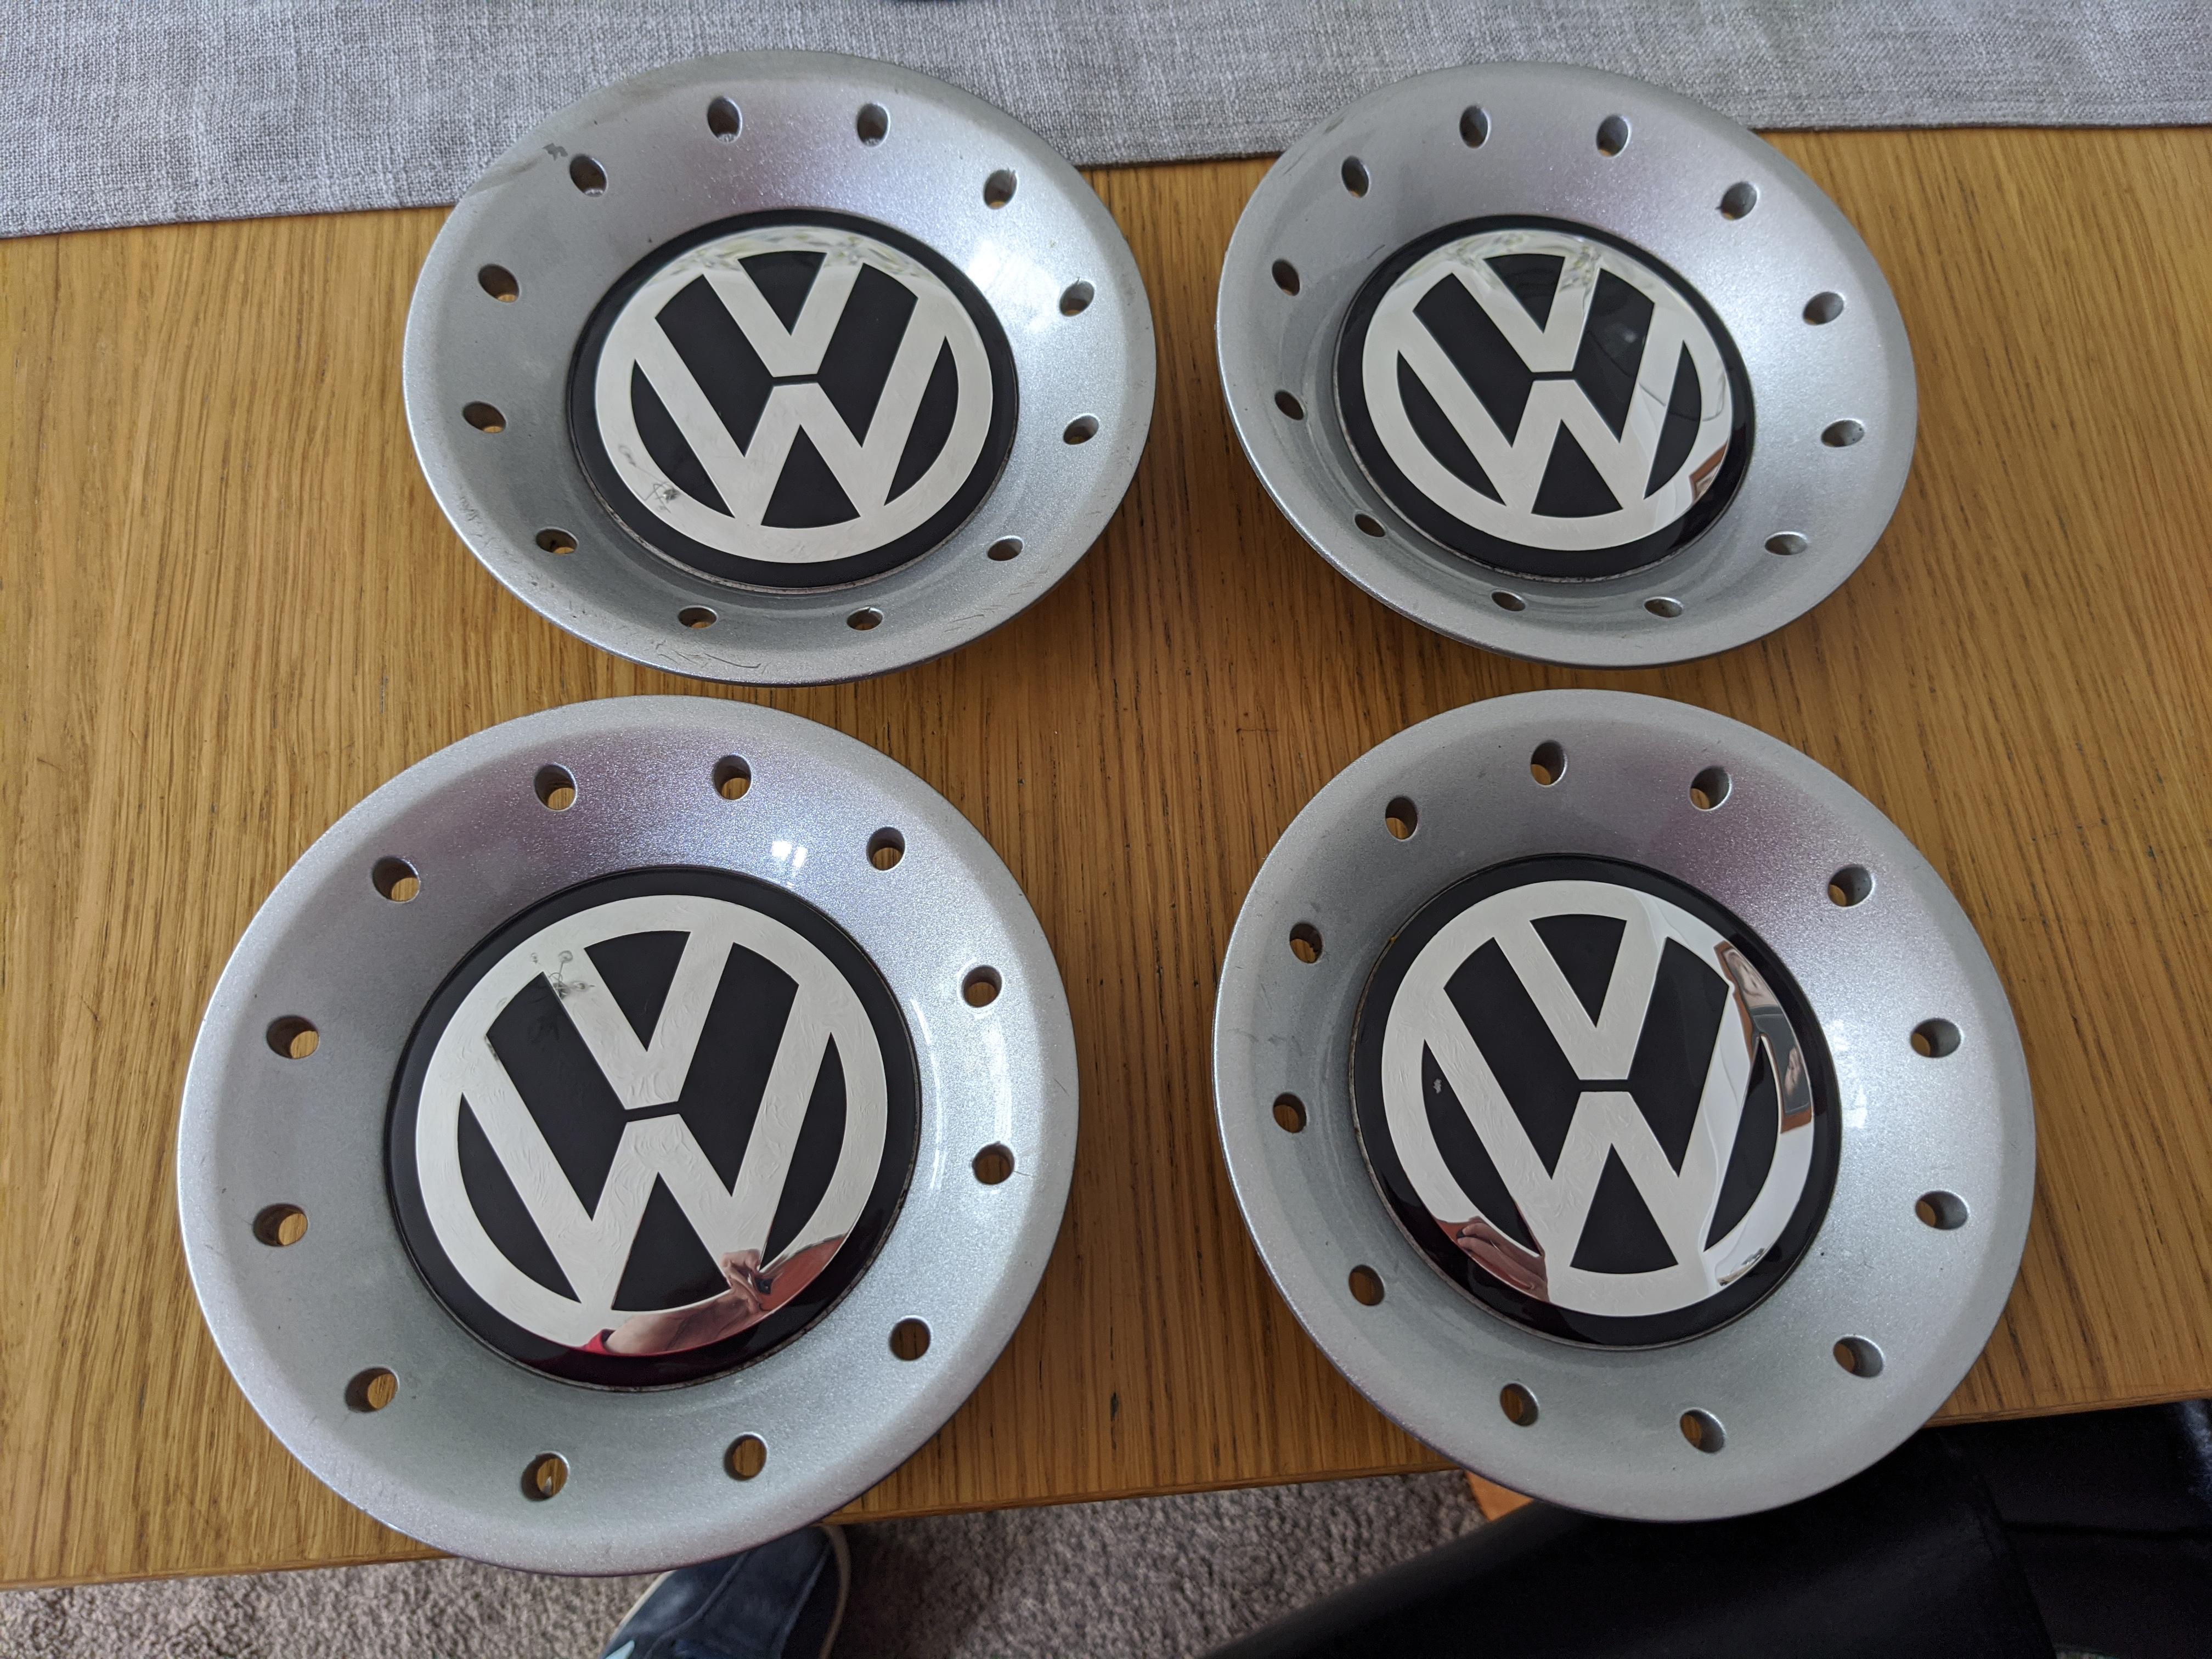
Wheels refurbed and new centre cap badges on.
Coilies on at the weekend assuming the weather is OK.


-
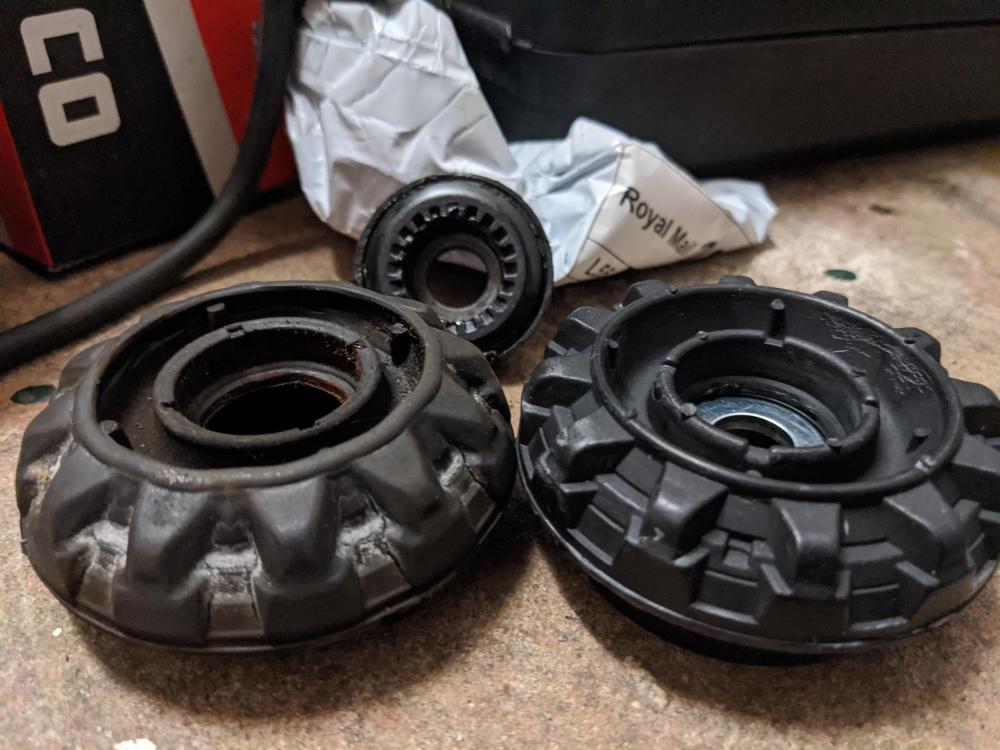
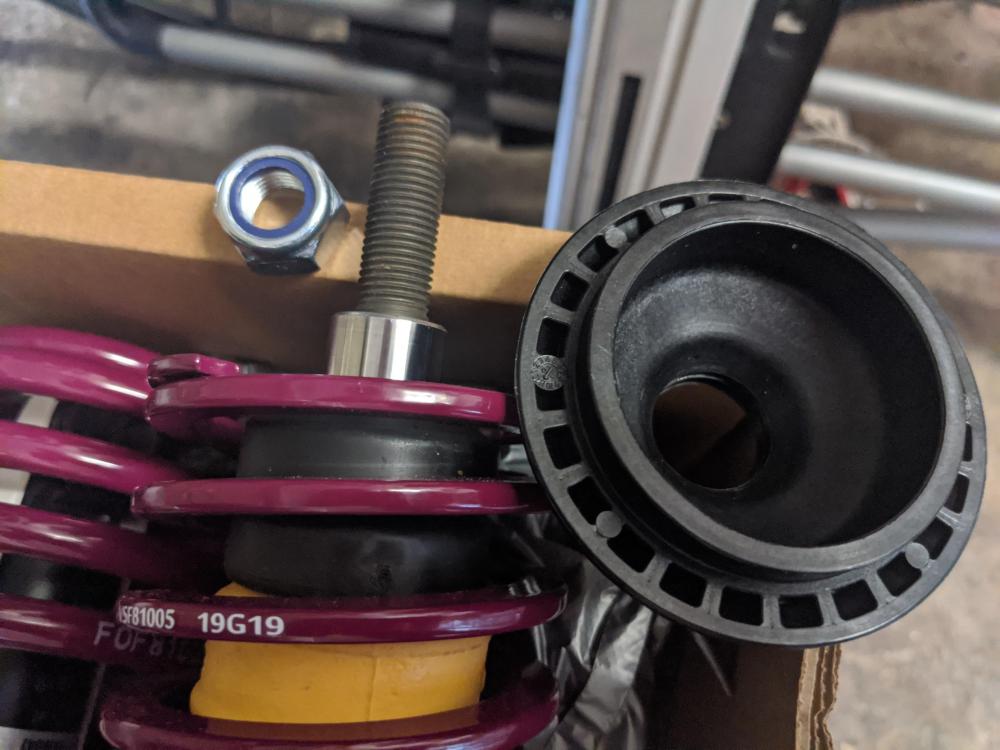
And now I'm even more confused. Apparently there's a bearing too?
These are the new struts. Can anyone tell me exactly what I'll need to get so I don't have to disassemble the old struts? Bush, bearing and nut?
Or just get the bush and use the old bearing and nut?
-
22 hours ago, LR5V said:
ideally with new top mounts
Can anyone advise where I can get some new top mount bushes? I can't find any on ECP or anywhere else.


Electric window regulator
in Car Care, Maintenance and Mechanical
Posted
It's the passenger one. ECP with the discount is £49. It says
"Replaces Regulator Provided With Original Motor With Electronic Box"
and
"without comfort function"
https://www.eurocarparts.com/p/aftermarket-window-regulator-492443751
does that mean I have to swap the motor over, or is it a solid state type direct drive rather than worm gear? And is the comfort function where you can do one press opening and closing?
I'll ring VW tomorrow for a price for OEM. I go on holiday at the end of next week and I don't want to leave it with a window taped shut while I'm away 😕
Thanks for help all