Search the Community
Showing results for tags 'connector'.
Found 2 results
-
Hi! My Lupo has already have ‘half’ seat heat system. I mean the loom, relay, and switches but the seats do have not any heater things. So I have bought after-market heat panels but it has just two wires. Positive and negative. (red, black). The loom cabel hasn’t got any connector under the seat. It has four wires (without connector) Black, brown (these are big), and yellow, red-yellow. I have measured the voltages but one of them has no voltage. (I think it is the ground). So my question is, Is it possible to connect the after-market heat panel to the loom? And what kind of wires are there under the seat? (positive, negative, etc.) I would appreciate your answer guys thanks.
-
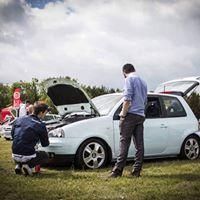 Just picked up my new car which had previously had Cambridge edition rear lights, these were switched back to standard Arosa Mk2 lights for the sale, all the fuses were blown so i replaced them and they blew all over again. Different wiring. While rectifying the problem i found a load of spliced wires and it occurred to me that not many people know how to correctly swap connections in terminals so i decided to write up this little how to. Here goes: This is the spliced loom how i got it (bar pin 6 which i fixed before thinking about making a how to). If this mod was done the 'correct' way, it would be a lot quicker to revert and a lot neater. Step 1: Insert a small screwdriver or something similar to pry each end of the retainer. This block is for the rear lights, the retainer on the connector block for the radio will be a slider that pulls out the center of the block. NOTE: MOST BLOCKS CONTAIN RETAINERS. INSPECT THE BLOCK THOROUGHLY BEFORE ATTEMPTING ANY EXTRACTION. This will be what it looks like open: Step 2: Insert something into the connector block from the front on either side of the pin to compress the tabs, you should feel/hear a small click or pop, this indicates the pin should be free. For this i used a staple from an electric stapler/nail gun. Not the greatest picture but you can just see on pin 5 (red and black) the staple pushing down on the tabs. Step 3: Extract the pins and swap around. Its that easy. A picture of the loom tidied up - all wires heat shrank up, then bound with insulating tape for water proofing and bound again with loom tape for strength.

