Leaderboard


Popular Content
Showing content with the highest reputation on 10/13/2012 in all areas
-
Thanks joe, I just borrowed inspiration from your car1 point
-
**** thats not good hope you ok? There was a few bumpers on ebay for around 30-40 squid Lucky your a 4x4 still, there could of been more damage1 point
-
I think both of you have made a wise move there, both cars looking great1 point
-
Really good job there mate look spot on!1 point
-
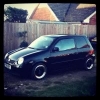
My brother from another (Japanese) mother......1 point
-
Chris C is now Rapey.1 point
-
Love them1 point
-
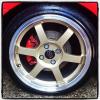
G60's on With the trims yo1 point
-
Venom motorsport and awesome gti?1 point
-
Haha lol with all the money I'd want near 2 grand once I get it wrapped Haha lol with all the money I'd want near 2 grand once I get it wrapped1 point
-
Look cosy although you wanna clean them it seems they have a sexually transmitted infection on them! Lol1 point
-
We could do a Saturday of more people are free? Large Lupo Convoys Are EPIC1 point
-
1 point
-
Thatll be the tyres not the wheels1 point
-
Really great work dude1 point
-
Absolutely stunning! Great work. Just wondering what something like that would cost? Really makes the paint look showroom worthy!1 point
-
Smooth rear lights before After before After Before After Before After Ryan1 point
-
I just wrote this for a lad off here, but thought i would post it up as it may benefit others. ######### TAKE NEGATIVE CONNECTION OFF BATTERY AND LEAVE FOR ABOUT 15 - 20 MINS SO THE AIR BAG DOESN`T GO OFF####### Parts to order: 1 pedal box, 1 brake pedal, and 2 sheer bolts (i think it was a 7.5mm torques socket needed for these.) 1. Remove the seat so you have plenty of room (put a cushion over the bit of metal that sticks out, cause you will get sick of it sticking in your back. 2. Remove lower dash parts (the plastic bit that goes right across holding the fuse box ect doesent come out) you may as well take the brake light switch off and put it some where safe while your here. 3. Remove steering column cowling (also remove any plastic bits from the drivers footwell). 4. On your ignition lock there is like a plastic thing which goes round it that houses the immobilizer sensor carefully pull it off (dont unplug the cable what ever you do, causes a lot more work.) 5. Now loosen off your clutch and remove cable from pedal, then remove pedal from the box by removing the nut at the end so it just slides off. 6. Now if you get on your back and look up you will see 2 sheer bolts either side of the column, these are a big pain in the arse. there are three methods to get these out, you can use a hammer and a chisel to try an tap them round (didn`t work for me) or drill them out (easier said than done) or use a stud extracter. 7. Then disconnect all wires on the steering column, now if you look down the steering colum you will see a universal joint take the bolt out of it and lift the column up and out. 8. Next job is to disconnect the brake pedal from the servo, there is a white clip that holds linkege bar coming from the brake servo and its a push in ball type fit, this is hard to remove and in the end i just pulled on the brake pedal till the clip broke. 9. Then you need to remove all the bolts around the pedal box, then disconnect the wires coming from the Throttle potenciometer (i did this on a fly by wire.) 10. Then the pedal box should just pull out (leave the long bolt in as there isn`t enough room to remove it all untill you have removed it. 11. Now just transfer everything from your old pedal box to your new one and start putting things back the way they came out (Take note of which way the spacer is that the steering column clips on, also dont forget to make sure the brake servo is lined up as this bolts through the bulk head on to the pedal box. I done this on a 1L but should be similar to others, would just like to say a big thanks to Bennet for helping me out on this. Cheers Luke. (if one of the mods would like to move this to the how to section it would be great)1 point