Trx 33 Posted April 7, 2013 Report Share Posted April 7, 2013 (edited) -EDIT- I have just noticed Flickr has decided to fail with my pictures, so here is my Flickr photostream, all pictures are on there. -EDIT- So im planning on starting this install thread and maintaining it.. but im a bit of a lazy sod so i apologise if if it goes to pot I've ripped out my old install which was done on a bit of a budget, it consisted of 2 10" Fli subs taken out of a FliTrap 1600W and the loaded 500 amp to go with it as well as 2 Audiobahn 12" ran off an Inphase 4ch amp, i cant really remember all of the details because i put it in quite a while ago.Here it is: Here is the new stuff thats going in.. eventually:Consists of (pictured):Sundown SAZ-1500D ampFocal PS-165 Component speakersStinger 14AWG Speaker wire5L Fiberglass kit5L Contact adhesivePaint + lacquer kit Non-Pictured:KnuKonceptz Kord Kable 12 Gauge Speaker WireAlpine MRX-F35Phonocar 4/927 Rain StopKnuKonceptz KCA Complete 4 Gauge amp installation kit2x Sundown SA-12 Already fitted:Alpine CDE-135BT Head unitXS Power D1200 AGM Battery'The Big 3' Upgrade with black KnuKonceptz 0AWGValeo 108a Passat alternator - http://forums.clublupo.co.uk/index.php?/topic/94682-180a-alternator-fitted/KnuKonceptz 0AWG cableKnuKonceptz Krystal Kable 2 Channel 5M Twisted Pair RCA Cable I've probably missed some stuff out but ill update when i remember. Edited June 21, 2013 by Trx 33 9 Quote Link to comment Share on other sites More sharing options...
Trx 33 Posted April 7, 2013 Author Report Share Posted April 7, 2013 (edited) So i got my 0AWG routed routed this past weekend, i still havent worked out fully how to get around the OEM fuse box/aftermarket battery problem so the engine bay wiring/fuse placement is still a bit rough but ive got the wire routed anyway.Everything out and the front footwell sound deadening mat removed.Found a suitable place to mount the cable gland to seal the 0AWG coming through the firewall. Marked up and located on the other side.Holesaw cut through the insulation to get the gland in place.A bit hard to see but next to the white dash on the firewall is the pilot hole drilled. I selected the place on the firewall because it was a perfectly flat section located just under a right angled recess. It would be able to mount the gland flat.Hole cut from the engine side.Wire through, ill try to get a picture of the gland in place soon.Through alongside the loom.The blue wire running alongside is the remote for the amp.RCA's ran along the OEM loom, had to have the steering column and the speedo clocks out to get to it though.Just peeking out behind the bonnet popper.Mirrored the power cable on the other side.HU loom tidied up, just need to wait for the aerial extension to arrive, then i will only have the speaker wires to solder up and run to the amp.. when it arrives. Once this is done i can get the HU back in. Edited July 7, 2013 by Trx 33 Quote Link to comment Share on other sites More sharing options...
manilasuperstar Posted April 8, 2013 Report Share Posted April 8, 2013 What subs are u putting in? Btw nice sub box there,, and great "hiding of cables " tough. Quote Link to comment Share on other sites More sharing options...
Pete91 Posted April 8, 2013 Report Share Posted April 8, 2013 Nice work so far man. It's interesting seeing how other folk have gone about it Quote Link to comment Share on other sites More sharing options...
Vinnyzf Posted April 8, 2013 Report Share Posted April 8, 2013 Looking forward to this Quote Link to comment Share on other sites More sharing options...
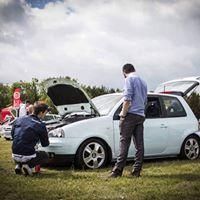
Trx 33 Posted April 8, 2013 Author Report Share Posted April 8, 2013 (edited) As promised, the cable gland engine side (excuse the filthy engine bay):Also, a cheeky peek at my new seats Edited June 9, 2013 by Trx 33 Quote Link to comment Share on other sites More sharing options...
Trx 33 Posted April 10, 2013 Author Report Share Posted April 10, 2013 (edited) Got some more bits and bobs in the post today:(i did not buy any ground zero, this was just a box.)2x Sundown SA-12'sISO connectorAerial extension1M USB extension Alpine MRX-F35Phonocar 4/927 Rain StopKnuKonceptz KCA Complete 4 Gauge amp installation kit Magnet in comparison to my keys. Compared to my old FLI's Finally my subs came. The grin on my face is pretty large right now.. Might get a little bit more wiring done tonight, connect up my radio again. Edited July 7, 2013 by Trx 33 Quote Link to comment Share on other sites More sharing options...
Vinnyzf Posted April 10, 2013 Report Share Posted April 10, 2013 If i had a clue how to connect my power cable to my battery I'd be doing this! For some reason I can't figure it outThis should get louddddd if tuned right!What amp are you running? And what are you wiring the subs too? Quote Link to comment Share on other sites More sharing options...
Trx 33 Posted April 11, 2013 Author Report Share Posted April 11, 2013 (edited) If i had a clue how to connect my power cable to my battery I'd be doing this! For some reason I can't figure it outThis should get louddddd if tuned right!What amp are you running? And what are you wiring the subs too?Connecting power to the battery is pretty easy, just find a nut and bolt it on This is the negative terminal, im guessing yours will look the same apart from the battery. All i did when i had the old battery was take off the nut and attach the wire, which was soldered up to a ring terminal. ON THE POSITIVE TERMINAL! ^^ Amp The subs are going to the SAZ-1500D. 1500w RMS at 1 ohm which is what im wiring them as. Edited June 9, 2013 by Trx 33 Quote Link to comment Share on other sites More sharing options...
Trx 33 Posted April 11, 2013 Author Report Share Posted April 11, 2013 (edited) Got a little more wiring done, sorted out how the power gets from the battery into the car with accesible fuse holders.VELCRO IS YOUR FRIEND. I have found that velcro is THE best thing for mounting in line fuse holders, had a tip to Halfrauds to get a few bits and bobs and picked up a pack of 15KG velcro. Brilliant for hiding fuse holders in hard to get to places but being able to maintain them.The old battery fuse box and wiring. Not the prettiest.The fuse box did not fit the uprated battery. At all. Cable ties are useful in situations like this Untidy wiring in awkward places.Tidied up.. just as the rain comes.Got the fuse holder velcro'd to the side of the battery, padded the battery clamp and the base and sides of the battery just to be a little nicer to it when the road gets rough The battery fuse box was separated from the bracket and velcro'd to the battery also, on the middle and side where it wraps around. Edited July 7, 2013 by Trx 33 Quote Link to comment Share on other sites More sharing options...
Pete91 Posted April 11, 2013 Report Share Posted April 11, 2013 Vinny, all you need is one of these wee guys to connect the pos to the battery:Trx 33, when I was wiring my subs and having to put them to 2 ohm I found a program thing that helped you see which way they had to be wired in order to get the right impedance. No doubt you've already figured it out but if you're interested/need it I'm sure I could dig it out? Quote Link to comment Share on other sites More sharing options...
Vinnyzf Posted April 11, 2013 Report Share Posted April 11, 2013 I can't take my fuse box thing off. I about died when I did it last. Might give it a go tomorrow Cheers. This build is going to be LOUD! Are you near Leicester? Quote Link to comment Share on other sites More sharing options...
Trx 33 Posted April 12, 2013 Author Report Share Posted April 12, 2013 http://www.the12volt.com/caraudio/woofer_configurations.asp?Q=2&I=42This is a pretty good website for general knowledge and working out the techie stuff I can't take my fuse box thing off. I about died when I did it last. Might give it a go tomorrow Cheers. This build is going to be LOUD! Are you near Leicester?You dont need to take the box off, just lift the lid. Where the metal connection is bolted down, just squeeze the wire onto that shaft.And no, im just a couple of minutes north of newcastle Quote Link to comment Share on other sites More sharing options...
Vinnyzf Posted April 12, 2013 Report Share Posted April 12, 2013 Shame, I'd love to hear it.I'll try and wire my sub up some time Quote Link to comment Share on other sites More sharing options...
Trx 33 Posted April 16, 2013 Author Report Share Posted April 16, 2013 Just a little update, not much been happening at all. Since i work shifts its difficult to find the time to work on the car but none the less, ill keep plodding on slowly.I got a bag of fixings today so i should hopefully be able to wire in the amp and components when i've got a free bit of time Quote Link to comment Share on other sites More sharing options...
Vinnyzf Posted April 16, 2013 Report Share Posted April 16, 2013 Got mine done over the weekend! Currently in a **** sealed box, soon to be making into a serious build Quote Link to comment Share on other sites More sharing options...
Trx 33 Posted April 21, 2013 Author Report Share Posted April 21, 2013 (edited) Got a little bit more wiring done yesterday.Originally planned on having my 4ch amp under the drivers seat.. but of course it didn't fit by approximately 4mm. Going to have it in the boot now instead, inside the wheel well once i get it deadened and glassed. Got the amp just in the boot for now with some old speakers hooked up to check all of the wiring is sound.4 runs of 14AWG to the boot, should have been 4 runs of Stinger but i ran out after 3.. used the KnuKoncepts 14AWG i got in the wiring kit for the fourth run. Need to order more wire.Not very interesting, but all soldered and heat shrank on the radio side.Had the steering coulomb dropped to remove the clocks to run wires behind.. i should point out i started working at 1 and finished at 12:30The wires ran. Edited July 7, 2013 by Trx 33 Quote Link to comment Share on other sites More sharing options...
Pete91 Posted April 21, 2013 Report Share Posted April 21, 2013 Wire is sooo much easier on a lupo haha Quote Link to comment Share on other sites More sharing options...
Trx 33 Posted April 26, 2013 Author Report Share Posted April 26, 2013 (edited) More goodies Edited July 7, 2013 by Trx 33 Quote Link to comment Share on other sites More sharing options...
Trx 33 Posted April 26, 2013 Author Report Share Posted April 26, 2013 (edited) Just finished night shift and thought id stay up to be around when te delivery man comes then go for a nap.. fat chance of that, soon as the parcels arrived i was in the car working Took the old headlining off to deaden the roof with silentcoat. If i was to do it again i just wouldnt. The cardboard deadening on the roof was atrocious to remove, the glue just wouldn't budge. Could NOT separate the card from the adhesive, had to cut it flat with a razor blade, must have spent about 2-3 hours on it.This is what i was left with.End product, dosent seem too different from what was there before sound wise, but i could just be forgetting what it sounded like before Ordered some black textured nylon headlining for when it goes all back together, need to order some thinsulate to pad the roof before that though. Started deadening the rest of the car as well but i just couldn't be bothered to take any photos because its dark, my fingers are sore as hell and im absolutely shattered There is definitely a noticeable difference in the boot well and the boot door makes a nice thud too, looking forward to getting it finished Edited June 9, 2013 by Trx 33 Quote Link to comment Share on other sites More sharing options...
Pete91 Posted April 26, 2013 Report Share Posted April 26, 2013 Loving the progress mate Just one thing though (I don't know how far you're going with it so might be a moot point) but don't go proper mad with the deadening. I was talking to one of the guys that own audiowise and he was saying that as an experiment they decided to proper full the car with the stuff. He said it was like driving in a bubble and had to keep the window open or he'd be sick lol.Anyway, keep updating this dude! 2 Quote Link to comment Share on other sites More sharing options...
Pete91 Posted April 26, 2013 Report Share Posted April 26, 2013 http://www.the12volt.com/caraudio/woofer_configurations.asp?Q=2&I=42This is a pretty good website for general knowledge and working out the techie stuff Just noticed this but yeah that's the site I use Quote Link to comment Share on other sites More sharing options...
Trx 33 Posted May 1, 2013 Author Report Share Posted May 1, 2013 SLOOOOOWWWWW. Thats the name of the game at the moment, not much else done deadening wise. got the rear panels done, the floor and the drivers door. It is covered in wax sealant which is a nightmare to remove, found a nice little trick though. Get a gift card or some other sort of disposable wallet card. Heat the wax up with a hair drier till the panel is warm then it should just scrape off, once the majority of it has gone, whack the hair drier up to HOT and heat it till the remaining wax is almost liquid. It should just wipe off with some kitchen roll like it was water, for safe measures i gave it a quick wipe down with tar and wax remover just to remove any film that was left.Also, i got my M8 rivnuts solid into the boot floor so i have something to bolt my false floor into. No pictures at the moment because my camera batteries are shot but ill try to get some up in the next few days Quote Link to comment Share on other sites More sharing options...
Dblock Posted May 1, 2013 Report Share Posted May 1, 2013 This is going to be awesome when finished. Quote Link to comment Share on other sites More sharing options...
Vinnyzf Posted May 3, 2013 Report Share Posted May 3, 2013 This is going to be awesome when finished. Quote Link to comment Share on other sites More sharing options...
Recommended Posts
Join the conversation
You can post now and register later. If you have an account, sign in now to post with your account.